Sponsored

New DiodeDynamics side markers

MakStang

Well-Known Member
Joined
Dec 11, 2016
Threads
15
Messages
1,678
Reaction score
265
Location
Greece
Website
www.cellentis.uk
First Name
Makis
Vehicle(s)
A 2017 miraculous little beast
Installed mine too!
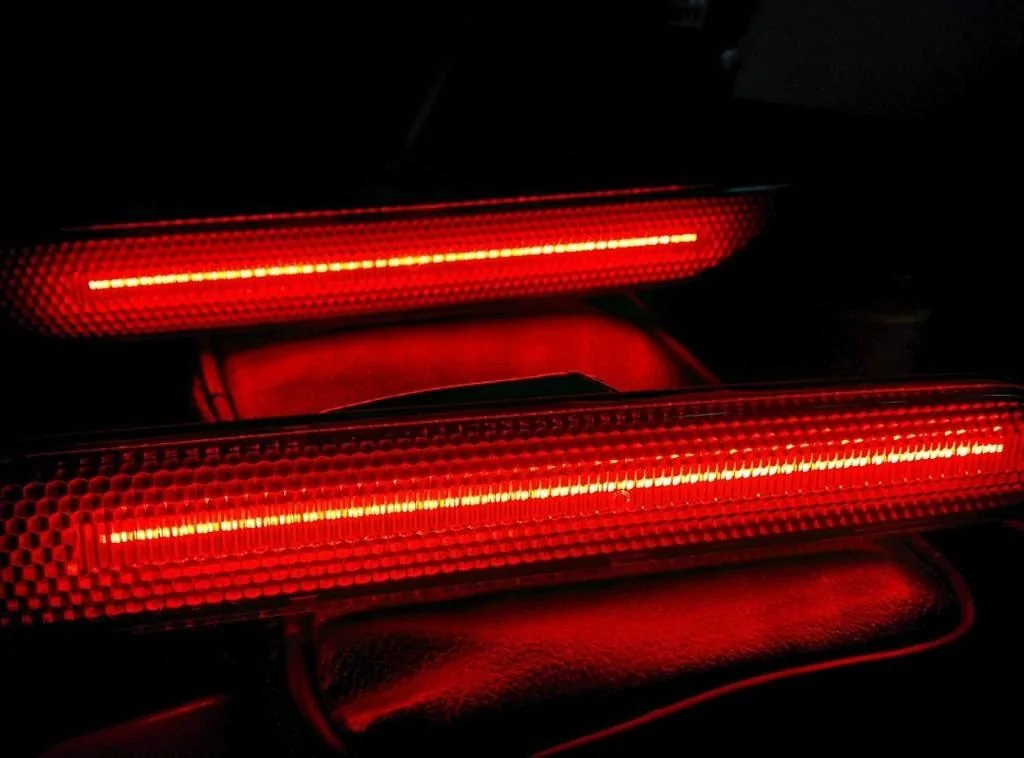
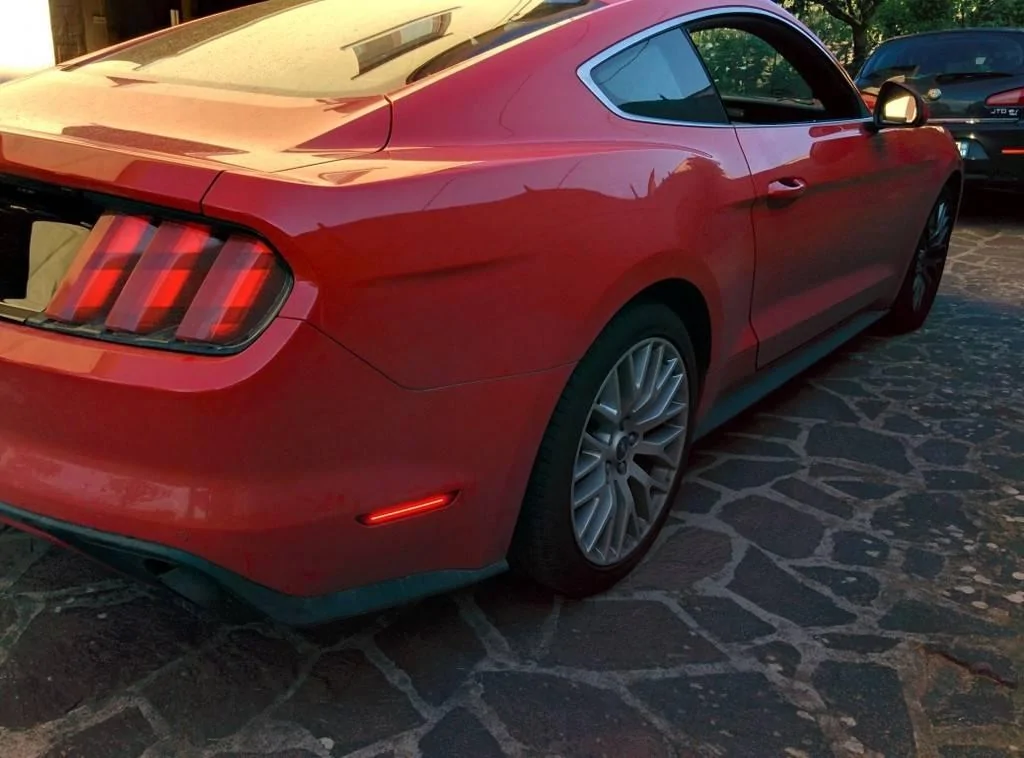
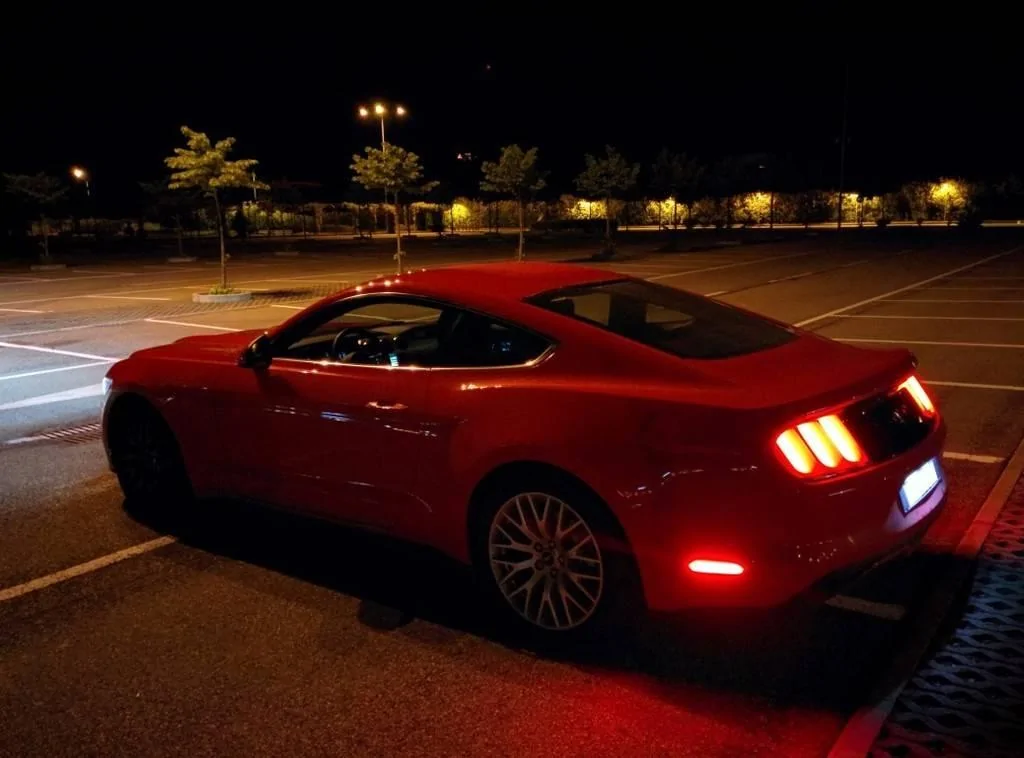
LED sidemarkers are really cool, even if probably they are too bright at night. I was checking other cars and no one has illuminated sidemarkers.. mmm..

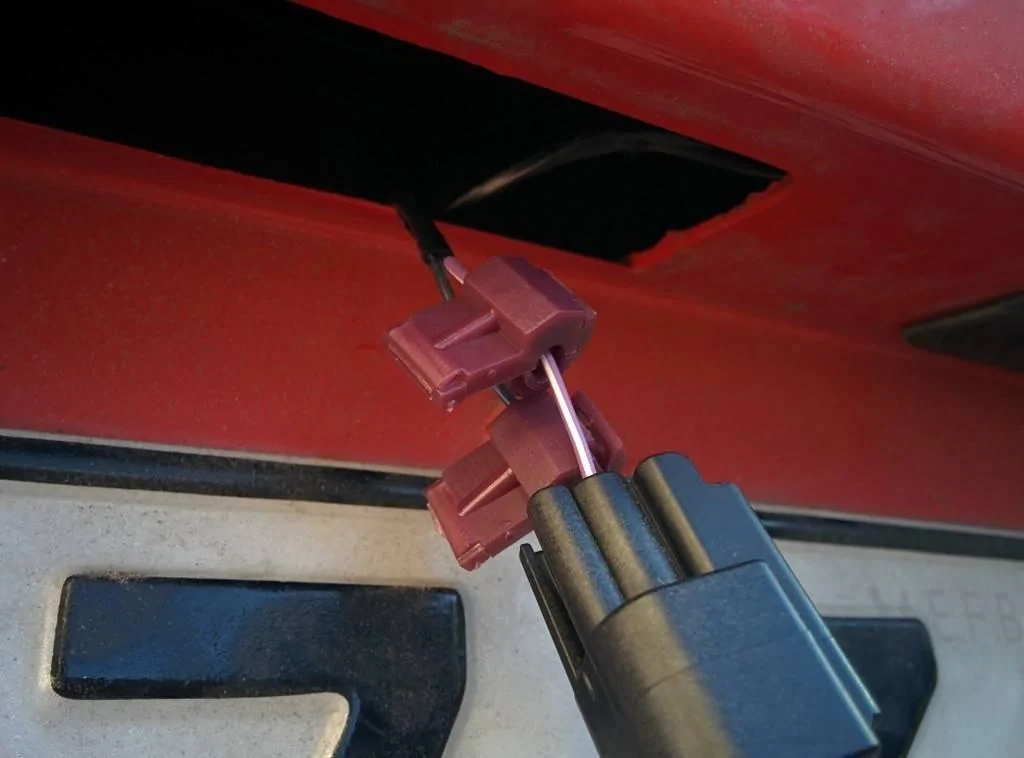
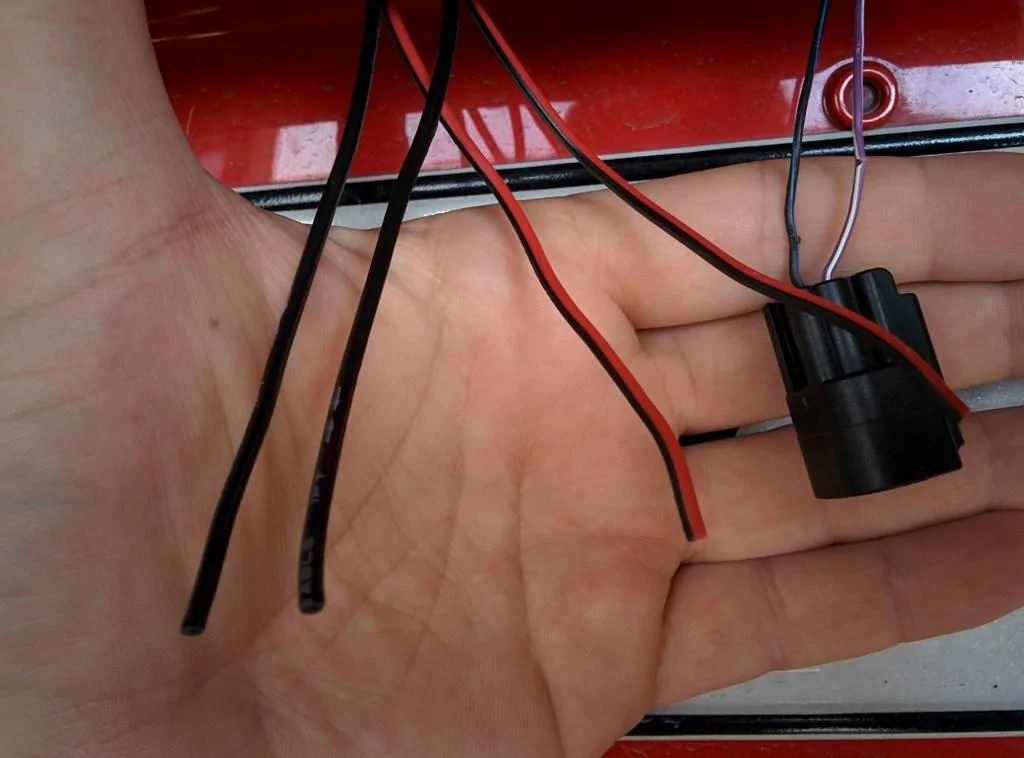
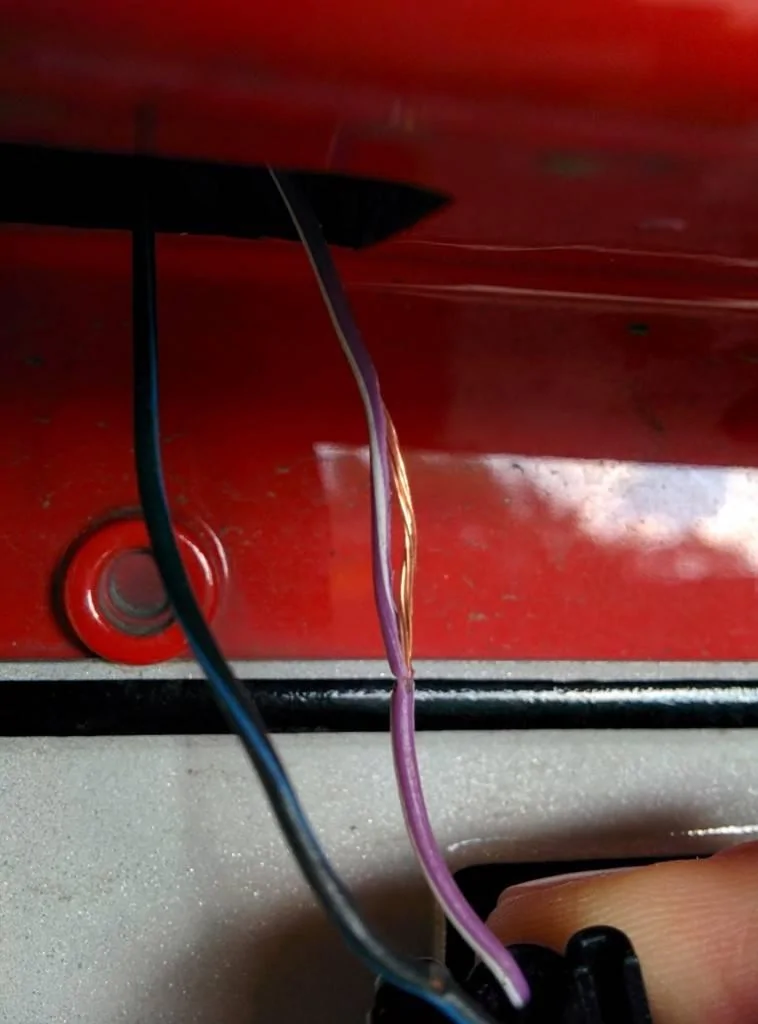
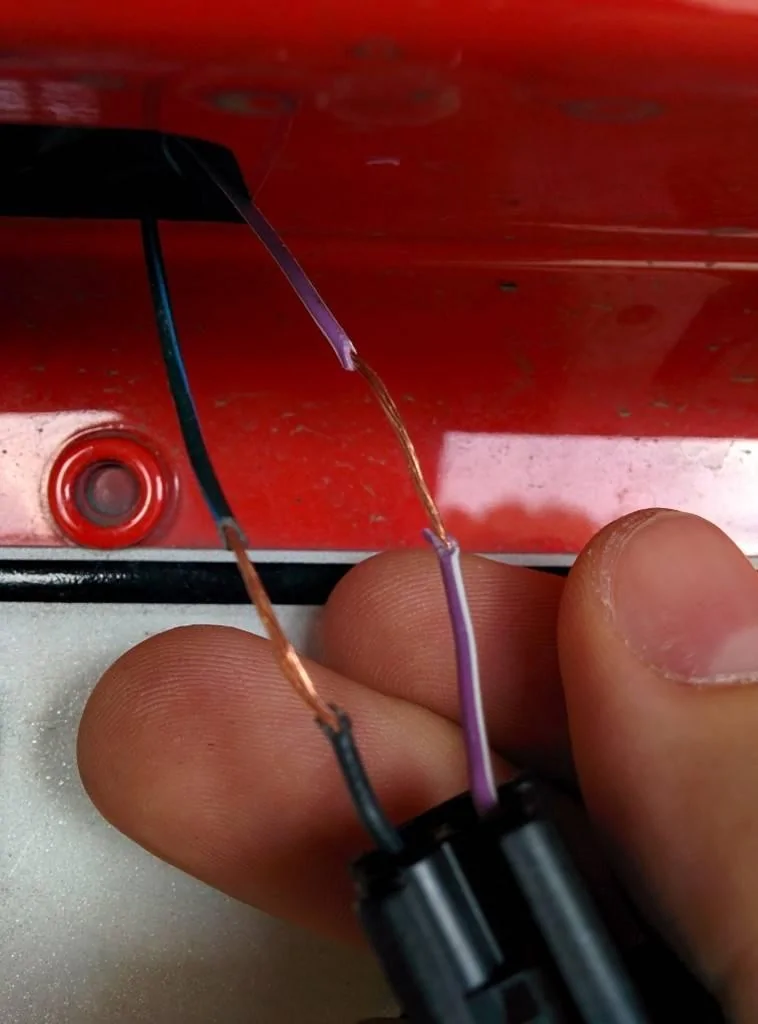
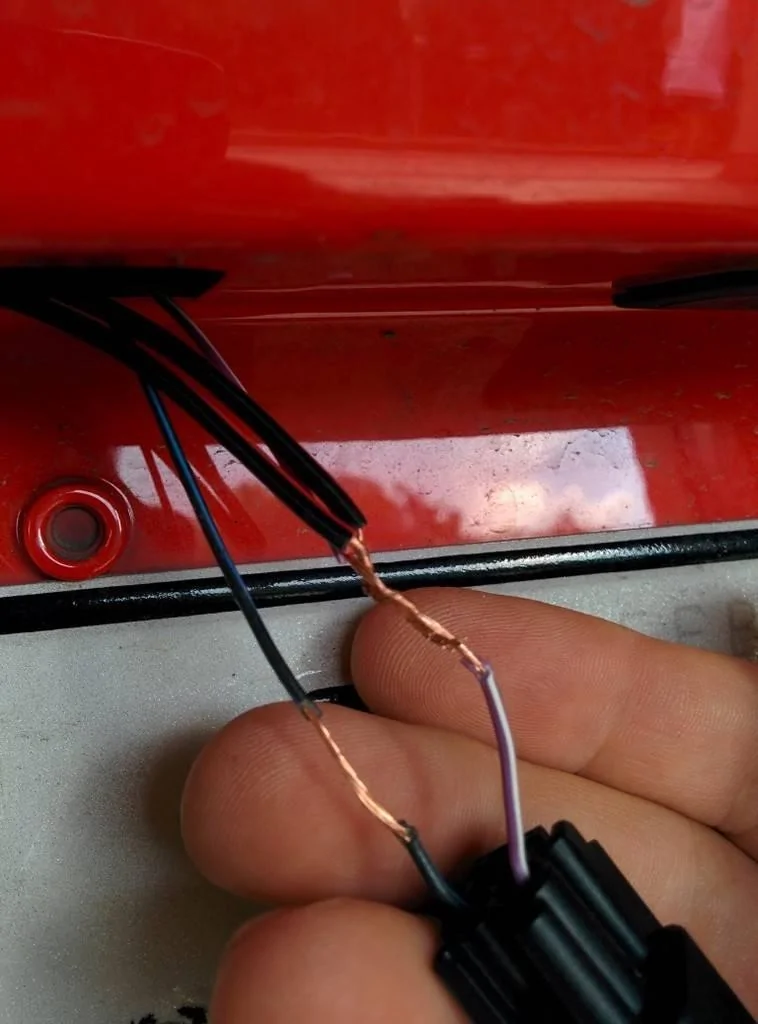
However, I need to complain with [MENTION=9987]Diode Dynamics[/MENTION] for the sh*tty quick splice connectors!! Guys, have you tried these before sending us?? I can't remember to have seen such a poor quality in a long time. The internal blades don't peel the wire properly, and the spade connector is very loose when inserted.

At first I had to re-open these stupid connectors because of faulty contacts, then I had to cover with electrical tape all this 'system' to avoid the wires falling down.

Yes, the sidemarkers work very well, they are great, but.. you always refers to quality, quality controls, quality materials.. Well I can say that the connectors you put in this are NOT quality at all. In the next few days I will remove again the license plate light to fix it in some other way.

Hopefully mine have a straight lines:
IMG_20160506_170508%20Medium_zps64udcbi7.jpg


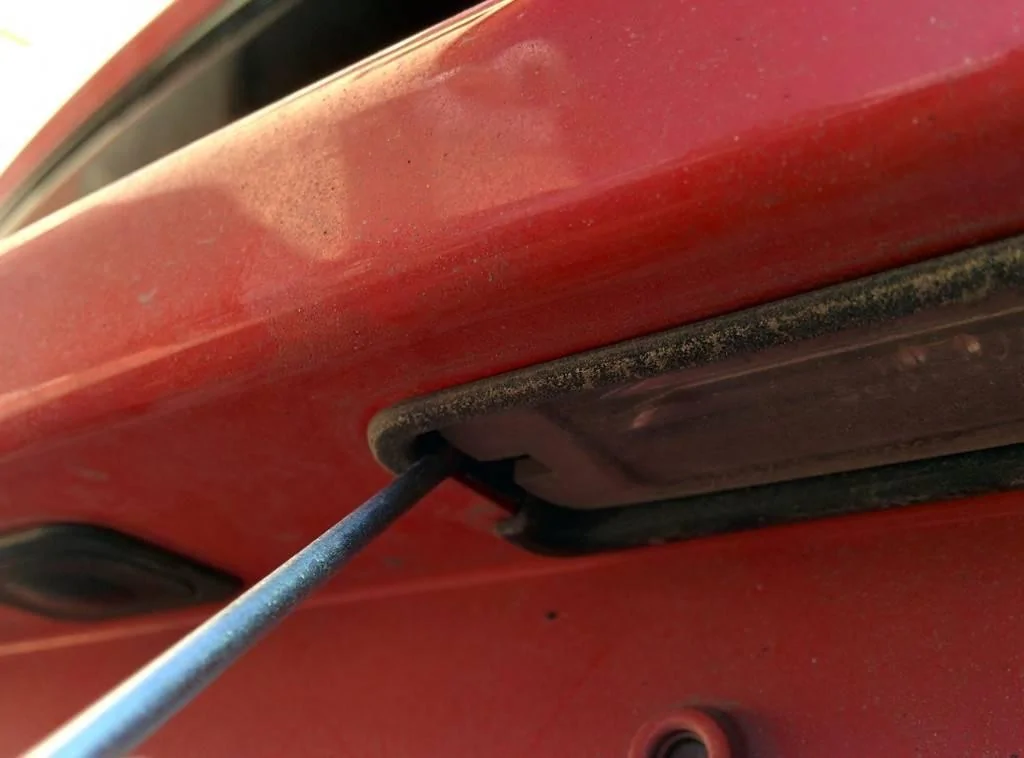
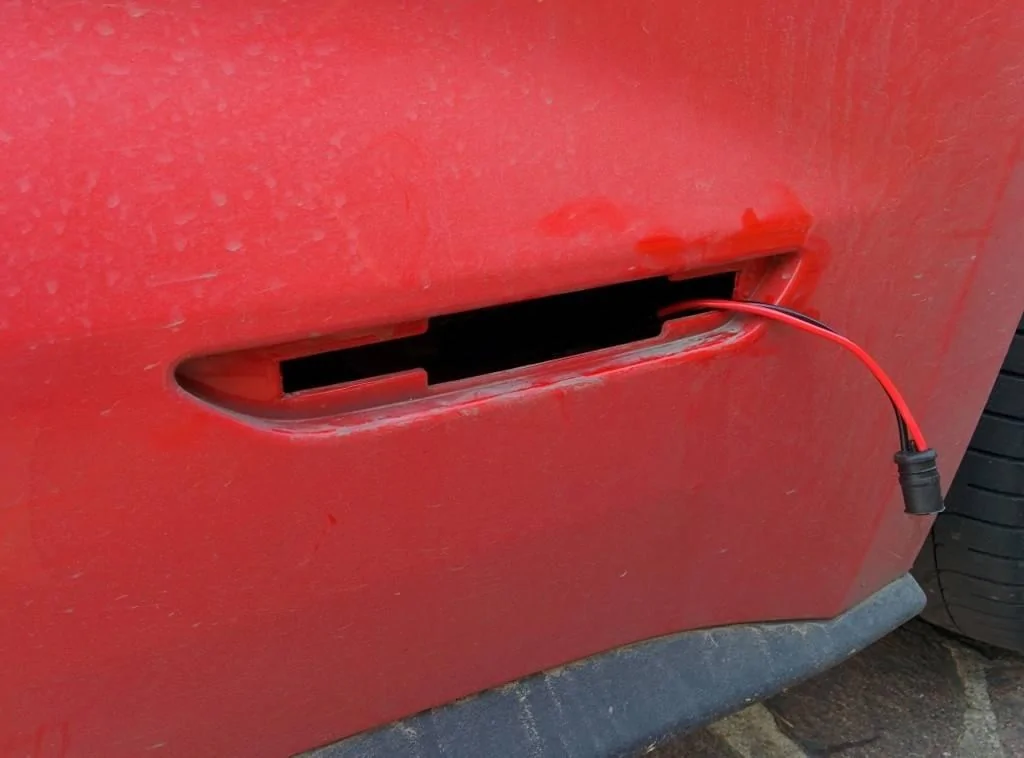
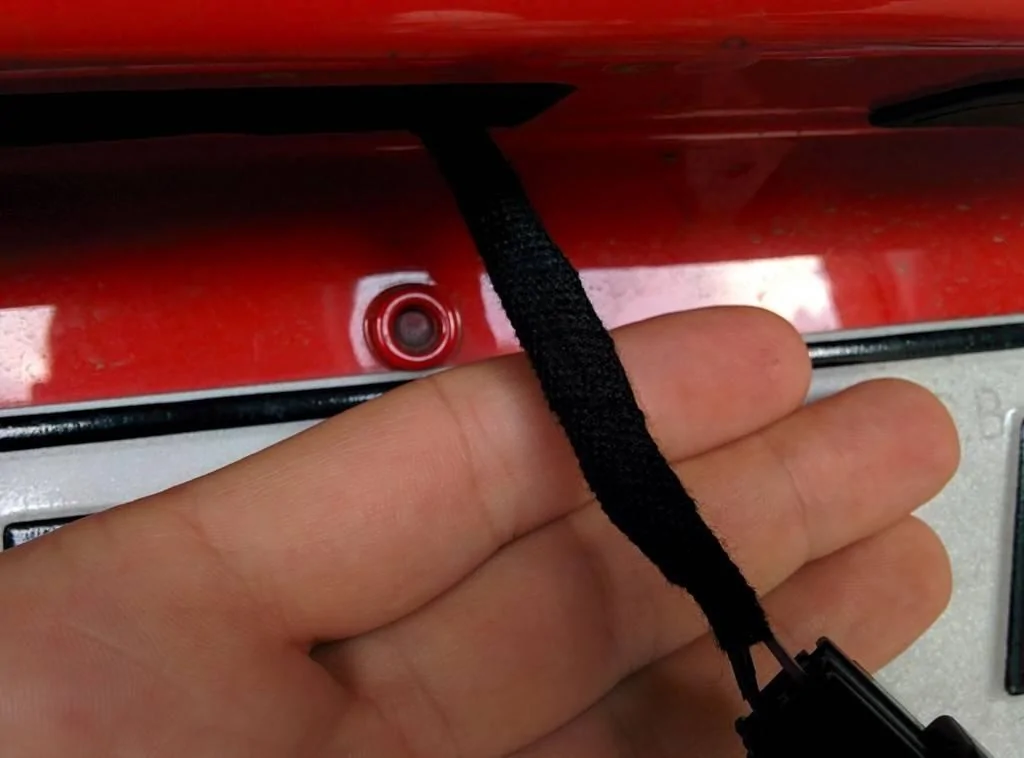
Removing light, very easy

IMG_20160506_174035%20Medium_zpsszm9m5ld.jpg


Very poor quick splice connectors

IMG_20160506_174952%20Medium_zpsakax2mgd.jpg


I haven't a picture of those covered with electrical tape because I was a bit upset!

IMG_20160506_180937%20Medium_zpstiqo0ogx.jpg


Job done

IMG_20160506_184107%20Medium_zps6shkpukz.jpg


However I'm a bit worried about night brightness.. maybe too much

IMG_20160506_230132%20Medium_zpshdnhuyup.jpg


I'm wondering if I could use a potentiometer to lower the voltage and have them a dim a bit..

[MENTION=12253]papinist[/MENTION] any chance that you upload the photos again, so that they show up. I am about to install the side markers and I always refer to your very useful and detailed posts for instructions.

One suggestion to those who will install those side markers. As I did with my front tribar led boards, I am not going to use the T-Tap connectors as they will fail sooner or later. Instead I will splice the wires and use Scotch 23 self fusing tape to cover everything, so that the connections are strong, as well as water and heat resistent.
Sponsored


MakStang

Well-Known Member
Joined
Dec 11, 2016
Threads
15
Messages
1,678
Reaction score
265
Location
Greece
Website
www.cellentis.uk
First Name
Makis
Vehicle(s)
A 2017 miraculous little beast
Having at this point an idea of the (low) quality of DD' products, I'm a bit surprised that my sidemarkers are still working.

Yesterday I did the weekly lights inspection - you know, with all those mods it's a good idea to check if everything is still working - and I noticed that both sidemarkers are OFF. Tapped gently on sidemarkers, no lights. Tapped on licence plate light, and sidemarkers comes ON!

This morning, sidemarkers are ON but when arrived at work, they are off again. Tapped again on license plate light, and they come on.

DAMN STUPID CONNECTORS!! :rant:

I said that I have to replace them, but never did. So today, while reciting a poem full of bad words against DD, I start to fix this imperfect mod.

First, remove the poor quality quick splice connectors

IMG_20160801_160548%20Medium_zpszcxh4bym.jpg


now you have all wires free and clean

IMG_20160801_160608%20Medium_zpsp60x79fk.jpg


skin the license plate light wires so you will have the internal wires exposed

IMG_20160801_160917%20Medium_zpsayafiq1k.jpg


IMG_20160801_161421%20Medium_zpswfpopui1.jpg


now twist the sidemarkers wires on them and cover with electrical tape

IMG_20160801_161524%20Medium_zps0dcpajzu.jpg


IMG_20160801_161827%20Medium_zpsouproiys.jpg


I also used some automotive fabric tape to protect it

IMG_20160801_162042%20Medium_zpsrmubovot.jpg


And now sidemarkers are working again :)

IMG_20160801_162156%20Medium_zpsj8a5asqz.jpg


I am really upset but not for the connectors itself. I often bought chinese or cheap stuff and sometimes they don't work as expected, but in those cases sellers are not claiming "top notch quality", or "designed by us in blahblah USA", as quality is their main concern.
Please DD stop advertising all your stuff as you produce the best-of-the-world stuff: you only have regular stuff, like other sellers, and sometimes below-average-quality items. Sure you have a good customer service, but it's the minimum you can do to fix all issues of your product!!
:tsk:
[MENTION=12253]papinist[/MENTION] Stefano, can you upload these photos as well? I mean I also use the exact same technique you use (a typical splicing method + self fusing electrician's tape), but it's always useful to look at best practices. Thanks man :cheers:
 
Last edited:

papinist

The Italian Pony
Joined
Nov 30, 2014
Threads
47
Messages
3,188
Reaction score
781
Location
Tuscany, Italy
First Name
Stefano
Vehicle(s)
Mustang EcoBoost MT Race Red EURO - NO MORE
[MENTION=27749]MakStang[/MENTION] you can install a Chrome\Firefox extension that allows photobucket's pictures to be showed again! I don't have the link right now but if you do a little search you will find it for sure :)
 

MakStang

Well-Known Member
Joined
Dec 11, 2016
Threads
15
Messages
1,678
Reaction score
265
Location
Greece
Website
www.cellentis.uk
First Name
Makis
Vehicle(s)
A 2017 miraculous little beast
Thanks Stefano. I did that and it works fine :thumbsup:

May I suggest something? Instead of using standard electrician's tape, try using self amalgamating tape instead (3M Scoth 23). It's perfect for what we need. As you pull it and wrap it around spliced wires, it self fuses, creating this way a very robust, water, weather and heat resistant connection that can probably last for ever. Actually when you pull it and wrap it around spliced wires, it transforms itself into a wire-like structure.

Maybe you know this already, but I thought to share it with you, just in case :cheers:
 
Last edited:

papinist

The Italian Pony
Joined
Nov 30, 2014
Threads
47
Messages
3,188
Reaction score
781
Location
Tuscany, Italy
First Name
Stefano
Vehicle(s)
Mustang EcoBoost MT Race Red EURO - NO MORE
Thanks Makis, I know that great tape, can't remember if I used it in that mod but I always use it! Last time on the oven handle for my mom :D
 

Sponsored

MakStang

Well-Known Member
Joined
Dec 11, 2016
Threads
15
Messages
1,678
Reaction score
265
Location
Greece
Website
www.cellentis.uk
First Name
Makis
Vehicle(s)
A 2017 miraculous little beast
Hi gang! I will install the side markers in a few days. Can some of you help me address the following three issues before I do the installation?

1. Did you use one of the license plate lights or both of them to connect the wire harnesses for the side markers?

2. Did you pass the wiring harness through the licence plate light housing area all the way to the side marker's location by working under the rear bumper, or you had to work your way to the side markers from inside the trunk?

3. Most important question: where did you tuck/hide the wires coming from the license plate light housing all the way to the side markers? And how did you secure the wires under the rear bumper so that they do not move around, especially on high speeds?

Thanks you guys. Having done this a while ago you are well ahead of me in this mod.
 

Charly159

Active Member
Joined
Mar 18, 2017
Threads
0
Messages
25
Reaction score
7
Location
France
First Name
Quentin
Vehicle(s)
Ecoboost 2016
1. Only one for both sidemarkers
2. Pass the cables through the bumper, and attached to the existing wiring harness that passes over the exhaust outlets.
3. I tied them on each side, after the exhausts
 

MakStang

Well-Known Member
Joined
Dec 11, 2016
Threads
15
Messages
1,678
Reaction score
265
Location
Greece
Website
www.cellentis.uk
First Name
Makis
Vehicle(s)
A 2017 miraculous little beast
Thanks a lot!
 

MakStang

Well-Known Member
Joined
Dec 11, 2016
Threads
15
Messages
1,678
Reaction score
265
Location
Greece
Website
www.cellentis.uk
First Name
Makis
Vehicle(s)
A 2017 miraculous little beast
That would be great if it's not too much trouble. Merci Quentin! :thumbsup:
 

Sponsored

Voodoo077

Well-Known Member
Joined
Jan 29, 2016
Threads
0
Messages
275
Reaction score
38
Location
Belgium
First Name
Kris
Vehicle(s)
Mustang EB 2016, BMW F11 M kit 2013, Seat Ateca 2017, Volvo T8 2019
That would be great if it's not too much trouble. Merci Quentin! :thumbsup:
Same here, merci Quentin!

But my biggest issue is that the license plate is glued with tape and not sure if I will be able to tape it back so I would have to connect them elsewhere ...Thx!
 

MakStang

Well-Known Member
Joined
Dec 11, 2016
Threads
15
Messages
1,678
Reaction score
265
Location
Greece
Website
www.cellentis.uk
First Name
Makis
Vehicle(s)
A 2017 miraculous little beast
[MENTION=21266]Voodoo077[/MENTION] you don't have to remove the license plate, just the license plate light housing. So I suppose you should be fine. Just go back a few pages in this thread, there is a photo that shows how to remove it, it's very easy.
 

Voodoo077

Well-Known Member
Joined
Jan 29, 2016
Threads
0
Messages
275
Reaction score
38
Location
Belgium
First Name
Kris
Vehicle(s)
Mustang EB 2016, BMW F11 M kit 2013, Seat Ateca 2017, Volvo T8 2019
@Voodoo077 you don't have to remove the license plate, just the license plate light housing. So I suppose you should be fine. Just go back a few pages in this thread, there is a photo that shows how to remove it, it's very easy.
Unfortunately most pictures have gone because of Photobucket license or so ... I saw there is a movie too in this topic but they do not show where to take power. So mine are just sitting in disconnected as we took power from subwoofer which was a bad idea.
 

MakStang

Well-Known Member
Joined
Dec 11, 2016
Threads
15
Messages
1,678
Reaction score
265
Location
Greece
Website
www.cellentis.uk
First Name
Makis
Vehicle(s)
A 2017 miraculous little beast
There is an easy fix. Downlooad a Chrome extension for photobucket and you will be able to see all photos again on Chrome. That's what I did.


Top