Seatown Stang
HereWeGo
- Joined
- Jun 17, 2015
- Threads
- 68
- Messages
- 442
- Reaction score
- 177
- Location
- Seattle, WA
- First Name
- Thomas
- Vehicle(s)
- 2015 Mustang GT Premium
- Thread starter
- #1
If your looking to add some uniqueness to the ride or just wan to see what it'll look like before you purchase a pair of blacked out emblems.
Tools needed:
Paper
painters tape
scissors
razor
Plasti Dip
Video: https://www.youtube.com/channel/UCZzix0gfvT0tJF-xBWOEOeA
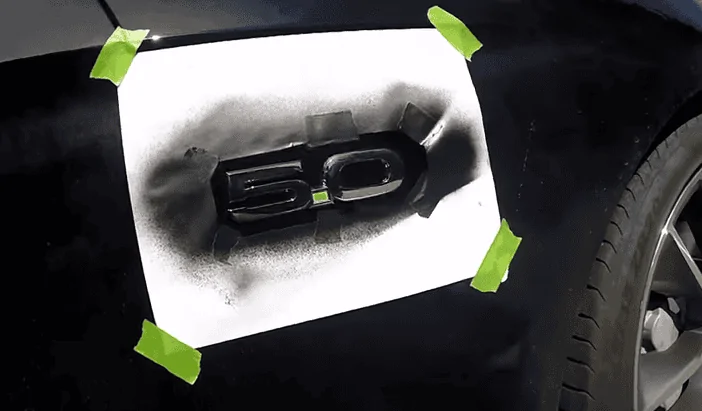
Step 1:
cut a rectangle in the paper a little larger than the emblem size and tape it to the car

Step 2:
place tape over the "Point", press it into the corners and use a razor or shape knife to cut.

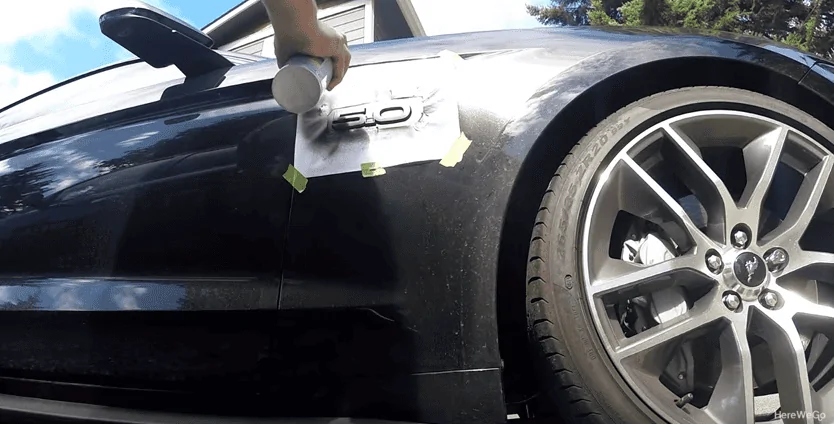
Step 3:
Paint. 1st coat get a 50/50 coverage and the 2-3 more wet coats after that. allow about 2-3 mins between coats.

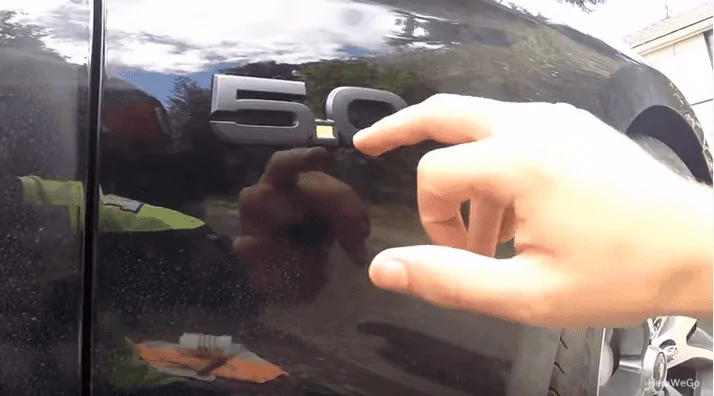
Step 4:
Remove tape from "Point" immediately after last coat is laid. This will allow for a nice straight cut around the point without having to worry about pulling up the plasti dip around the area.

Step 5: (if you have a vinyl overlay for the point)
place overlay in point and you are done...almost

Step 6: clean up
Clean up any over spray by rubbing it with a micro fiber towel.

Tools needed:
Paper
painters tape
scissors
razor
Plasti Dip
Video: https://www.youtube.com/channel/UCZzix0gfvT0tJF-xBWOEOeA
Step 1:
cut a rectangle in the paper a little larger than the emblem size and tape it to the car
Step 2:
place tape over the "Point", press it into the corners and use a razor or shape knife to cut.

Step 3:
Paint. 1st coat get a 50/50 coverage and the 2-3 more wet coats after that. allow about 2-3 mins between coats.
Step 4:
Remove tape from "Point" immediately after last coat is laid. This will allow for a nice straight cut around the point without having to worry about pulling up the plasti dip around the area.

Step 5: (if you have a vinyl overlay for the point)
place overlay in point and you are done...almost
Step 6: clean up
Clean up any over spray by rubbing it with a micro fiber towel.

Sponsored
Last edited: