Sagacity
M6G SoCal Cruisers
- Joined
- Feb 13, 2015
- Threads
- 43
- Messages
- 309
- Reaction score
- 195
- Location
- San Diego
- Website
- www.youtube.com
- First Name
- Matt
- Vehicle(s)
- 2015 Mustang LE, Kona Blue #146, Manual
- Thread starter
- #1
For those interested in painting your coil/engine covers, I found a great tutorial online that gives you the step by step details on how to do this. I followed the steps and made a few changes and I think the results turned out awesome.
I found the tutorial on another mustang forum that will show up in Google search under mustang coil cover painting tutorial.
I purchased a pint of Kona blue paint and two part clear coat online from Automotive touch up.
1. Using a course Scotch pad, wipe over the entire surface
2. Wipe surface with mineral spirits or 90% alcohol
3. Using Adhesion promoter, follow directions on can, 3 coats
4. For light colors, use an AUTO type primer, then sand with 400-600 according to the primer directions. For darker colors, can skip to step 5.
5. Apply paint..at least two light coats before applying medium coat
If you want a different color lettering and bars, follow steps 6-10, otherwise skip to Step 11.
6 Apply clear coat on area around 2 bars and around letters. You may do this after initial paint has dried to the touch. This will protect overspray while painting the letters.
7. Let Dry overnight.
8. Tape off area around bars and large areas around letters (No need to tape off every millimeter of the area)
9. Using an airbrush, paint the bars, then remove tape, wiping off overspray with REDUCER OR Airbrush Thinner...NOT PAINT or LACQUER THINNER. The clear you have already sprayed around this area will protect paint underneath from being removed with thinner.
10. Paint 3-4 letters at a time, then quickly remove tape and wipe overspray. Do this until all the letters are painted. By now all the painting should be done.
11. You are now ready for clear coat. Lightly scuff painted surface with a fine Scotch pad.
12. Wipe with tack cloth (I use compressed air)...There should be NO dust on the item before clear coating.
13. Spray clear coat.. I use 2-part professional auto clear coat, 3 light layers and one medium-heavy layer, with 10-15 minutes flash time.. You need to follow recommendation on the clear product you use.
14. Let dry over night.
15. Now you are ready for Wet Sanding- If you are happy with clear coat finish, you may install and be on your way, but there is nothing like buffing out clear for the glass, mirror shine and to remove the orange peel look.
a. 1000 grit
b. 1500 grit
c. 2000 grit--all should be WET SANDING!
16. Buffing- If you know how to buff with rubbing compound and polishing compound, you may do so. I used chemical guys V34 with orange pad, V36 with Green pad and V38 with White Pad. Lastly I Sealed it with Chemical guys jet sealer.
Before Pic

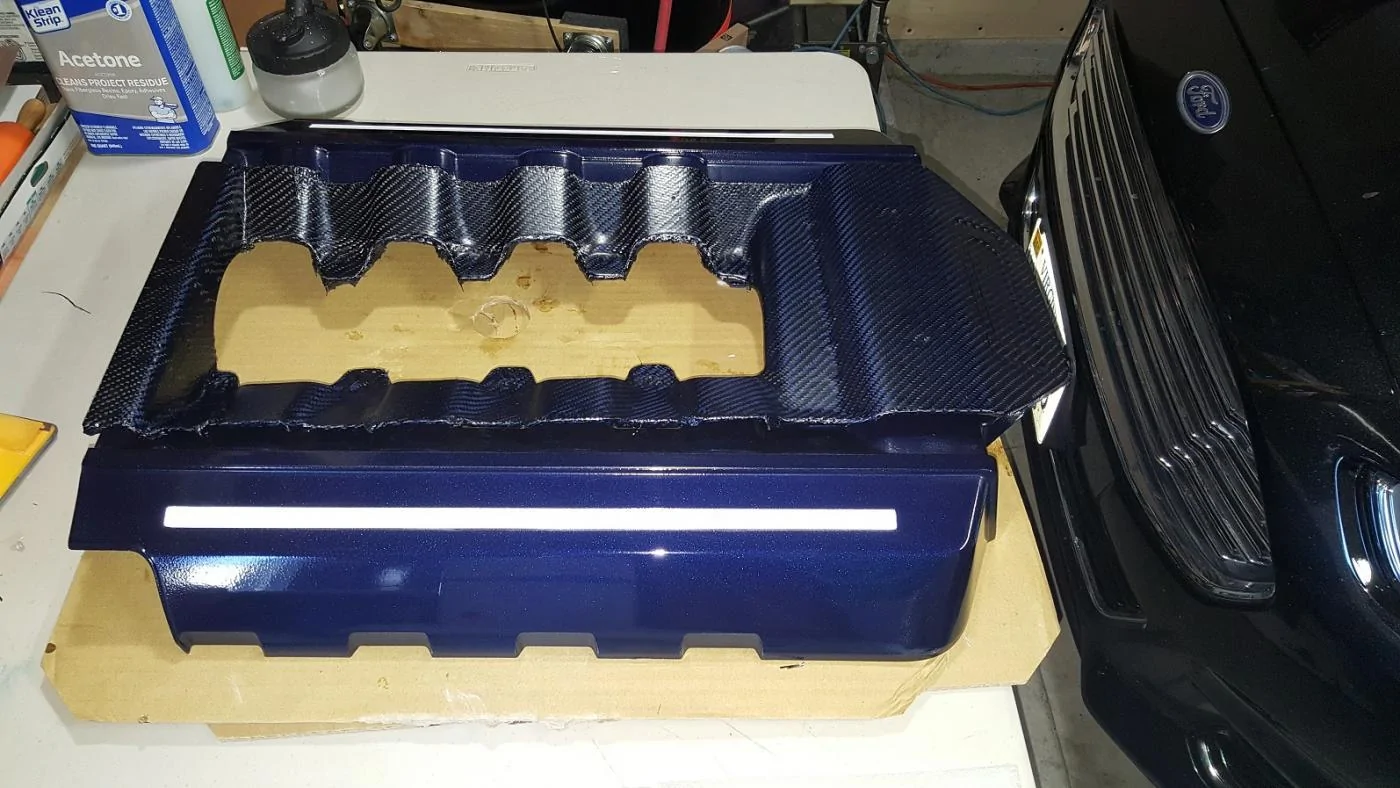
Coil cover painted

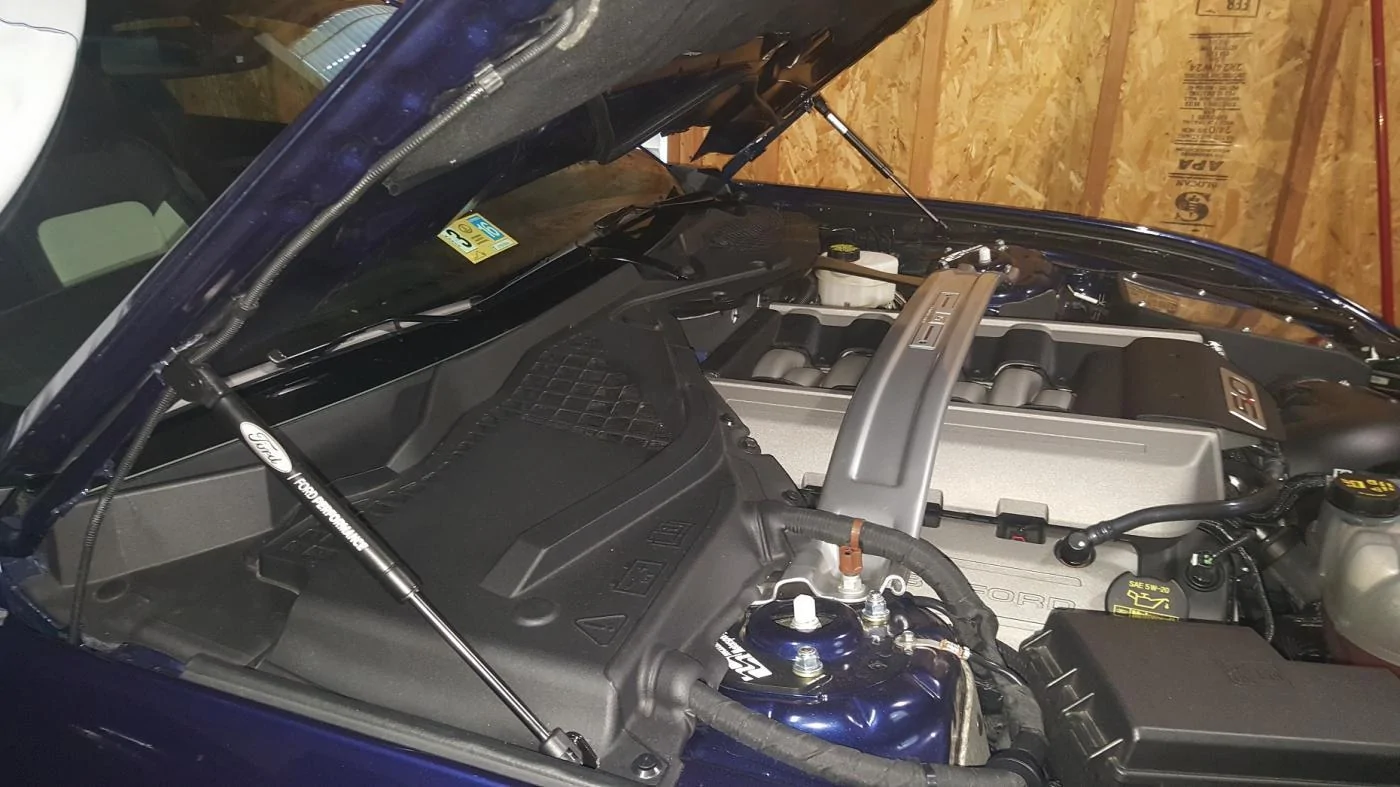
Coil Cover installed
I found the tutorial on another mustang forum that will show up in Google search under mustang coil cover painting tutorial.
I purchased a pint of Kona blue paint and two part clear coat online from Automotive touch up.
1. Using a course Scotch pad, wipe over the entire surface
2. Wipe surface with mineral spirits or 90% alcohol
3. Using Adhesion promoter, follow directions on can, 3 coats
4. For light colors, use an AUTO type primer, then sand with 400-600 according to the primer directions. For darker colors, can skip to step 5.
5. Apply paint..at least two light coats before applying medium coat
If you want a different color lettering and bars, follow steps 6-10, otherwise skip to Step 11.
6 Apply clear coat on area around 2 bars and around letters. You may do this after initial paint has dried to the touch. This will protect overspray while painting the letters.
7. Let Dry overnight.
8. Tape off area around bars and large areas around letters (No need to tape off every millimeter of the area)
9. Using an airbrush, paint the bars, then remove tape, wiping off overspray with REDUCER OR Airbrush Thinner...NOT PAINT or LACQUER THINNER. The clear you have already sprayed around this area will protect paint underneath from being removed with thinner.
10. Paint 3-4 letters at a time, then quickly remove tape and wipe overspray. Do this until all the letters are painted. By now all the painting should be done.
11. You are now ready for clear coat. Lightly scuff painted surface with a fine Scotch pad.
12. Wipe with tack cloth (I use compressed air)...There should be NO dust on the item before clear coating.
13. Spray clear coat.. I use 2-part professional auto clear coat, 3 light layers and one medium-heavy layer, with 10-15 minutes flash time.. You need to follow recommendation on the clear product you use.
14. Let dry over night.
15. Now you are ready for Wet Sanding- If you are happy with clear coat finish, you may install and be on your way, but there is nothing like buffing out clear for the glass, mirror shine and to remove the orange peel look.
a. 1000 grit
b. 1500 grit
c. 2000 grit--all should be WET SANDING!
16. Buffing- If you know how to buff with rubbing compound and polishing compound, you may do so. I used chemical guys V34 with orange pad, V36 with Green pad and V38 with White Pad. Lastly I Sealed it with Chemical guys jet sealer.
Before Pic
Coil cover painted

Coil Cover installed

Sponsored