Anthony@HTM
Well-Known Member
- Thread starter
- #1
After taking delivery of my car and really going through it I have found 2 issues.
1. The rear glass is slightly higher on the right as well as the third brake light is slightly lower on the right. I hardly notice it but it's something I can live with as I do not want the rear glass pulled.
2. My left tail light is a bit sunken in and the trunk is rotated counter clockwise. The only way you notice it is if you look at the bottom line of the center black plastic trunk piece and compare it to how it lines up with the tail lights.
I despise dealers and can't stand the thought of them touching my car so I decided to fix it myself.
Many parts of this car have slight adjustment, if you know what you are doing you can work it out pretty easily.
I wanted to work on the tail light first.
1.
Remove the 4 knobs (nuts) on the plastic cover that's hide the trunk latch. Pull towards the front of the car and up and it should pop up with little force. ( the spare tire or air pump may be in the way so remove that before this step if needed)
2.
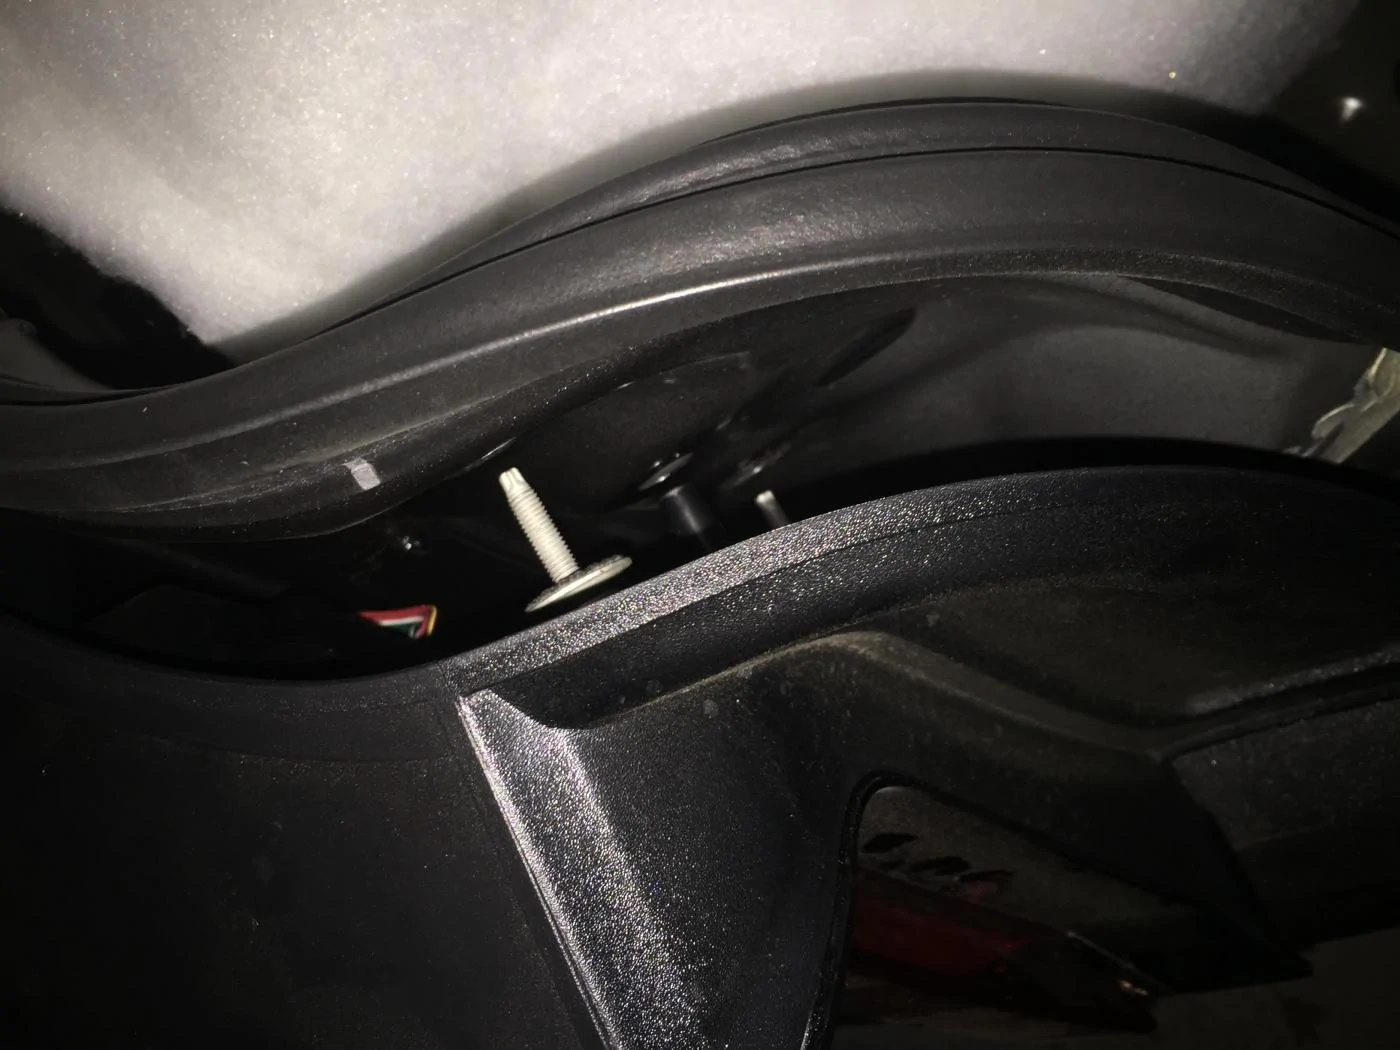
Now onto the trunk carpet, the part that covers access to the tail light bolts.
There is a plastic push pin that goes into the metal of the trunk. It's right below the hydraulics that lift the trunk. Pull that out and you'll notice a magnet that helps keep the carpet from sagging. Just push this aside and now you will have access to 3x10mm nuts.
3.
Since the tail light was too far in on the trunk side I added 2 washers on each stud in between the tail light and metal body. Slide the tail light back in and bolt it all back up.
4.
At this point it should be much better. Now the gap of the center panel with the emblem on it was off by a few mm to the right. On the trunk lid remove all of the plastic push pins and pull down on the trunk latch plastic cover. The carpet will come off now and the trunk will be exposed.
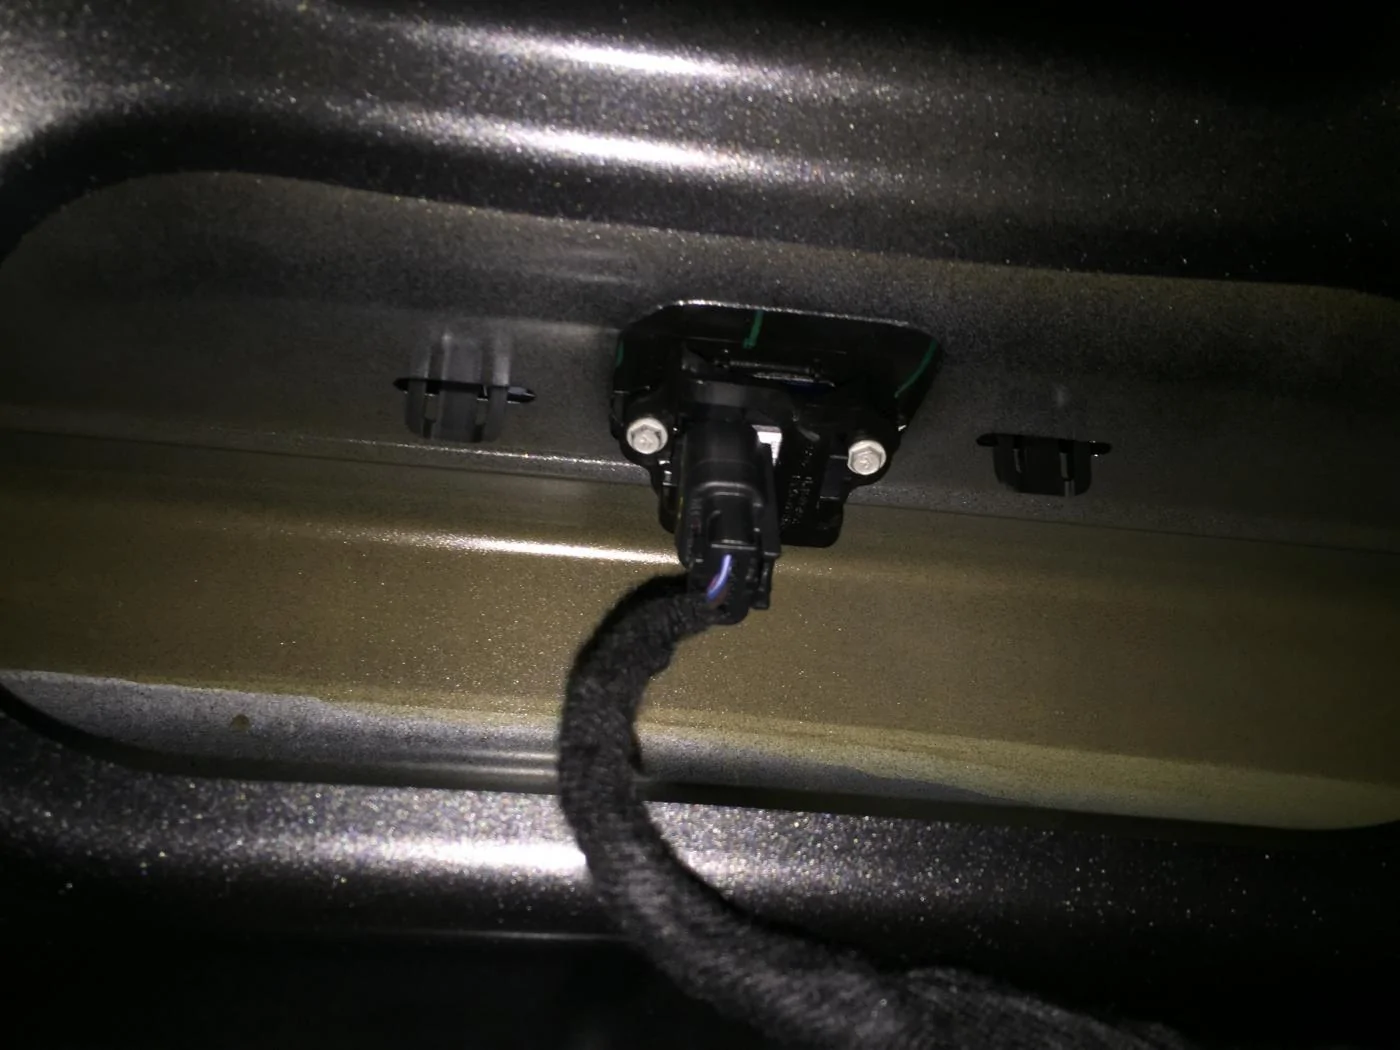
5.
Looking at the trunk completely open you'll notice 2 plastic covers in the top left and top right corner. Pull these off and you'll see 2 7mm bolts on each side.
6.
Loosen these about 2 full turns. Now look at the pic below and you'll see how this black center piece pops in to the metal trunk. Push on these tabs left or right, in my case left and check to see how the trim gap is looking.
7.
Mine is just about perfect now, the trunk could be rotated but I'd have to undo the bolts holding the trunk which is something I don't want to do. This is because the bolts are painted over and since the car is so new I don't want to move it at this time.
I hope this helps you guys, I'd say it's at 90% perfect now and if I rotate the trunk it would be perfect.
Please post here if anyone has any questions. This is very easy to do!

1. The rear glass is slightly higher on the right as well as the third brake light is slightly lower on the right. I hardly notice it but it's something I can live with as I do not want the rear glass pulled.
2. My left tail light is a bit sunken in and the trunk is rotated counter clockwise. The only way you notice it is if you look at the bottom line of the center black plastic trunk piece and compare it to how it lines up with the tail lights.
I despise dealers and can't stand the thought of them touching my car so I decided to fix it myself.
Many parts of this car have slight adjustment, if you know what you are doing you can work it out pretty easily.
I wanted to work on the tail light first.
1.
Remove the 4 knobs (nuts) on the plastic cover that's hide the trunk latch. Pull towards the front of the car and up and it should pop up with little force. ( the spare tire or air pump may be in the way so remove that before this step if needed)
2.
Now onto the trunk carpet, the part that covers access to the tail light bolts.
There is a plastic push pin that goes into the metal of the trunk. It's right below the hydraulics that lift the trunk. Pull that out and you'll notice a magnet that helps keep the carpet from sagging. Just push this aside and now you will have access to 3x10mm nuts.
3.
Since the tail light was too far in on the trunk side I added 2 washers on each stud in between the tail light and metal body. Slide the tail light back in and bolt it all back up.
4.
At this point it should be much better. Now the gap of the center panel with the emblem on it was off by a few mm to the right. On the trunk lid remove all of the plastic push pins and pull down on the trunk latch plastic cover. The carpet will come off now and the trunk will be exposed.
5.
Looking at the trunk completely open you'll notice 2 plastic covers in the top left and top right corner. Pull these off and you'll see 2 7mm bolts on each side.
6.
Loosen these about 2 full turns. Now look at the pic below and you'll see how this black center piece pops in to the metal trunk. Push on these tabs left or right, in my case left and check to see how the trim gap is looking.
7.
Mine is just about perfect now, the trunk could be rotated but I'd have to undo the bolts holding the trunk which is something I don't want to do. This is because the bolts are painted over and since the car is so new I don't want to move it at this time.
I hope this helps you guys, I'd say it's at 90% perfect now and if I rotate the trunk it would be perfect.
Please post here if anyone has any questions. This is very easy to do!
Sponsored