CrowdControl_5.0
Member
- Joined
- Dec 24, 2019
- Threads
- 1
- Messages
- 10
- Reaction score
- 9
- Location
- California
- First Name
- Joe
- Vehicle(s)
- 2017 Mustang GT PP
- Thread starter
- #1
I just install the Ford Performance Power Pack 2 on my 2017 GTPP. This is not going to be an install guide. There's plenty of info already out there on this forum and YouTube. I just wanted to share a couple things I experienced and learned from when I installed mine.
1. Disconnect the negative battery cable before begining. I didn't see this in the instructions, but LMR's video recommended it. Made sense to me and it's cheap insurance.
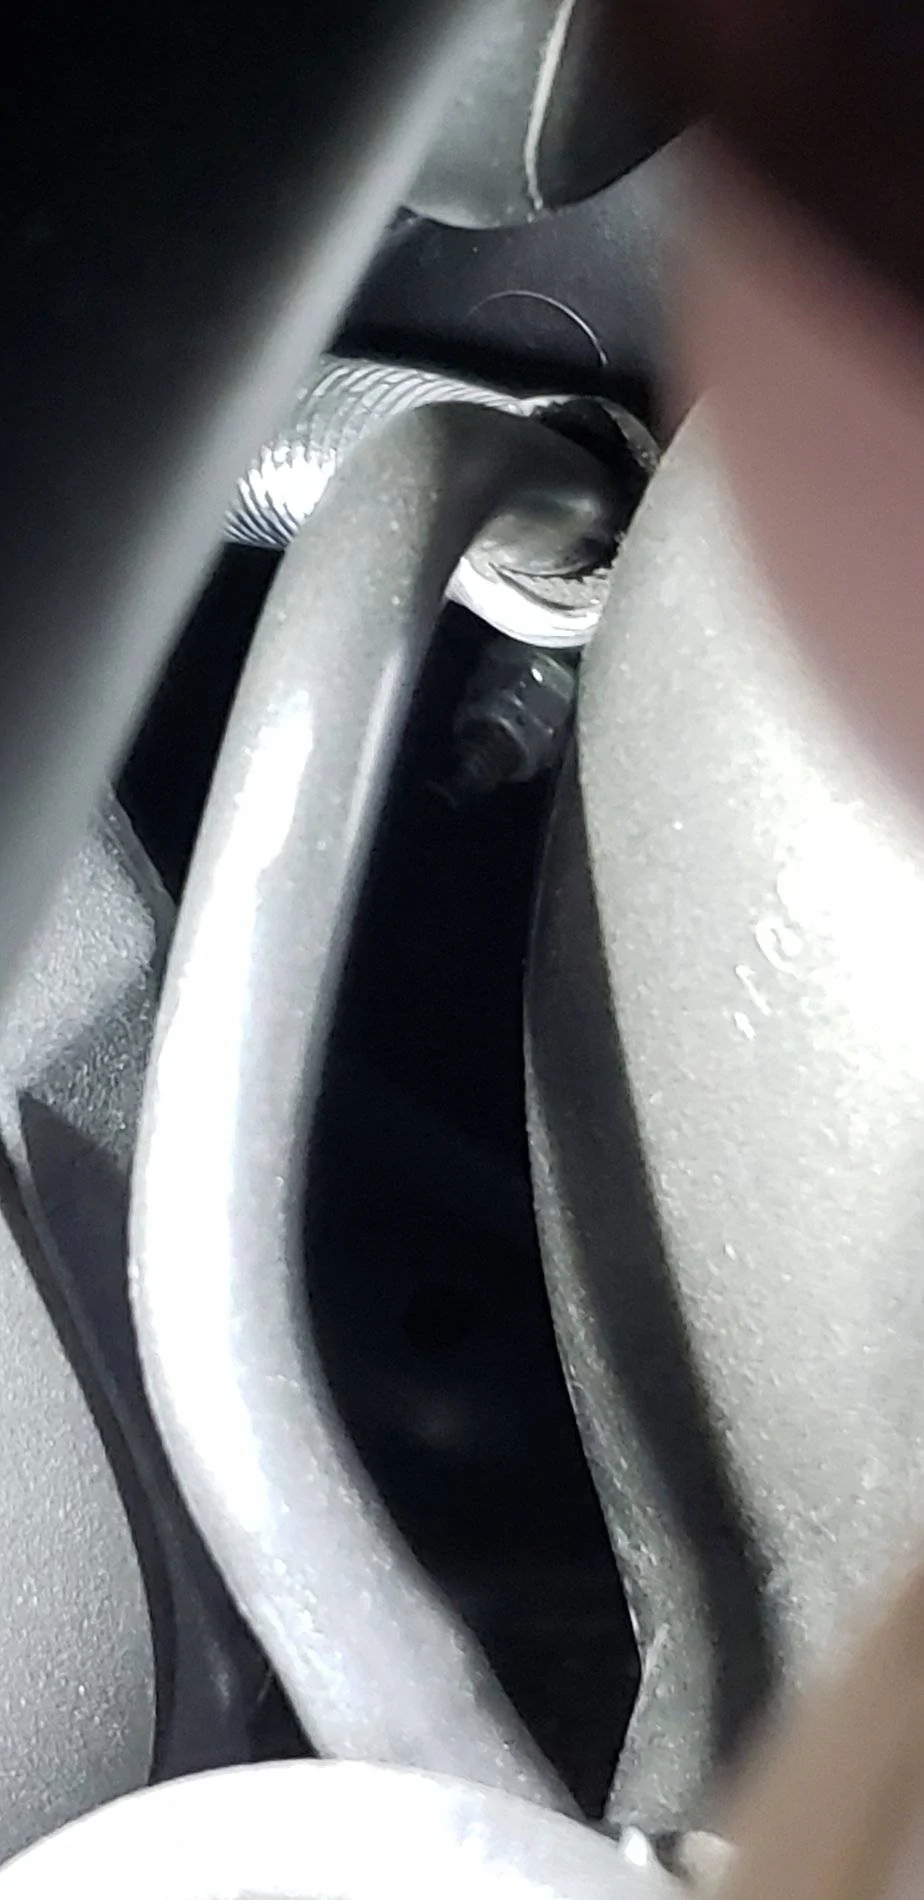
2. Removing the sound symposer sucks. How much it will suck will depend on two things: tools and hand/arm size. I dont have a bunch of extensions and swivels, but I do have a 10mm flex head ratcheting wrench with a long (maybe 10" long) handle. (See attached photos of the sound symposer stud location and the tools I used.) I also used a 1/4" flex head ratchet with a short extension and 10mm deep socket. I could only react it with my left arm and there isn't much room to work, so it's like a 1/4 turn or so at a time. I just took my time here and took a lot of breaks.
3. There's no way in hell I was going to be able to get the firewall plug installed myself. My meat hooks are just too big. I'm gonna let my petite wife give it a go when she gets home. Maybe if I removed the windshield wiper cover and K brace, I might be able to reach it from the top. But, I am way too lazy for that. So it's just an open hole until either my wife does it, or I rent a child to do it for me.
3. Light. Lots of it. There's a fancy underhood light I've had my eye on, and I sure wish I'd had it today. At minimum, you're gonna need a flashlight from time to time, just to make sure things are lined up, connected, not rubbing, etc.
4. Get a cheap telescoping retrieval magnet. I dropped my 10mm socket down onto the belly pan. Luckily I had my fancy magnet on a stick, otherwise I'd probably have to pull the belly pan, and the car was not in a good position in the garage to be able to even jack it up properly. Or, just don't drop stuff.
5. When you go to install the new intake assembly, remove the air filter first. There's a rubber inlet that you're instructed to cut a couple times to make a flap. Also, I removed the plastic radiator support cover. It's just a few push pins and it gives you a better view when you're aligning the duct.
6. Install the soft supplied airbox gasket before you install the filter. There wasn't much clearance between the end of the filter and the edge of the airbox, and I wasn't able to slip the gasket between them. So, I had to remove the filter again to make room.
7. The 2017 GT doesn't use the supplied T fitting. It's only for the 2015-2016 GT.
8. You're gonna need a Dremel or something to clearance the plastic engine cover. It clearly hits the one of the hoses, and it's really easy to see where and how much you'll have to grind on it. This didn't take more than ten minutes to do and a couple test fits.
9. The engine harness on the passenger side was contacting the throttle body plug. The harness is held to the front of the engine with a little plastic zip tie. If you push on it a bit, it will move easily and I am certain that it's not putting an pressure on the plug that would be of any concern.
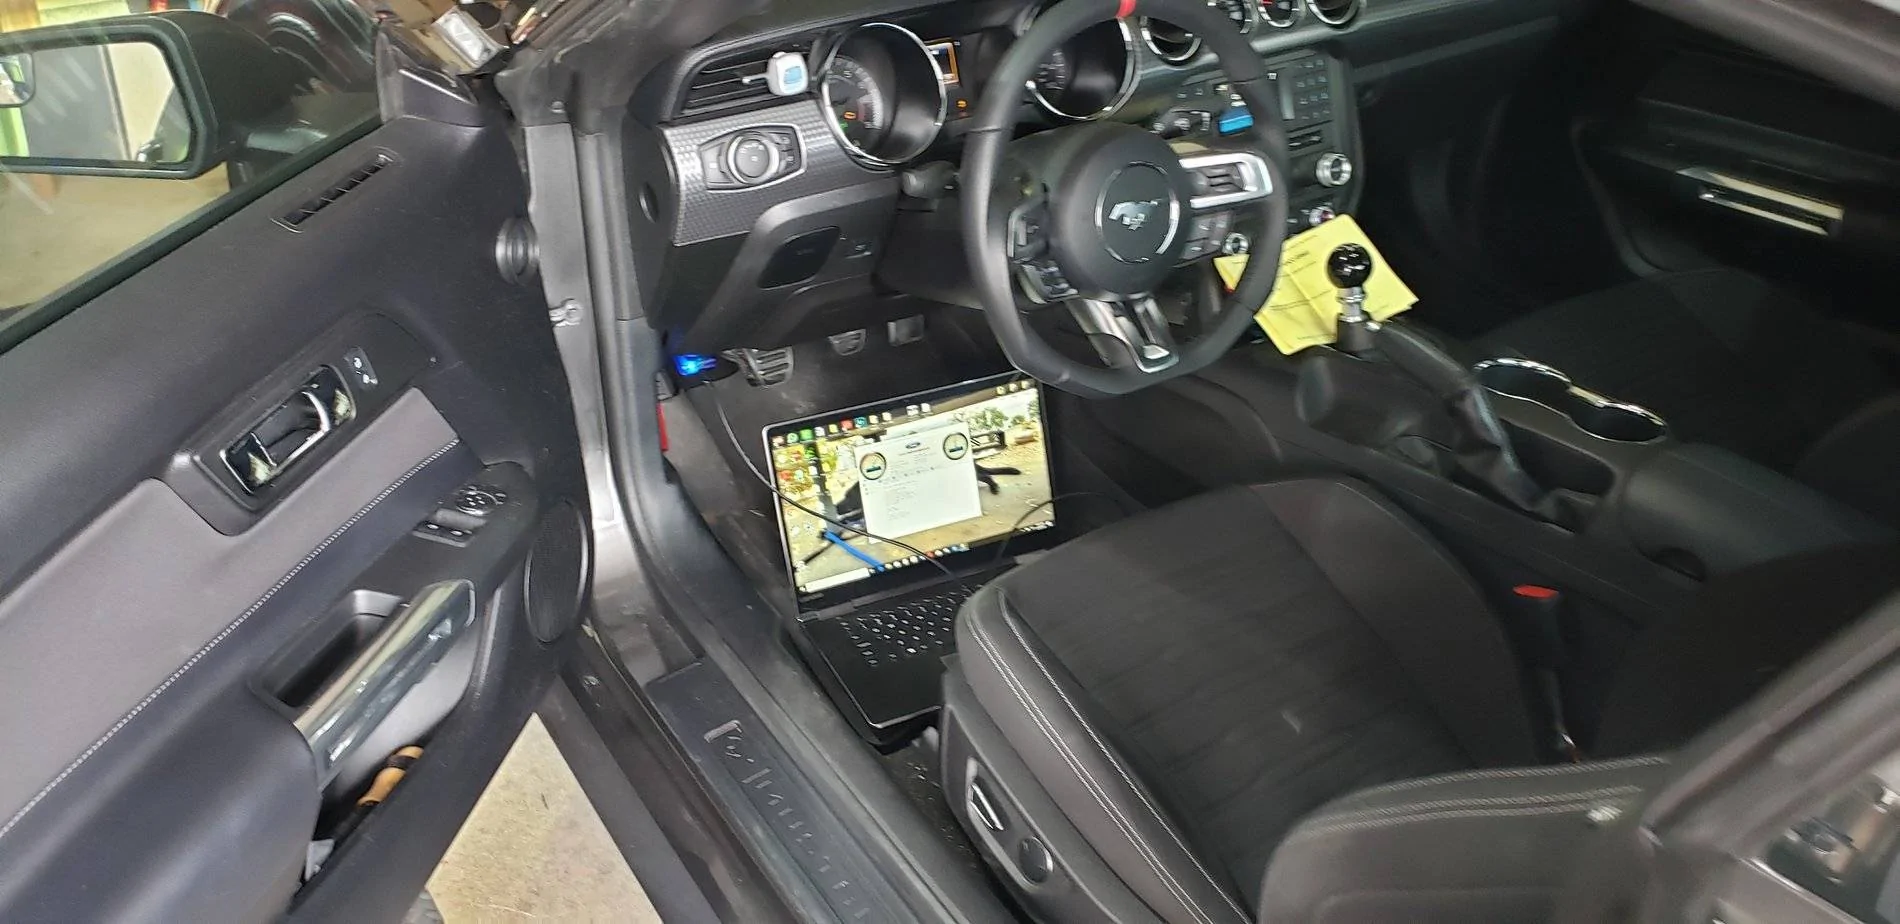
10. The Procal tool process was easy, but the directions suck. Here's what I did. Once the car was all buttoned up and the battery was reconnected, I connected the procal to the OBD plug. Then I started the Ford Performance application (which I previously downloaded), and then connected the procal to the laptop. Then I turned the car on accessory (meaning don't start the car). I went to the "download" tab and entered my login and the code provided with the kit. It prompts you when it's done. Then I went to the "program" tab and began that process. I would make sure your battery is healthy, or hook up a battery tender/charger while you do the flash. You do not want this process to get interrupted! It goes through several steps while it reads and writes to your ECU. While this is happening, all kinds of check engine and warning lights will cycle on the dash. This is normal. (I might have pooped myself a little while all this was happening.) Toward the end of this process, the Procal software will prompt you to turn off power to the module. I was unsure of what this meant, so I disconnected the procal tool. DO NOT DO THIS!!! It freaked out and an ABORT message popped up on screen. Luckily, I was able to start the whole process over and I didn't brick my ECU (if this is even possible). What they should tell you is "turn the car off". Then it prompts you to power the car back up. After a minute or two, the Procal software read "Successful" in green. At this point you can unplug the procal from the OBD port and fire up the car. Some have experienced a crank sensor code, but I did not. From the videos I have seen, the crank relearn process is very easy, so I wouldn't sweat it if it throws that code.
11. Take your time. It took my about an hour and a half from start to finish, but this will depend upon your skill level and the tools you have available. The real struggle is with the stupid sound tube. Just be patient and work at it a little at a time and it will eventually come off. I have read of other people just ripping it off the wall, but I don't like doing things that way. To each his/her own. Double check everything before shutting the hood. Make sure all your fittings and connections are good, tools put away, etc.
12. This tune is for 91+ octane, so if you have lower octane fuel, go burn it up or siphon it out and fill up with some good premium fuel before driving it. I am sure you'll have issues with crappy or low octane fuel.
13. Use a torque wrench. No uggie duggies! Especially with the throttle body. This 1.5 hour job can easily become an all day affair if you strip something out. Most of this stuff is in inch pounds and low foot pounds, so I definitely don't recommend using a cordless driver when installing this stuff, but feel free to use it for disassembly.
So, after all was said and done, I took it for a drive and it works great. No loss in driveability in town and definitely feel that it has more torque through the low and midrange. Supposedly it has a higher redline, but I don't race, so shifting at around 6K works fine for me. It has better throttle response and a nice sound from under the hood. I tried the no lift shift and it's pretty neat. I'm glad had previously installed a Whiteline transmission mount bushing because it shifted into 3rd and 5th without an issue. Anyway, I hope this helps someone out in the future and makes their install go as smooth or smoother than mine did.
Here's my disclaimer: I am not a professional mechanic. But, I do have some basic knowledge and have been working on my own cars and motorcycles for over 20 years. Always default to following the manufacturer's instructions, and if you decide to deviate from them, then you're on your own. These tips I have shared jive with what the instructions say, and hopefully clarify some of the vague portions of the instructions. Again, TAKE YOUR TIME! Don't force anything off that doesn't want to come off. All this stuff went together with very little forcing or coercing. If it's not coming apart easily and gently, then you're doing it wrong. When in doubt, take a breath, re-read the instructions, and/or call Ford's tech line.
Cheers,
CC50
P.S. Here's a list of tools I used to get this done.
1. 1/4" drive flex head ratchet
2. 6" 1/4" extension
3. 1/4" drive 7mm, 8mm & 10mm (deep and regular)
4. Needle nose pliers
5. Interior panel tool (for pulling trim tabs and those little Christmas tree pins)
6. Razor knife
7. Dremel with sanding barrel
8. Matco 10" flex head ratcheting wrench
9. Torque wrench capable of inch pounds
10. Tiny flathead screwdriver to help with undoing PCV connections and clips
11. Lots of light
12. A laptop


1. Disconnect the negative battery cable before begining. I didn't see this in the instructions, but LMR's video recommended it. Made sense to me and it's cheap insurance.
2. Removing the sound symposer sucks. How much it will suck will depend on two things: tools and hand/arm size. I dont have a bunch of extensions and swivels, but I do have a 10mm flex head ratcheting wrench with a long (maybe 10" long) handle. (See attached photos of the sound symposer stud location and the tools I used.) I also used a 1/4" flex head ratchet with a short extension and 10mm deep socket. I could only react it with my left arm and there isn't much room to work, so it's like a 1/4 turn or so at a time. I just took my time here and took a lot of breaks.
3. There's no way in hell I was going to be able to get the firewall plug installed myself. My meat hooks are just too big. I'm gonna let my petite wife give it a go when she gets home. Maybe if I removed the windshield wiper cover and K brace, I might be able to reach it from the top. But, I am way too lazy for that. So it's just an open hole until either my wife does it, or I rent a child to do it for me.
3. Light. Lots of it. There's a fancy underhood light I've had my eye on, and I sure wish I'd had it today. At minimum, you're gonna need a flashlight from time to time, just to make sure things are lined up, connected, not rubbing, etc.
4. Get a cheap telescoping retrieval magnet. I dropped my 10mm socket down onto the belly pan. Luckily I had my fancy magnet on a stick, otherwise I'd probably have to pull the belly pan, and the car was not in a good position in the garage to be able to even jack it up properly. Or, just don't drop stuff.
5. When you go to install the new intake assembly, remove the air filter first. There's a rubber inlet that you're instructed to cut a couple times to make a flap. Also, I removed the plastic radiator support cover. It's just a few push pins and it gives you a better view when you're aligning the duct.
6. Install the soft supplied airbox gasket before you install the filter. There wasn't much clearance between the end of the filter and the edge of the airbox, and I wasn't able to slip the gasket between them. So, I had to remove the filter again to make room.
7. The 2017 GT doesn't use the supplied T fitting. It's only for the 2015-2016 GT.
8. You're gonna need a Dremel or something to clearance the plastic engine cover. It clearly hits the one of the hoses, and it's really easy to see where and how much you'll have to grind on it. This didn't take more than ten minutes to do and a couple test fits.
9. The engine harness on the passenger side was contacting the throttle body plug. The harness is held to the front of the engine with a little plastic zip tie. If you push on it a bit, it will move easily and I am certain that it's not putting an pressure on the plug that would be of any concern.
10. The Procal tool process was easy, but the directions suck. Here's what I did. Once the car was all buttoned up and the battery was reconnected, I connected the procal to the OBD plug. Then I started the Ford Performance application (which I previously downloaded), and then connected the procal to the laptop. Then I turned the car on accessory (meaning don't start the car). I went to the "download" tab and entered my login and the code provided with the kit. It prompts you when it's done. Then I went to the "program" tab and began that process. I would make sure your battery is healthy, or hook up a battery tender/charger while you do the flash. You do not want this process to get interrupted! It goes through several steps while it reads and writes to your ECU. While this is happening, all kinds of check engine and warning lights will cycle on the dash. This is normal. (I might have pooped myself a little while all this was happening.) Toward the end of this process, the Procal software will prompt you to turn off power to the module. I was unsure of what this meant, so I disconnected the procal tool. DO NOT DO THIS!!! It freaked out and an ABORT message popped up on screen. Luckily, I was able to start the whole process over and I didn't brick my ECU (if this is even possible). What they should tell you is "turn the car off". Then it prompts you to power the car back up. After a minute or two, the Procal software read "Successful" in green. At this point you can unplug the procal from the OBD port and fire up the car. Some have experienced a crank sensor code, but I did not. From the videos I have seen, the crank relearn process is very easy, so I wouldn't sweat it if it throws that code.
11. Take your time. It took my about an hour and a half from start to finish, but this will depend upon your skill level and the tools you have available. The real struggle is with the stupid sound tube. Just be patient and work at it a little at a time and it will eventually come off. I have read of other people just ripping it off the wall, but I don't like doing things that way. To each his/her own. Double check everything before shutting the hood. Make sure all your fittings and connections are good, tools put away, etc.
12. This tune is for 91+ octane, so if you have lower octane fuel, go burn it up or siphon it out and fill up with some good premium fuel before driving it. I am sure you'll have issues with crappy or low octane fuel.
13. Use a torque wrench. No uggie duggies! Especially with the throttle body. This 1.5 hour job can easily become an all day affair if you strip something out. Most of this stuff is in inch pounds and low foot pounds, so I definitely don't recommend using a cordless driver when installing this stuff, but feel free to use it for disassembly.
So, after all was said and done, I took it for a drive and it works great. No loss in driveability in town and definitely feel that it has more torque through the low and midrange. Supposedly it has a higher redline, but I don't race, so shifting at around 6K works fine for me. It has better throttle response and a nice sound from under the hood. I tried the no lift shift and it's pretty neat. I'm glad had previously installed a Whiteline transmission mount bushing because it shifted into 3rd and 5th without an issue. Anyway, I hope this helps someone out in the future and makes their install go as smooth or smoother than mine did.
Here's my disclaimer: I am not a professional mechanic. But, I do have some basic knowledge and have been working on my own cars and motorcycles for over 20 years. Always default to following the manufacturer's instructions, and if you decide to deviate from them, then you're on your own. These tips I have shared jive with what the instructions say, and hopefully clarify some of the vague portions of the instructions. Again, TAKE YOUR TIME! Don't force anything off that doesn't want to come off. All this stuff went together with very little forcing or coercing. If it's not coming apart easily and gently, then you're doing it wrong. When in doubt, take a breath, re-read the instructions, and/or call Ford's tech line.
Cheers,
CC50
P.S. Here's a list of tools I used to get this done.
1. 1/4" drive flex head ratchet
2. 6" 1/4" extension
3. 1/4" drive 7mm, 8mm & 10mm (deep and regular)
4. Needle nose pliers
5. Interior panel tool (for pulling trim tabs and those little Christmas tree pins)
6. Razor knife
7. Dremel with sanding barrel
8. Matco 10" flex head ratcheting wrench
9. Torque wrench capable of inch pounds
10. Tiny flathead screwdriver to help with undoing PCV connections and clips
11. Lots of light
12. A laptop


Sponsored