Sponsored

Steeda Hood Strut Install (Videos)

markleigh

Well-Known Member
Joined
Apr 4, 2016
Threads
50
Messages
301
Reaction score
111
Location
Surrey
First Name
Mark... duh!
Vehicle(s)
Ruby Red Mustang GT ...just sold :-(
...by supplying a battery cover which didn't cover the mount points? :)

I think the battery cover is an issue on both LHD and RHD but just different sides.

I know. I want the world!
(And I want it now!)
Sponsored


MrWolf

Well-Known Member
Joined
May 3, 2015
Threads
37
Messages
1,502
Reaction score
533
Location
UK - Wiltshire
First Name
Tom
Vehicle(s)
MY2018 Magnetic Auto GT
Another cool video. Very helpful.

Would be pretty cool if you made one for when (I assume) you fit your cb005cradle lock out kit
 
OP
OP
Enoch

Enoch

Well-Known Member
Joined
Feb 10, 2015
Threads
83
Messages
2,203
Reaction score
1,105
Location
UK
First Name
Andy
Vehicle(s)
Guard 5.0 (Auto) Fastback, Saddle Leather
Another cool video. Very helpful.

Would be pretty cool if you made one for when (I assume) you fit your cb005cradle lock out kit

Trouble Mr Wolf, is that I'm planning on doing springs, ARB, bushes, etc as one big job, as I don't want to be repeating lowering the subframe, etc when I only need to do it once......but I'll see what I can do. Probably a bit involved for a video, but I'll endeavour to get a few photos, and do a bit of a guide...
:)
 

Steeda UK

Well-Known Member
Diamond Sponsor
Joined
Mar 12, 2016
Threads
114
Messages
851
Reaction score
290
Location
London, UK
Website
www.steeda.co.uk
Vehicle(s)
Mustangs
Great stuff thanks Enoch!

I think regarding the battery cover, you can usually just pop it off and slide it up a bit in order to uncouple battery for example. You would only need to pop off the strut (or cut a slot) if you wanted to completely remove the cover from the car
 

McDoodle

Well-Known Member
Joined
Jun 1, 2015
Threads
28
Messages
770
Reaction score
193
Location
England
Vehicle(s)
A grey car
A couple of new videos for your perusal:)
I think the need for hole elongation is that the PDF template is on 'Letter' sized paper, and I'm guessing most people will print out on A4 as that is the most popular paper size in the UK. This will make the template a fraction too narrow and long.

A4 is 210 x 297mm
Letter (US) is 216 x 279mm

If you want to scale it, width needs to increase by 1.03, length needs to decrease by 0.94 or when you print the PDF select (if you get the option) 'Page Scaling: None' (the default is probably 'Fit to Printable Area') and I think that will give you the template at the correct size. Cheers ....
 

Sponsored

OP
OP
Enoch

Enoch

Well-Known Member
Joined
Feb 10, 2015
Threads
83
Messages
2,203
Reaction score
1,105
Location
UK
First Name
Andy
Vehicle(s)
Guard 5.0 (Auto) Fastback, Saddle Leather
I think the need for hole elongation is that the PDF template is on 'Letter' sized paper, and I'm guessing most people will print out on A4 as that is the most popular paper size in the UK. This will make the template a fraction too narrow and long.

A4 is 210 x 297mm
Letter (US) is 216 x 279mm

If you want to scale it, width needs to increase by 1.03, length needs to decrease by 0.94 or when you print the PDF select (if you get the option) 'Page Scaling: None' (the default is probably 'Fit to Printable Area') and I think that will give you the template at the correct size. Cheers ....
You could well be right.:)..... Well that's the excuse I'm going to use,:thumbsup: see it wasn't my fault at all:lol::lol:

Although I was a tad more than 1mm by the end:shrug:...... More like half an inch:headbonk::headbonk:
 

McDoodle

Well-Known Member
Joined
Jun 1, 2015
Threads
28
Messages
770
Reaction score
193
Location
England
Vehicle(s)
A grey car
You could well be right.:)..... Well that's the excuse I'm going to use,:thumbsup: see it wasn't my fault at all:lol::lol:

Although I was a tad more than 1mm by the end:shrug:...... More like half an inch:headbonk::headbonk:
Don't wish to hijack your thread Enoch, but just fitted my struts so have a few additional observations that might help future installers. Learnt a lot from your videos, so this is really just standing-on-the-shoulders-of-giants stuff :cheers:.

I can confirm the template needs the 'Scaling:None' selected if you're printing on A4. It seems to work fine, but I also did a 'belt and braces' job; marked with the template and also fitted the bracket to the car before cutting the hole and measured where the apex of the bracket was to ensure it matched with the template. I also made a cut from the hole to the edge of the cover nearest to the wing, so I can easily remove the battery cover without having to pop the strut off the bracket.

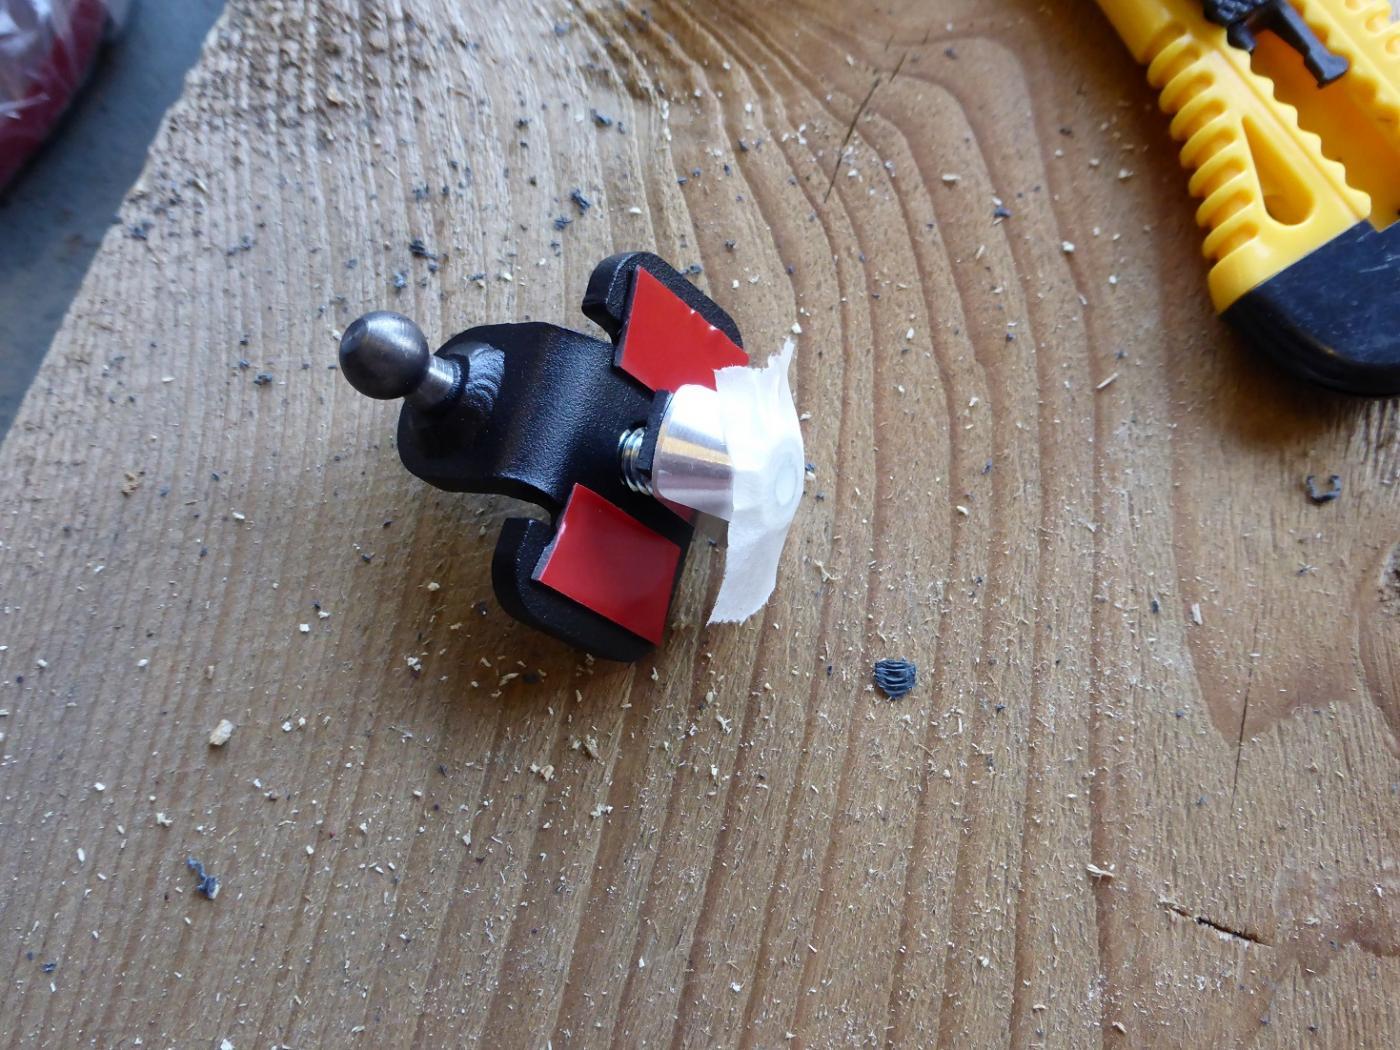
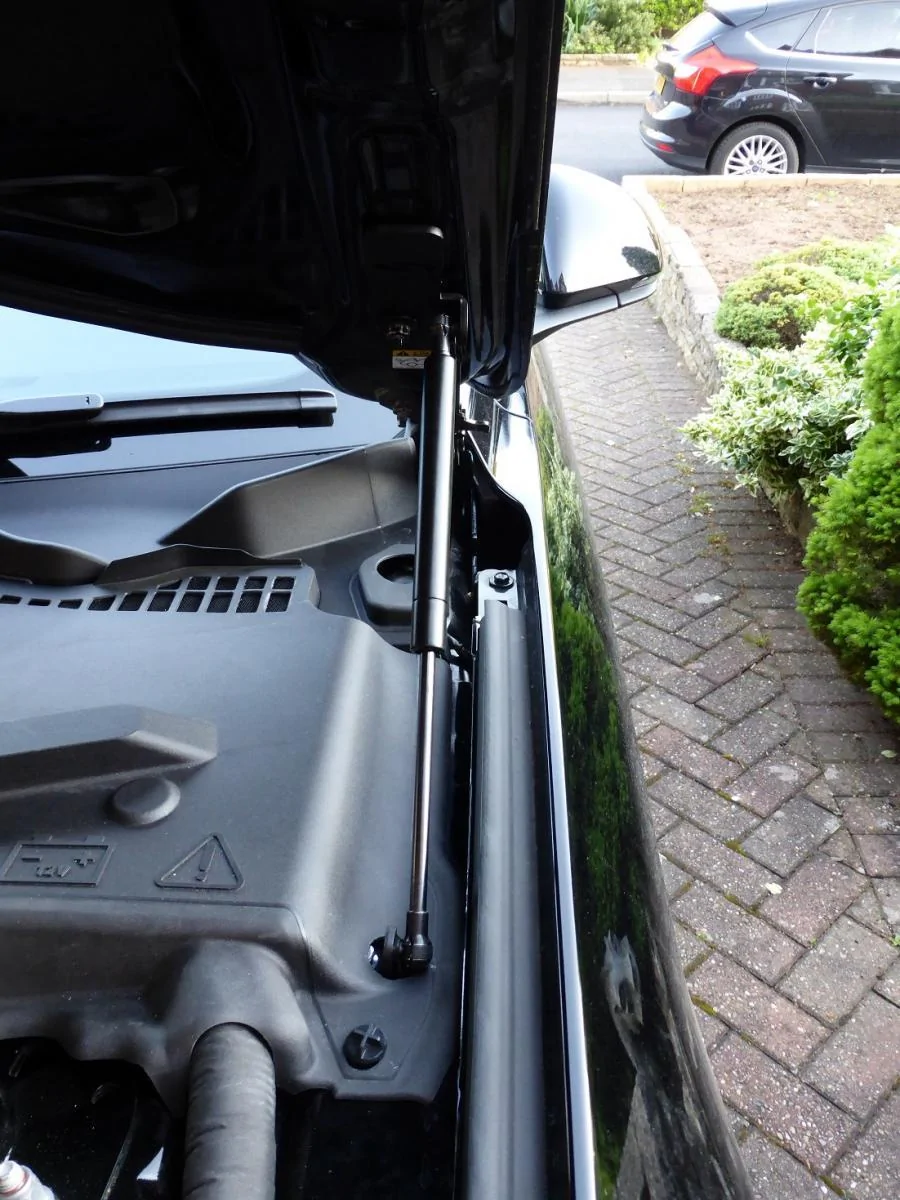
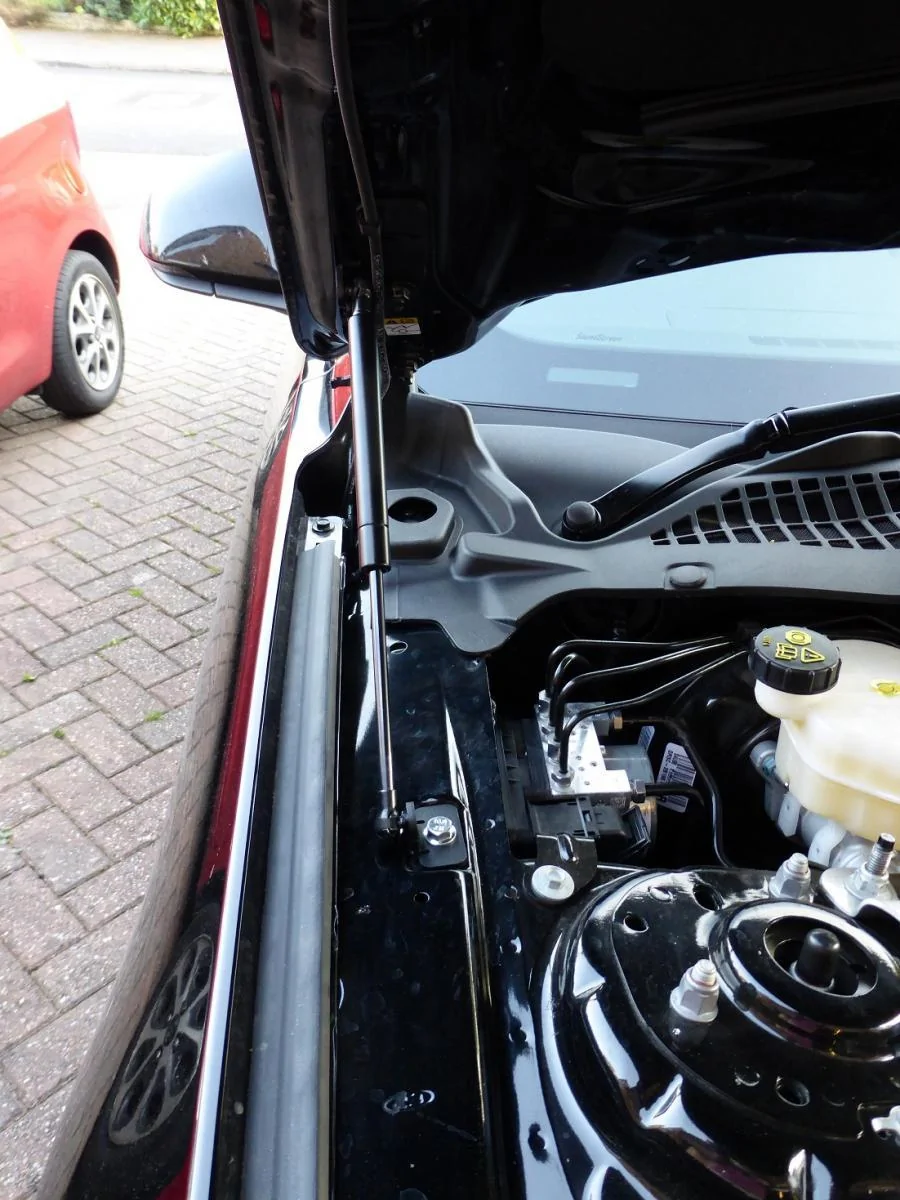
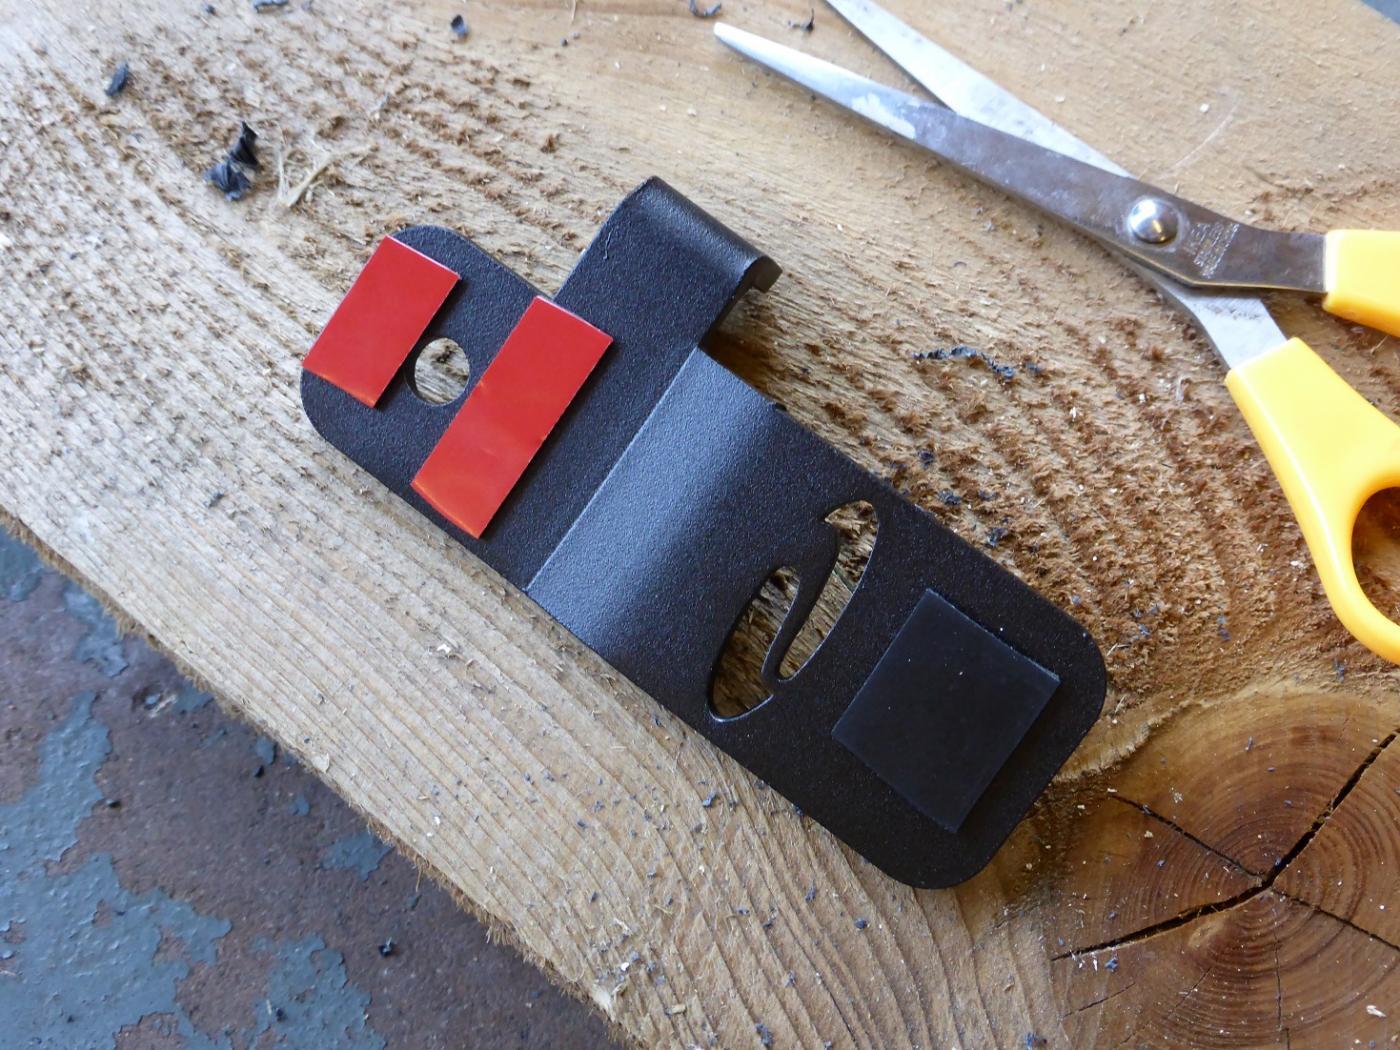
I also used some additional padding on the brackets where possible to avoid metal-to-metal contact (see photos 1&2). It didn't seem to cause any issues with installation but my only slight concern is that it will compress over time, so I'll probably need to re-torque the bolts at some point.

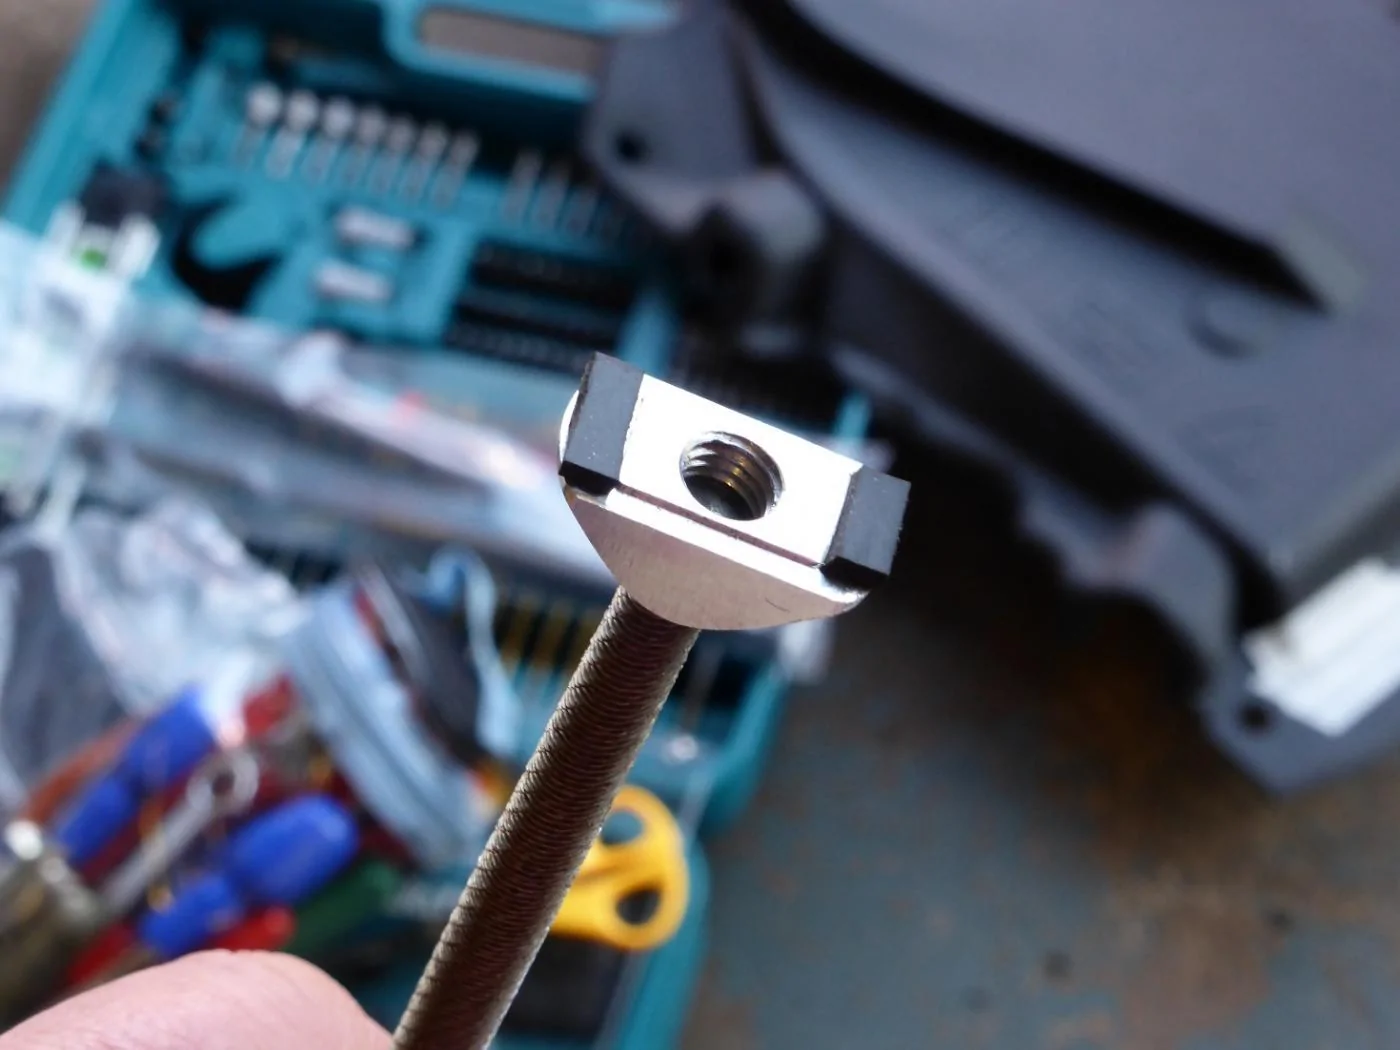
It is quite tricky to get the support piece inside the wing to stay in position while you tighten the bolt. I found that a bit of masking tape held the support piece in place while you inserted it into the wing and got everything lined up (photo 3), however tightening the bolt and keeping the bottom support piece in the right position is a bit tricky. It's difficult to keep pressure on it to stop it from turning when you tighten the bolt. Takes a bit of patience and prodding with a cocktail stick!

Just one other thing. Was there ever a definitive answer to the 'what happens if you're in a collision with a pedestrian' issue? Will the struts prevent the bonnet from deploying properly? ..... and where would that leave you with regard to insurance? I also have a strut brace fitted which potentially makes things doubly problematic. Cheers .....

oh yeah, PS .... just to clarify, the 0.94 and 1.03 I mentioned earlier for scaling were factors not measurements.
1463083155.Debur.webp
Foam.jpg
Retain.jpg
Left.webp
Right.webp
 
OP
OP
Enoch

Enoch

Well-Known Member
Joined
Feb 10, 2015
Threads
83
Messages
2,203
Reaction score
1,105
Location
UK
First Name
Andy
Vehicle(s)
Guard 5.0 (Auto) Fastback, Saddle Leather
Nice Job......I like the idea of the extra padding:thumbsup:
 

McDoodle

Well-Known Member
Joined
Jun 1, 2015
Threads
28
Messages
770
Reaction score
193
Location
England
Vehicle(s)
A grey car
Nice Job......I like the idea of the extra padding:thumbsup:
Cheers .... but as I said, thinking of alternative ways to do things is easy once someone else has done all the hard work!

There were a couple of things I did that weren't too clever, so here's a chance for the next person to learn and improve on what I did:

1. Hole marking. Marking with the template is OK but not particularly accurate so I'd recommend just marking it (with the template) in the first instance then putting the bracket on the car and checking via some measurements that the mark is at the apex of the bracket. My first mark was about 3 or 4mm out so it's worth taking a bit of extra time. Cover the area of the battery cover you're working on in masking tape too (it scratches quite easily) and do your measuring, marking and cutting on that.
2. Hole cutting. I used a 19mm hole boring flat bit (the biggest one I had) on my drill which did the job nicely and the hole looked 'proper' (I also put masking tape over the area I was cutting, just to keep it neat and scratch free) - but the hole was too small, so I ended up having to file it which takes away the professional looking neatness of the cut. It took me ages to file and then smooth the edges of the cut to get it looking neat again, so my advice would be to make sure you have a proper hole cutter of the correct size (measure the width of the vertical bit of the bracket to get an exact size, I can't remember what it was off the top of my head) - either wood boring bit or hole cutter or sheet metal punch and die. This will give you a neat and pro looking finish in about 30 seconds instead of 15mins of filing and smoothing :headbonk:.
3. Cut from hole to edge of battery cover. I used a stanley knife and a straight edge to make the cut in the cover from the hole to the edge. With experience, it's probably not the best way to do it. The cut was clean enough but it's difficult to keep the cut straight because of the contours of the cover. Mine ended up going a bit wonky near the edge, which is a softer plastic than the main bit of the cover. If I could do it again I think I'd stick some masking tape over the cutting area and mark a pencil line. Then use some decent aviation snips, which will probably give you a much straighter cut.
 

NicoMCH

Well-Known Member
Joined
Jun 19, 2015
Threads
0
Messages
229
Reaction score
65
Location
ZĂĽrich, Switzerland
Vehicle(s)
EU GT 2015
Nice Job......I like the idea of the extra padding:thumbsup:
Cheers .... but as I said, thinking of alternative ways to do things is easy once someone else has done all the hard work!
Hi Enoch and McDoodle

Great tutorials, I used them to install my kit (ordered in the US though but checking with Robbie from Steeda UK, it seems I got the new EU spec bracket :)).

I have a LHD, but the only thing that changes is the location of the battery cover. The hood bracket with the hole for the windshield washer is located on the left (when facing the engine bay).

I was wondering if you guys had any problems getting the retainer pin holding the water hose back into its hole? Mine does not seem to hold very well (or at least can be taken out by hand...). I have installed the bracket twice with all the specs given by Steeda, but still the same result (I swapped the pin with the one above, seems to hold better but sill just trying to be safe). I am trying to find some longer pins but it is a pain finding such elements.

If you have any insight or advice it will be gladly welcomed :thumbsup::D

Cheers
 

Sponsored

McDoodle

Well-Known Member
Joined
Jun 1, 2015
Threads
28
Messages
770
Reaction score
193
Location
England
Vehicle(s)
A grey car
Hi Enoch and McDoodle

Great tutorials, I used them to install my kit (ordered in the US though but checking with Robbie from Steeda UK, it seems I got the new EU spec bracket :)).

I have a LHD, but the only thing that changes is the location of the battery cover. The hood bracket with the hole for the windshield washer is located on the left (when facing the engine bay).

I was wondering if you guys had any problems getting the retainer pin holding the water hose back into its hole? Mine does not seem to hold very well (or at least can be taken out by hand...). I have installed the bracket twice with all the specs given by Steeda, but still the same result (I swapped the pin with the one above, seems to hold better but sill just trying to be safe). I am trying to find some longer pins but it is a pain finding such elements.

If you have any insight or advice it will be gladly welcomed :thumbsup::D

Cheers
Hi Nico

Don't remember the water hose being a problem, but I'll check how mine looks next time I'm out in the car. If I recall correctly the water hose clip should be long enough (but only just!) to go through the new bracket and only be held by the original hole in the bonnet (not by the new bracket). Due to the new bracket being quite long and there only being one bolt to hold it in place, I noticed that the end of new bracket furthest from the bolt can lift up so there's a gap between the bracket and the bonnet - this will obviously mean less of the water hose clip can protrude into the original hole. Might be worth checking to see if this is happening on your car. My hose clip is only just long enough, so it does wobble around a bit but it stays in.

Cheers ....

 

NicoMCH

Well-Known Member
Joined
Jun 19, 2015
Threads
0
Messages
229
Reaction score
65
Location
ZĂĽrich, Switzerland
Vehicle(s)
EU GT 2015
Hi Nico

Don't remember the water hose being a problem, but I'll check how mine looks next time I'm out in the car. If I recall correctly the water hose clip should be long enough (but only just!) to go through the new bracket and only be held by the original hole in the bonnet (not by the new bracket). Due to the new bracket being quite long and there only being one bolt to hold it in place, I noticed that the end of new bracket furthest from the bolt can lift up so there's a gap between the bracket and the bonnet - this will obviously mean less of the water hose clip can protrude into the original hole. Might be worth checking to see if this is happening on your car. My hose clip is only just long enough, so it does wobble around a bit but it stays in.

Cheers ....

Hi McDoodle

Thanks for your feedback, it is exactly what I noticed on mine. Not sure if the padding plays a role here but definitely the fact that there is only one bolt. The end of the bracket lifts a bit away from the hood making it difficult to put the pin back in. Reinstalling the bracket has changed anything and trying to bend the bracket is impossible without the right tools (not even sure it would be recommended). I took the pin above and swapped it with the one that is supposed to go back in the hole in the hood through the bracket but its just holding, you definitely do not need a nylon trim remover to get it out...

I will see it seems to hold.

Have you noticed any material deterioration/crush effect from the lower bracket on the hose? Our italian colleague papinist noticed that his hose got crushed by his strut, he's got the Ford Performance one:

Here are some pics of his problem: http://www.mustang6g.com/forums/showpost.php?p=1298684&postcount=62http://www.mustang6g.com/forums/showthread.php?t=43904&page=5
 
Last edited:

Greg C

Well-Known Member
Joined
Dec 1, 2015
Threads
12
Messages
409
Reaction score
131
Location
Devon U.K.
First Name
Greg
Vehicle(s)
2016 Mustang Convertible
Fitted my gas struts yesterday. Your video was all I used - kept pausing and going back to make sure I was doing it right! I removed battery cover completely then at the end fitted it back - I did not bother with template just trimmed a bit off the cover so it can be easily removed if needed. One comment is that how can I remove the gas strut from the brackets if needed? I had to loosen one of the brackets I had already fitted to get the gas strut in and then tighten it up again once in.
 

SteveS

...Bon Scott Land...
Joined
Mar 17, 2015
Threads
16
Messages
4,549
Reaction score
1,232
Location
Bon Scott Land
First Name
Steve
Vehicle(s)
Mustang GT Magnetic
Fitted my gas struts yesterday. Your video was all I used - kept pausing and going back to make sure I was doing it right! I removed battery cover completely then at the end fitted it back - I did not bother with template just trimmed a bit off the cover so it can be easily removed if needed. One comment is that how can I remove the gas strut from the brackets if needed? I had to loosen one of the brackets I had already fitted to get the gas strut in and then tighten it up again once in.
There's a clip/tab on the back of the sockets on the Redline struts apparently. Don't know about the Steeda ones. Nothing in the instructions that came with them?
 
OP
OP
Enoch

Enoch

Well-Known Member
Joined
Feb 10, 2015
Threads
83
Messages
2,203
Reaction score
1,105
Location
UK
First Name
Andy
Vehicle(s)
Guard 5.0 (Auto) Fastback, Saddle Leather
I think you just put a small screwdriver behind the metal band that keeps the strut on the ball head.:)
Sponsored


Top