DFB5.0
Well-Known Member
- Thread starter
- #1
This is one of the most diverse areas of the detailing industry and one that can be a “where do I start” type of situation. Choosing what to buy when there are thousands of different brands, materials and sizes to choose from can be daunting. I also find pad preferences are subjective depending on what you like to work with or type of paint systems you are polishing the most.
In this thread, I will cover –
- The main pad materials
- Colour coding systems
- Specific Pad Usages
- How to select and buy pads
- Pad Quantities
- How to maintain and care for pads before, during and after use.
As with the polishing compounds, my knowledge on this topic is still developing, but I know enough to be dangerous!

Colour Coding –
This is a very important topic to understand because colour coding is not a level playing field.
Pad colours are used to differentiate the levels of cutting performance within a pad manufacturers lineup. While that might sound like a simple concept to grasp, the colour coding system varies between each brand, so there is no universal standard. This makes it more challenging for those new to polishing, I even kept a cheat sheet of what each pad did for many years to the point where its now second nature for me.
When starting out, the best advice here would be to pick one pad brand and then work on memorizing the colour code hierarchy as you go. This keeps it simple while learning, you can then branch out once you know what you like.
Pad Materials –
In very simplistic terms, there are three main pad materials to choose from; foam, wool and microfiber. Within those material groupings, there are varying degrees of aggression and varying degrees of overlap. For example, a heavy cut foam pad could very well be more aggressive than a fine wool pad. Again, there is a LOT of variables in pad material choices, so I’ll try and keep it simple.
Foam –
Foam pads are where most people should and do start from. In most cases, foam is more user friendly and least likely to cause accidental damage while you are learning. While foam can do some serious cutting with an appropriate pad, for the most part you tend use these pads for moderate cutting right down to fine finish polishing. Foam pads come in either flat/unpatterned or dimpled/patterned surfaces. In theory, the patterned versions are more forgiving in terms of heat management and are often where people start out. The drawback is the lower surface area, so if you are needing more cut, then the flat pad might be a better choice. Flat pads are typically cheaper too.
Best For – general finish polishing, through to moderate cutting on softer paint. Ideally suited to novice users and dual action machines.
Use Case Example – On a Mustang, a blue ShineMate pad teamed with Sonax Perfect Finish will work well to level down wash induced micro marring and gloss up the paint.

Wool –
Wool pads and rotary polishers were once the mainstay of paint correction, in fact nothing scares me more than that combination, but the material sort of got left behind as foam and microfiber pads took over the industry. However, wool has come a long way in recent years and is something even a hobbyist can get value from.
In most cases, you are using a wool pad to provide cutting performance, but the right pad can finish out nicely too. Wool pads tend to run cooler and provide more even performance due to surface area of the fibres. They are more expensive though, and residue control and cleaning is more involved.
Best For – medium to heavy defect removal on paint and even glass. A wool pad can also be used to dial up a one-step compound.
Use Case Example - Using the Rupes DA Fine Yellow Wool teamed with either Sonax Perfect Finish or Rupes DA Fine will do some serious work while still finishing out very well.

Microfiber –
Microfiber pads are typically seen as the most aggressive, even in their least aggressive form. Like wool, the multitude of fibres allow the compound to be absorbed and then distributed more evenly, increasing the cutting performance. Unlike wool, each fibre is softer, meaning they can finish down nicer.
While these pads can deal with heavy defects from paint and glass, they do generate more heat than wool, something that requires some management as you work. Microfiber pads are also pretty pricy.
Best For – medium to severe defect removal on harder paint systems from the likes Porsche, Mercedes and BMW. Can also be used for deep cleaning glass.
Use Case Example - While I have a selection of smaller microfiber pads for spot polishing, my use of this material is limited. Considering I tend to deal with medium Ford paint, I really have little need for these pads. However, if you are grabbing a microfiber pad, chances are you are needing heavy defect removal, meaning the use of something like Sonax CutMax, Rupes DA Coarse or Jescar Correction Compound.

Rayon –
These pads are specific to glass polishing only, used in tandem with cerium oxide type products such as Carpro CeriGlass. These pads are ultra thing and are used to remove heavy water spotting and minor scratches in glass surfaces. These pads are not especially user friendly, and you must be mindful of heat generation. A Rayon Pad with CeriGlass would be a last resort sort of situation.
Pad Sizing -
This is where some confusion can set in because references to machine size and pad size do not match. When I’m referring to a 3-inch or 5-inch machine, that is in reference to the backing plate size of the machine, the corresponding pad sizes are larger than that. If you are new to polishing, this is just something to be mindful of when ordering pads.
For reference, this is the machine to pad size hierarchy –
6-inch Machine/Backing Plate - 6.5 to 7-inch sized pads.
5-inch Machine/Backing Plate – 5.5 to 6.0-inch pads
3-inch Machine/Backing Plate – 3.5 to 4-inch pads
2-inch Machine/Backing Plate – 2.2 to 2.5-inch pads
1-inch Machine/Backing Plate – 1.2 to 1.5-inch pads
Pads from Lake Country tend to have less pad overhang, 0.5-inch, while Rupes and ShineMate have 1-inch overhangs.
Pad Care and Storage -
Pads cost money, especially wool and microfiber. This is something that adds up when you consider how many you end up rotating through. As such, maintaining and storing your pads is pretty important.
Pad Cleaning -
Surely one of the worst parts of polishing…………….cleaning used pads! How easily a pad releases the polish within the material will depend on the chemical make up of the products used. A solvent based compound will naturally take longer to clean than a water-based product. If you’ve used a wax or sealant, you have two options, wash the pad as best you can then store it in a zip lock bag……………….or throw it away!
In any case, you need some sort of chemical assistance. There are specific chemicals designed for pad cleaning, think Lake Country Snappy Clean or McKee’s Polishing Pad Cleaner.
McKee's 37 Polishing Pad Cleaner - 650ml – The Detail Store
Polishing Pad Cleaner - McKees37.com
Get Lake Country Snappy Clean Boost Online | Waxit – Waxit Car Care
Snappy Clean Boost Pad Cleaning Powder (carpro-us.com)
The Snappy Clean was designed for the Lake Country Pad Washer, but can be used universal. That pad cleaner is probably the best way to clean pads, especially if this is your profession. The drawback is the price.
Get Lake Country Pad Washer 4000 Deluxe Online | Waxit – Waxit Car Care
Lake Country - System 4000 Pad Washer | The Rag Company

A cheaper alternative would be the Detail Guardz Pad Cleaner, which was designed to be used in conjunction with a Detail Guardz grit guard in a wash bucket. The concept is like the Lake Country version, just without the complexity and cost.
THE DETAIL GUARDZ Dirt Lock Pad Washer System Attachment (detailingshed.com.au)
Detail Guardz Dirt Lock Pad Washer Kit - Detailed Image
DIRT LOCK - WASH BUCKET INSERT filter nearly 100% of your wash water! (detailingshed.com.au)
Detail Guardz Dirt Lock - Detailed Image


However, for someone only needing to wash pads every few months, this is my process……………..
Place the pads in a bucket of water, add some APC or even an alkaline wash soap such as Carpro Lift. You can also use your microfiber detergent such as P&S Rangs to Riches. Allow the pads to soak overnight, then agitate each pad under warm running water, squeezing and releasing until the water is running clean. You may need to apply more APC as you do this for stubborn deposits. After this, I then throw the pads into the washing machine with microfiber detergent and air dry the pads indoors before storage.
You also need a pad cleaning brush or compressed air to brush/blow out the pad between sections. This helps remove dust build up and allows the pad to go further before swapping to a clean, fresh pad. There are several different types of these brushes, but for the dual-purpose ability of the Rupes Claw Pad Tool is my choice.
Get Rupes Bigfoot Claw Pad Tool Online | Waxit – Waxit Car Care
Rupes BigFoot Claw Pad Tool - Standard - Detailed Image
Get Tornador Basic Online | Waxit – Waxit Car Care
Tornador Air Blow Gun Z-014 - Detailed Image


Pad Storage -
Keeping pads clean and contamination free is vitally important. And unless you have a climate controlled and fully sealed garage, don’t just throw them into the back of the cabinet. In my case, I’m storing pads in plastic storage containers, sealed to keep the dust out. You also need to be mindful of making sure the pads are completely dry before storage, or you risk mold growth.
I’d like to say I have my pads completely graded and sorted, but it’s a bit of jumbled mess at the moment and something I want to better organise at some point. Having said that, I can identify each pad, but I would be labelling each container while you learn your chosen pad system/s.
Buying Recommendations –
This is where it gets tricky! Which brand, how many and how to buy are variables that you need to figure out depending on budget, frequency of use and the sort of paint you are ultimately polishing. Without covering each and every brand and pad on the market, I’ll try and keep this generalised so that you can use it as a starting point.
Brands –
There are three main brands that I typically shop when buying pads to serve various applications. There are numerous brands producing quality polishing pads, but I have settled on the below three for the blend of quality and value.
ShineMate – this is a value orientated brand that I mostly use for 3 and 5-inch foam pads in various grades. ShineMate offer both flat pad and the patterned Black Diamond range. My go to for most situations being the intermediate blue, sometimes the yellow cutting pad, both the in Black Diamond format which is said to offer better heat management.

Rupes – a line of premium foam, wool and microfiber pads with separate systems for dual action, forced rotation and rotary movements. Rupes also make pad suggestion and selection easy by colour coding their polishing compounds to the pad colour. I mostly shop Rupes for smaller 1.5- and 2.5-inch foam and wool pads that I run on an iBrid Nano. I’m also a huge fan of their modern DA wool pads, especially the fine yellow. The new new microfiber pads are said to be very good too. In my case with access to ShineMate, I skip the larger foam pads for cost control reasons.

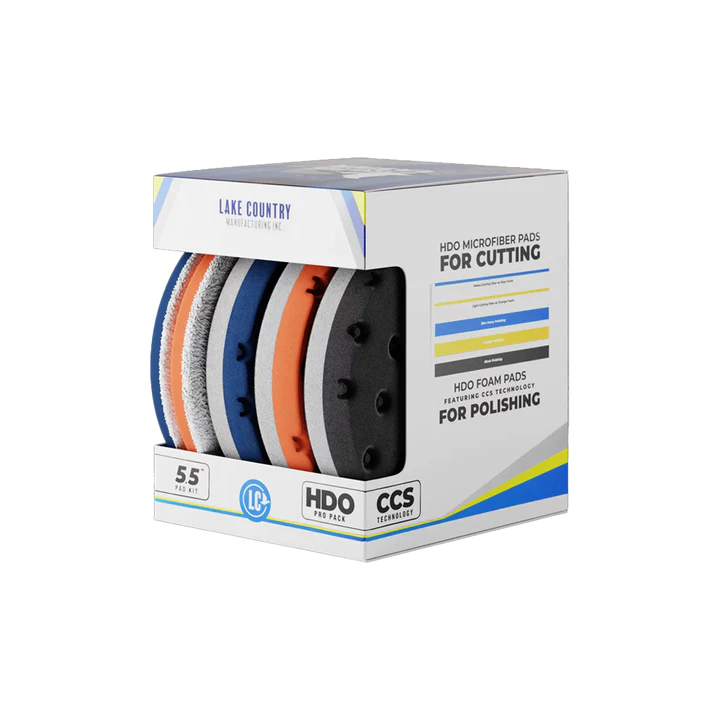
Lake Country – this is the brand I started with when I began machine polishing, in particular their CCS style pads. Those original CCS pads were designed for user friendliness, the dimples providing heat management as well as holding compound to extending the working time. While those pads are still available, they are very bulky, and technology has moved on since. Having said that, Lake Country have recently introduced a new generation of CCS pads based on their modern HDO line, but they are somewhat pricey and not really needed. Personally, I’m shopping the more affordable flat SDO line, which I like for the minimal bulk in the 3.5- and 5.5-inch sizes.


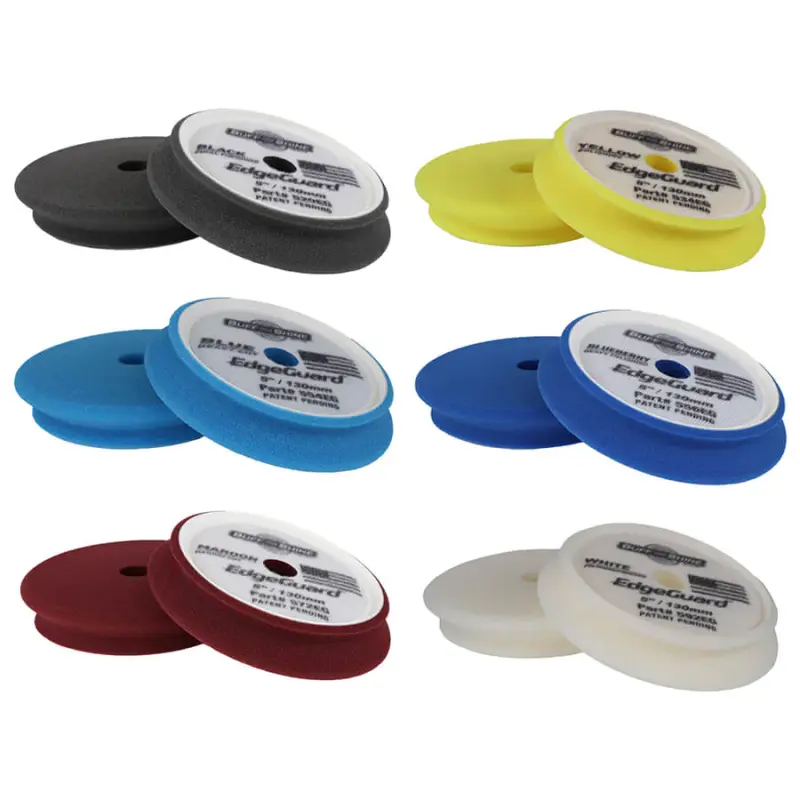
Wildcard – Buff and Shine have recently launched their new EdgeGuard line. These pads have a foam lip the extends upwards to encase the backing plate and help prevent accidental damage. For US customers, these are a very nice pad and well worth looking at. For me, they are priced way out of the market, with a single 5-inch pad costing $28.95 each, which is just on twice the price of a Lake Country SDO.

Where to Start and How Many to Have –
When you first start polishing, I suggest being conservative with pad choice. Stick with foam in soft to moderate cutting performance. Quite often, retailers will sell pad stacks with a selection of pad grades, which is great for finding what you like before ordering up big. From there, start to experiment with wool and microfiber.
For reference, I stated with pad stacks for 3 and 5-inch machines that contained 2 red, 2 blue and 2 yellow ShineMate foam pads, then built out the collection from there.
I actually tallied up my current pad count when preparing this article, only to discover that I have over 100 pads in stock! For some, that would be excessive, for others it would conservative. The pads in my collection are spread over differing materials, grades and sizes in both brand new or used condition. As a hobbyist, you certainly don’t need that many.
As a very rough guide, for the average weekend warrior you will want at least 4 to 6 of each pad type and size. For the pads you use the most, you can increase those numbers if needed. At these quantities, you can swap to a clean pad as needed without having to clean them mid-session.
Which grades you prioritize early on will come down to the paint systems you are dealing with. For example, on Japanese cars, you will be choosing foam pads with only mild to moderate cutting performance. On German cars, you are going to need heavier foam, wool and microfiber pads in your rotation. From experience, Australian and American made Ford’s sit in the middle, and in my case, I have only ever needed moderate levels cutting performance.
To give you an idea of the pad requirements needed to polish something like a Mustang or Falcon, I would have the following. You won’t end up using all of those in one session, but you ideally want to have the ability to step up or down the aggression. From experience, the Rupes Yellow Wool or ShineMate Blue Foam is what I have used in the past to do a one-step correction.
- 4 Rupes Yellow Wool (Cutting) 6-inch
- 4 ShineMate Yellow Foam (Cutting) 6-inch
- 4 ShineMate Yellow Foam (Cutting) 4-inch
- 4 ShineMate Blue Foam (Intermediate) 5-inch
- 4 ShineMate Blue Foam (Intermediate) 3-inch
- 1 ShineMate Black (Waxing) 5-inch
- 4 Rupes DA Fine Yellow Foam (Finishing) 2-inch
- 4 Rupes DA Fine Yellow Foam (Finishing) 1.5-inch
The cost of the above adds up real quick, so you could probably skip the wool and waxing pads to save money.
My Favorites -
The following pads are what I find suits my vehicles and tastes. This will vary from person to person, car to car, compound to compound, so use this as a guide.
One-Step Corrections – Rupes Yellow Wool or ShineMate Diamond Blue Foam (3 and 5-inch sizes)
Nano Size Pads – Rupes DA Fine Yellow Foam or Rupes Yellow Wool (teamed with the above)
Heavier Cutting – ShineMate Diamond Yellow Foam
Headlights – Rupes Blue Coarse Wool
Waxing – Lake Country SDO Black Foam
Glass – Lake Country SDO Blue Foam
Conclusions -
That’s a lot to process, and you can easily be led down the garden path buying and trying different pads. As mentioned, start with a single brand, learn the system and then branch out once you find what you like. I never did this, but if you are apprehensive about machine polishing and pad choices, go grab a junkyard hood to practice! You could also treat that hood to find out what it takes to burn through the clear coat, which is both easier and harder than you would think (See videos in the following post).
Happy Polishing!

In this thread, I will cover –
- The main pad materials
- Colour coding systems
- Specific Pad Usages
- How to select and buy pads
- Pad Quantities
- How to maintain and care for pads before, during and after use.
As with the polishing compounds, my knowledge on this topic is still developing, but I know enough to be dangerous!
Colour Coding –
This is a very important topic to understand because colour coding is not a level playing field.
Pad colours are used to differentiate the levels of cutting performance within a pad manufacturers lineup. While that might sound like a simple concept to grasp, the colour coding system varies between each brand, so there is no universal standard. This makes it more challenging for those new to polishing, I even kept a cheat sheet of what each pad did for many years to the point where its now second nature for me.
When starting out, the best advice here would be to pick one pad brand and then work on memorizing the colour code hierarchy as you go. This keeps it simple while learning, you can then branch out once you know what you like.
Pad Materials –
In very simplistic terms, there are three main pad materials to choose from; foam, wool and microfiber. Within those material groupings, there are varying degrees of aggression and varying degrees of overlap. For example, a heavy cut foam pad could very well be more aggressive than a fine wool pad. Again, there is a LOT of variables in pad material choices, so I’ll try and keep it simple.
Foam –
Foam pads are where most people should and do start from. In most cases, foam is more user friendly and least likely to cause accidental damage while you are learning. While foam can do some serious cutting with an appropriate pad, for the most part you tend use these pads for moderate cutting right down to fine finish polishing. Foam pads come in either flat/unpatterned or dimpled/patterned surfaces. In theory, the patterned versions are more forgiving in terms of heat management and are often where people start out. The drawback is the lower surface area, so if you are needing more cut, then the flat pad might be a better choice. Flat pads are typically cheaper too.
Best For – general finish polishing, through to moderate cutting on softer paint. Ideally suited to novice users and dual action machines.
Use Case Example – On a Mustang, a blue ShineMate pad teamed with Sonax Perfect Finish will work well to level down wash induced micro marring and gloss up the paint.
Wool –
Wool pads and rotary polishers were once the mainstay of paint correction, in fact nothing scares me more than that combination, but the material sort of got left behind as foam and microfiber pads took over the industry. However, wool has come a long way in recent years and is something even a hobbyist can get value from.
In most cases, you are using a wool pad to provide cutting performance, but the right pad can finish out nicely too. Wool pads tend to run cooler and provide more even performance due to surface area of the fibres. They are more expensive though, and residue control and cleaning is more involved.
Best For – medium to heavy defect removal on paint and even glass. A wool pad can also be used to dial up a one-step compound.
Use Case Example - Using the Rupes DA Fine Yellow Wool teamed with either Sonax Perfect Finish or Rupes DA Fine will do some serious work while still finishing out very well.
Microfiber –
Microfiber pads are typically seen as the most aggressive, even in their least aggressive form. Like wool, the multitude of fibres allow the compound to be absorbed and then distributed more evenly, increasing the cutting performance. Unlike wool, each fibre is softer, meaning they can finish down nicer.
While these pads can deal with heavy defects from paint and glass, they do generate more heat than wool, something that requires some management as you work. Microfiber pads are also pretty pricy.
Best For – medium to severe defect removal on harder paint systems from the likes Porsche, Mercedes and BMW. Can also be used for deep cleaning glass.
Use Case Example - While I have a selection of smaller microfiber pads for spot polishing, my use of this material is limited. Considering I tend to deal with medium Ford paint, I really have little need for these pads. However, if you are grabbing a microfiber pad, chances are you are needing heavy defect removal, meaning the use of something like Sonax CutMax, Rupes DA Coarse or Jescar Correction Compound.
Rayon –
These pads are specific to glass polishing only, used in tandem with cerium oxide type products such as Carpro CeriGlass. These pads are ultra thing and are used to remove heavy water spotting and minor scratches in glass surfaces. These pads are not especially user friendly, and you must be mindful of heat generation. A Rayon Pad with CeriGlass would be a last resort sort of situation.
Pad Sizing -
This is where some confusion can set in because references to machine size and pad size do not match. When I’m referring to a 3-inch or 5-inch machine, that is in reference to the backing plate size of the machine, the corresponding pad sizes are larger than that. If you are new to polishing, this is just something to be mindful of when ordering pads.
For reference, this is the machine to pad size hierarchy –
6-inch Machine/Backing Plate - 6.5 to 7-inch sized pads.
5-inch Machine/Backing Plate – 5.5 to 6.0-inch pads
3-inch Machine/Backing Plate – 3.5 to 4-inch pads
2-inch Machine/Backing Plate – 2.2 to 2.5-inch pads
1-inch Machine/Backing Plate – 1.2 to 1.5-inch pads
Pads from Lake Country tend to have less pad overhang, 0.5-inch, while Rupes and ShineMate have 1-inch overhangs.
Pad Care and Storage -
Pads cost money, especially wool and microfiber. This is something that adds up when you consider how many you end up rotating through. As such, maintaining and storing your pads is pretty important.
Pad Cleaning -
Surely one of the worst parts of polishing…………….cleaning used pads! How easily a pad releases the polish within the material will depend on the chemical make up of the products used. A solvent based compound will naturally take longer to clean than a water-based product. If you’ve used a wax or sealant, you have two options, wash the pad as best you can then store it in a zip lock bag……………….or throw it away!
In any case, you need some sort of chemical assistance. There are specific chemicals designed for pad cleaning, think Lake Country Snappy Clean or McKee’s Polishing Pad Cleaner.
McKee's 37 Polishing Pad Cleaner - 650ml – The Detail Store
Polishing Pad Cleaner - McKees37.com
Get Lake Country Snappy Clean Boost Online | Waxit – Waxit Car Care
Snappy Clean Boost Pad Cleaning Powder (carpro-us.com)
The Snappy Clean was designed for the Lake Country Pad Washer, but can be used universal. That pad cleaner is probably the best way to clean pads, especially if this is your profession. The drawback is the price.
Get Lake Country Pad Washer 4000 Deluxe Online | Waxit – Waxit Car Care
Lake Country - System 4000 Pad Washer | The Rag Company
A cheaper alternative would be the Detail Guardz Pad Cleaner, which was designed to be used in conjunction with a Detail Guardz grit guard in a wash bucket. The concept is like the Lake Country version, just without the complexity and cost.
THE DETAIL GUARDZ Dirt Lock Pad Washer System Attachment (detailingshed.com.au)
Detail Guardz Dirt Lock Pad Washer Kit - Detailed Image
DIRT LOCK - WASH BUCKET INSERT filter nearly 100% of your wash water! (detailingshed.com.au)
Detail Guardz Dirt Lock - Detailed Image
However, for someone only needing to wash pads every few months, this is my process……………..
Place the pads in a bucket of water, add some APC or even an alkaline wash soap such as Carpro Lift. You can also use your microfiber detergent such as P&S Rangs to Riches. Allow the pads to soak overnight, then agitate each pad under warm running water, squeezing and releasing until the water is running clean. You may need to apply more APC as you do this for stubborn deposits. After this, I then throw the pads into the washing machine with microfiber detergent and air dry the pads indoors before storage.
You also need a pad cleaning brush or compressed air to brush/blow out the pad between sections. This helps remove dust build up and allows the pad to go further before swapping to a clean, fresh pad. There are several different types of these brushes, but for the dual-purpose ability of the Rupes Claw Pad Tool is my choice.
Get Rupes Bigfoot Claw Pad Tool Online | Waxit – Waxit Car Care
Rupes BigFoot Claw Pad Tool - Standard - Detailed Image
Get Tornador Basic Online | Waxit – Waxit Car Care
Tornador Air Blow Gun Z-014 - Detailed Image
Pad Storage -
Keeping pads clean and contamination free is vitally important. And unless you have a climate controlled and fully sealed garage, don’t just throw them into the back of the cabinet. In my case, I’m storing pads in plastic storage containers, sealed to keep the dust out. You also need to be mindful of making sure the pads are completely dry before storage, or you risk mold growth.
I’d like to say I have my pads completely graded and sorted, but it’s a bit of jumbled mess at the moment and something I want to better organise at some point. Having said that, I can identify each pad, but I would be labelling each container while you learn your chosen pad system/s.
Buying Recommendations –
This is where it gets tricky! Which brand, how many and how to buy are variables that you need to figure out depending on budget, frequency of use and the sort of paint you are ultimately polishing. Without covering each and every brand and pad on the market, I’ll try and keep this generalised so that you can use it as a starting point.
Brands –
There are three main brands that I typically shop when buying pads to serve various applications. There are numerous brands producing quality polishing pads, but I have settled on the below three for the blend of quality and value.
ShineMate – this is a value orientated brand that I mostly use for 3 and 5-inch foam pads in various grades. ShineMate offer both flat pad and the patterned Black Diamond range. My go to for most situations being the intermediate blue, sometimes the yellow cutting pad, both the in Black Diamond format which is said to offer better heat management.
Rupes – a line of premium foam, wool and microfiber pads with separate systems for dual action, forced rotation and rotary movements. Rupes also make pad suggestion and selection easy by colour coding their polishing compounds to the pad colour. I mostly shop Rupes for smaller 1.5- and 2.5-inch foam and wool pads that I run on an iBrid Nano. I’m also a huge fan of their modern DA wool pads, especially the fine yellow. The new new microfiber pads are said to be very good too. In my case with access to ShineMate, I skip the larger foam pads for cost control reasons.
Lake Country – this is the brand I started with when I began machine polishing, in particular their CCS style pads. Those original CCS pads were designed for user friendliness, the dimples providing heat management as well as holding compound to extending the working time. While those pads are still available, they are very bulky, and technology has moved on since. Having said that, Lake Country have recently introduced a new generation of CCS pads based on their modern HDO line, but they are somewhat pricey and not really needed. Personally, I’m shopping the more affordable flat SDO line, which I like for the minimal bulk in the 3.5- and 5.5-inch sizes.
Wildcard – Buff and Shine have recently launched their new EdgeGuard line. These pads have a foam lip the extends upwards to encase the backing plate and help prevent accidental damage. For US customers, these are a very nice pad and well worth looking at. For me, they are priced way out of the market, with a single 5-inch pad costing $28.95 each, which is just on twice the price of a Lake Country SDO.
Where to Start and How Many to Have –
When you first start polishing, I suggest being conservative with pad choice. Stick with foam in soft to moderate cutting performance. Quite often, retailers will sell pad stacks with a selection of pad grades, which is great for finding what you like before ordering up big. From there, start to experiment with wool and microfiber.
For reference, I stated with pad stacks for 3 and 5-inch machines that contained 2 red, 2 blue and 2 yellow ShineMate foam pads, then built out the collection from there.
I actually tallied up my current pad count when preparing this article, only to discover that I have over 100 pads in stock! For some, that would be excessive, for others it would conservative. The pads in my collection are spread over differing materials, grades and sizes in both brand new or used condition. As a hobbyist, you certainly don’t need that many.
As a very rough guide, for the average weekend warrior you will want at least 4 to 6 of each pad type and size. For the pads you use the most, you can increase those numbers if needed. At these quantities, you can swap to a clean pad as needed without having to clean them mid-session.
Which grades you prioritize early on will come down to the paint systems you are dealing with. For example, on Japanese cars, you will be choosing foam pads with only mild to moderate cutting performance. On German cars, you are going to need heavier foam, wool and microfiber pads in your rotation. From experience, Australian and American made Ford’s sit in the middle, and in my case, I have only ever needed moderate levels cutting performance.
To give you an idea of the pad requirements needed to polish something like a Mustang or Falcon, I would have the following. You won’t end up using all of those in one session, but you ideally want to have the ability to step up or down the aggression. From experience, the Rupes Yellow Wool or ShineMate Blue Foam is what I have used in the past to do a one-step correction.
- 4 Rupes Yellow Wool (Cutting) 6-inch
- 4 ShineMate Yellow Foam (Cutting) 6-inch
- 4 ShineMate Yellow Foam (Cutting) 4-inch
- 4 ShineMate Blue Foam (Intermediate) 5-inch
- 4 ShineMate Blue Foam (Intermediate) 3-inch
- 1 ShineMate Black (Waxing) 5-inch
- 4 Rupes DA Fine Yellow Foam (Finishing) 2-inch
- 4 Rupes DA Fine Yellow Foam (Finishing) 1.5-inch
The cost of the above adds up real quick, so you could probably skip the wool and waxing pads to save money.
My Favorites -
The following pads are what I find suits my vehicles and tastes. This will vary from person to person, car to car, compound to compound, so use this as a guide.
One-Step Corrections – Rupes Yellow Wool or ShineMate Diamond Blue Foam (3 and 5-inch sizes)
Nano Size Pads – Rupes DA Fine Yellow Foam or Rupes Yellow Wool (teamed with the above)
Heavier Cutting – ShineMate Diamond Yellow Foam
Headlights – Rupes Blue Coarse Wool
Waxing – Lake Country SDO Black Foam
Glass – Lake Country SDO Blue Foam
Conclusions -
That’s a lot to process, and you can easily be led down the garden path buying and trying different pads. As mentioned, start with a single brand, learn the system and then branch out once you find what you like. I never did this, but if you are apprehensive about machine polishing and pad choices, go grab a junkyard hood to practice! You could also treat that hood to find out what it takes to burn through the clear coat, which is both easier and harder than you would think (See videos in the following post).
Happy Polishing!
Sponsored
