papinist
The Italian Pony
- Joined
- Nov 30, 2014
- Threads
- 47
- Messages
- 3,188
- Reaction score
- 781
- Location
- Tuscany, Italy
- First Name
- Stefano
- Vehicle(s)
- Mustang EcoBoost MT Race Red EURO - NO MORE
- Thread starter
- #1
IMPORTANT: If you don't see the images, try installing this chrome extension: https://chrome.google.com/webstore/...ed-fix/naolkcpnnlofnnghnmfegnfnflicjjgj?hl=it
It's a temporary solution until I have time to upload pictures to some other hosting site. Thank you!
Hi guys,
I just removed headlights to get tribar drls installed (FYI 'rest of the world models come without tribar drls..) so I search for some video tutorials. I found a couple with mixed information so I thought I can integrate those info with some pictures.
Don't know if these two guys are M6G members..!
[ame]
This video is ok, you can watch only the first 6:45 min that explain how to remove front bumper.
Another great video here:
[ame]
It's not hard, but there are two 7mm bolts, one per side, that will keep you busy for long time. Be careful NOT to do as the second video explains, simply pull bumper without removing these bolts because you will broke the clips.
Here are my addition to those videos.
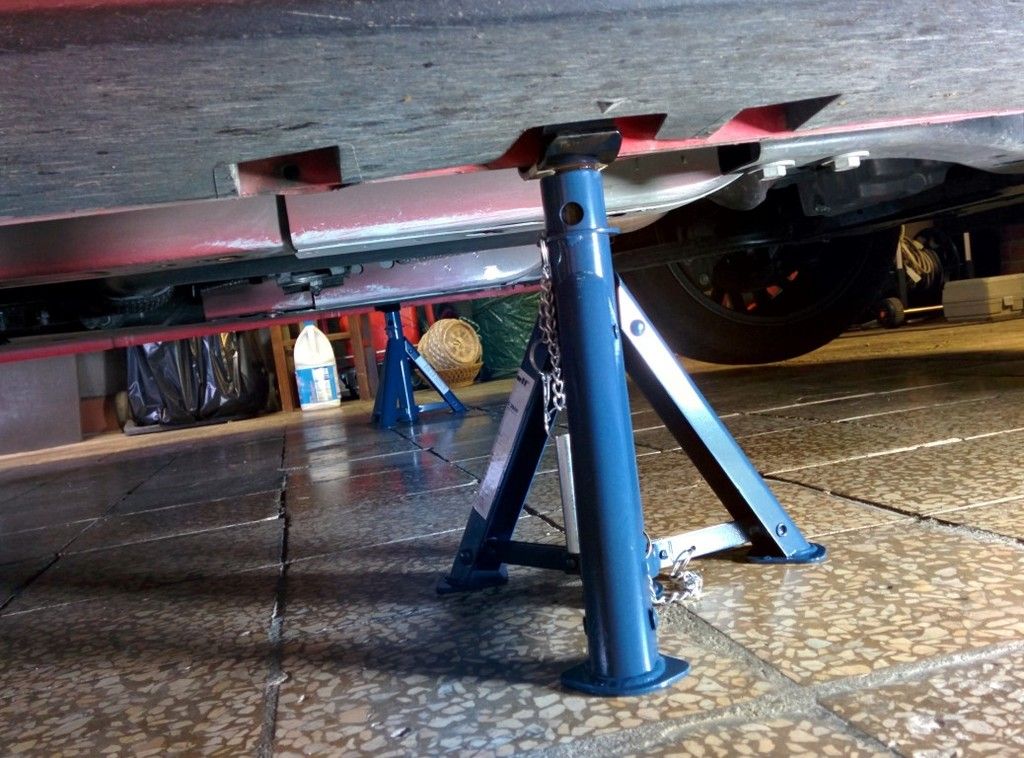
First of all, if you can, put your car on jack stands. Front will be higher so you can easily reach screws under the bumper.

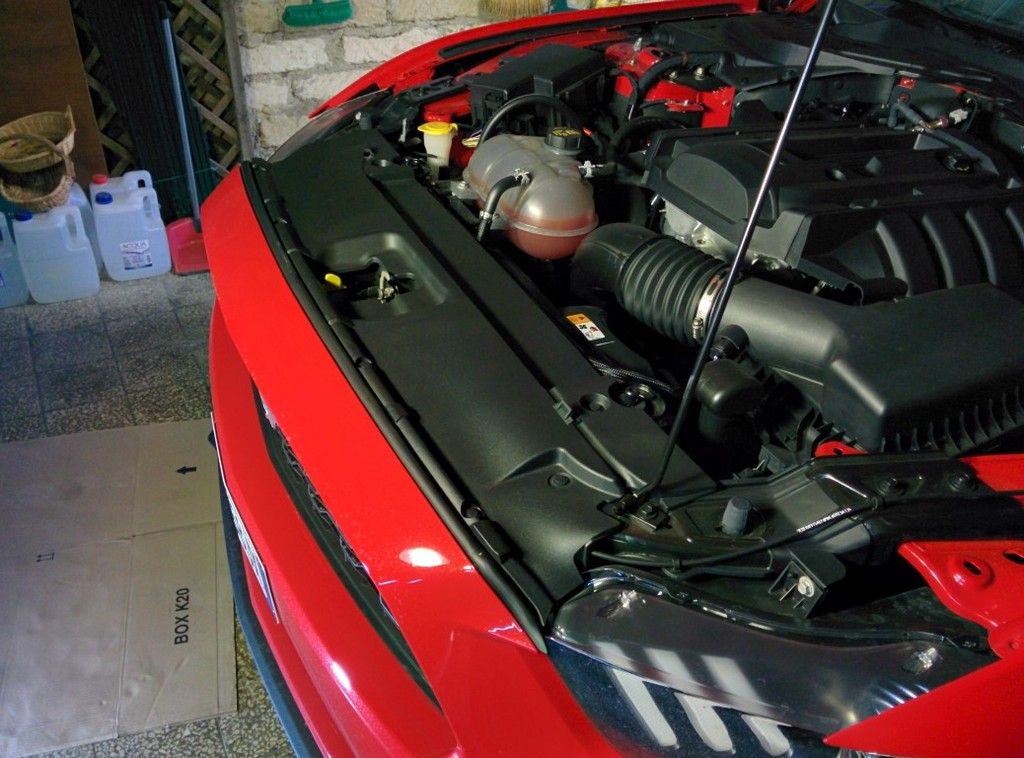
Remove the pull tabs on the upper cover
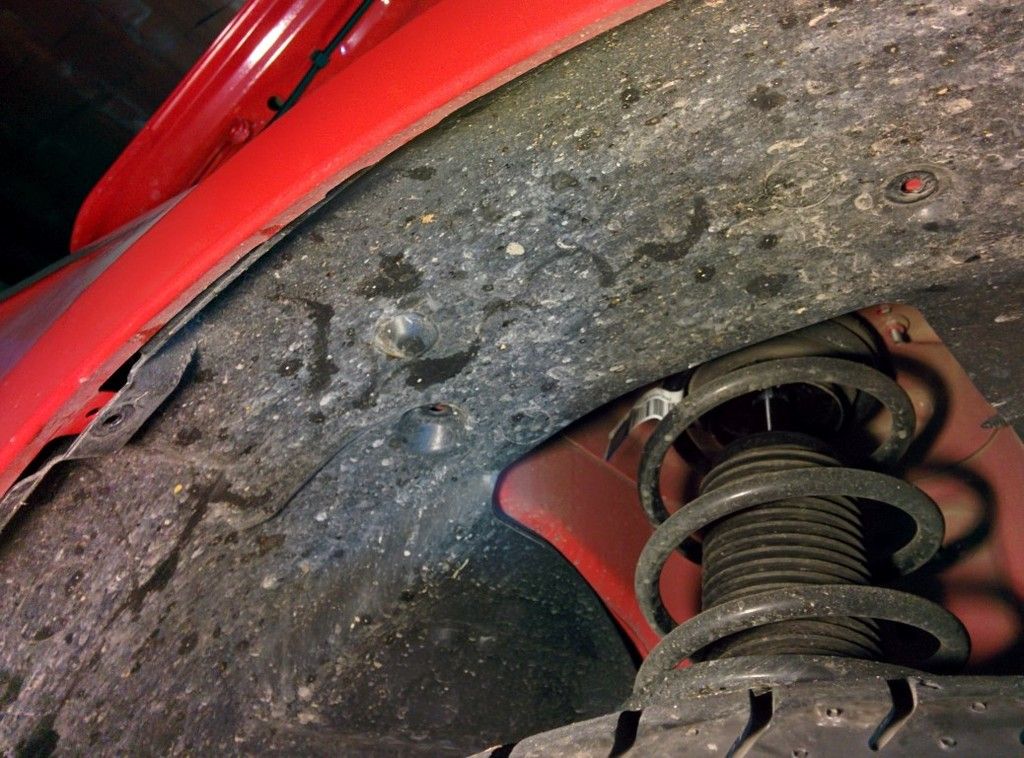
Inside the wheel well, in addition to the 3 pull tabs mentioned in the videos, do yourself a favour and remove all the tabs you can see!! This will help you a lot on pulling apart the well cover and reaching the damn 7mm bolt.
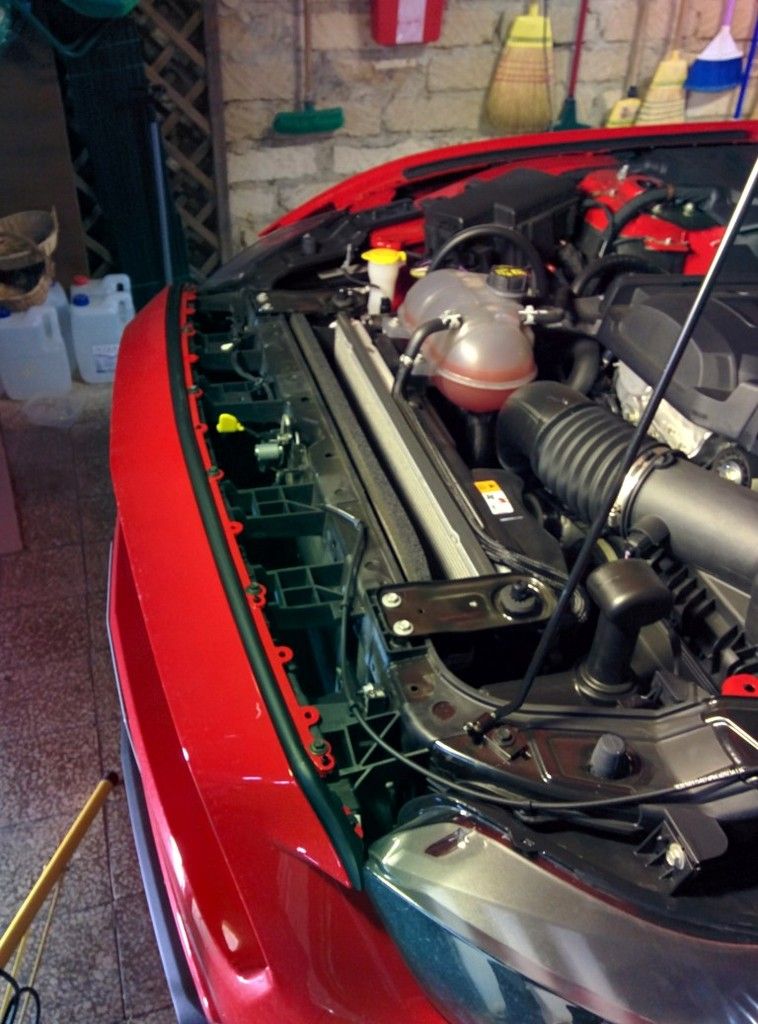
I removed the other 3 pull tabs
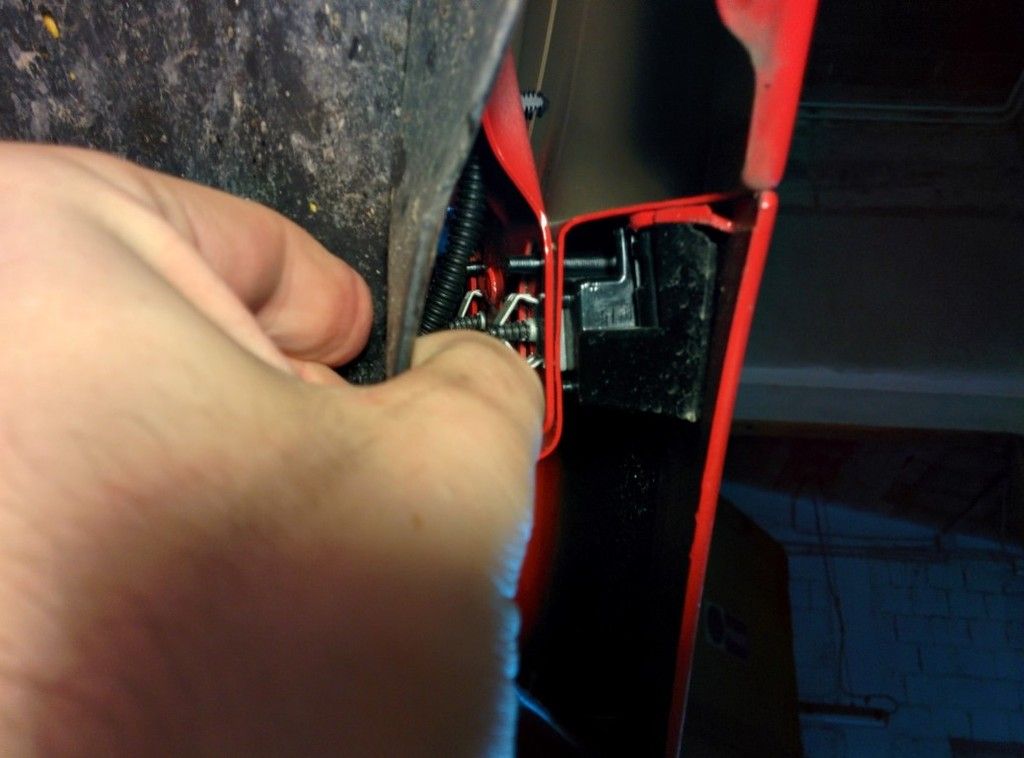
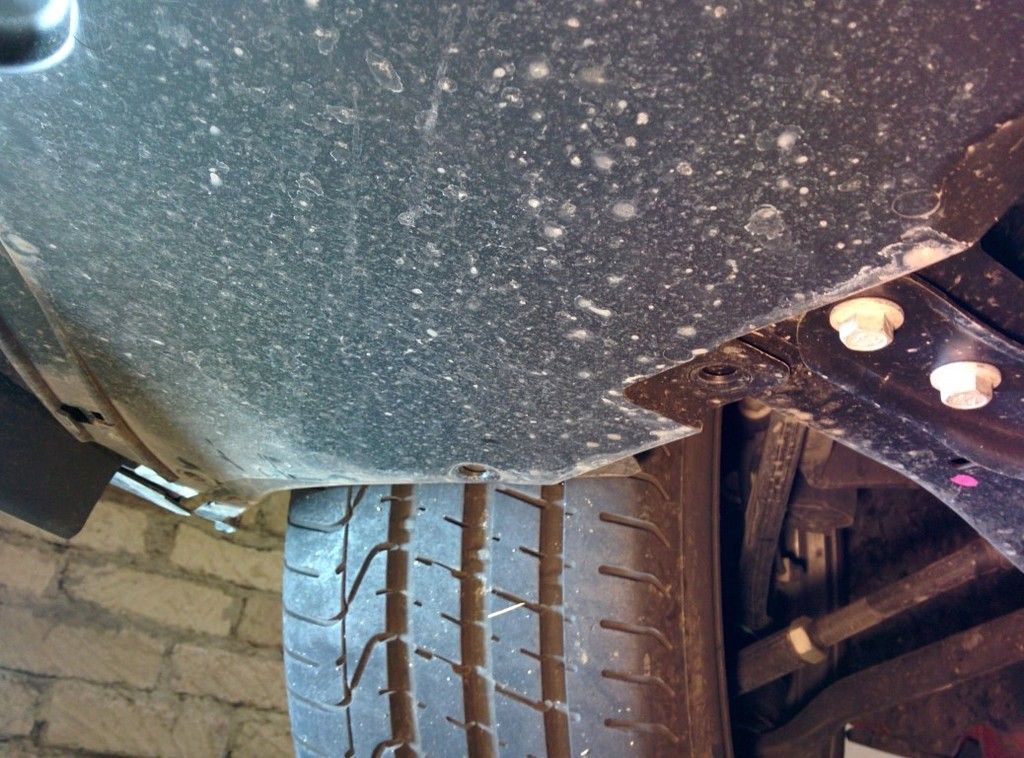
That bolt is so well hidden that I haven't got it in this picture, but this is the area
After that you can remove the upper bolts, don't forget the two hidden by the rubber
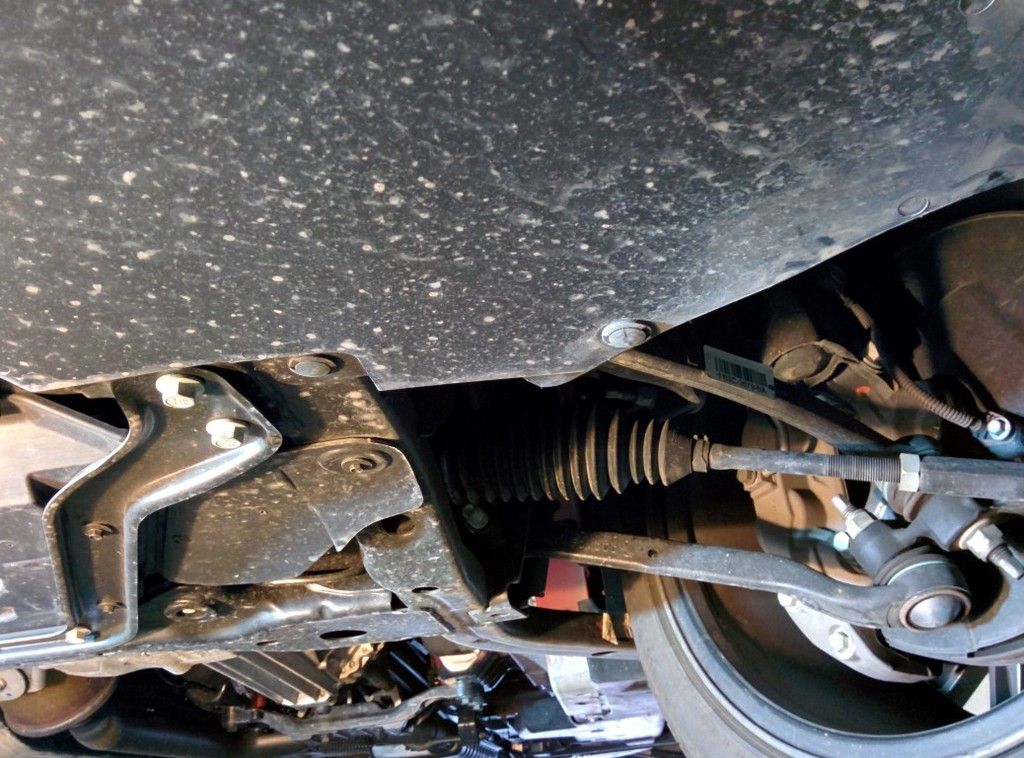
Bottom side: you don't need to remove all the screws, especially the most forward ones since these only keep in position the splitter.
Sorry for the bad pictures here, but even with car on jack stands it's not easy.
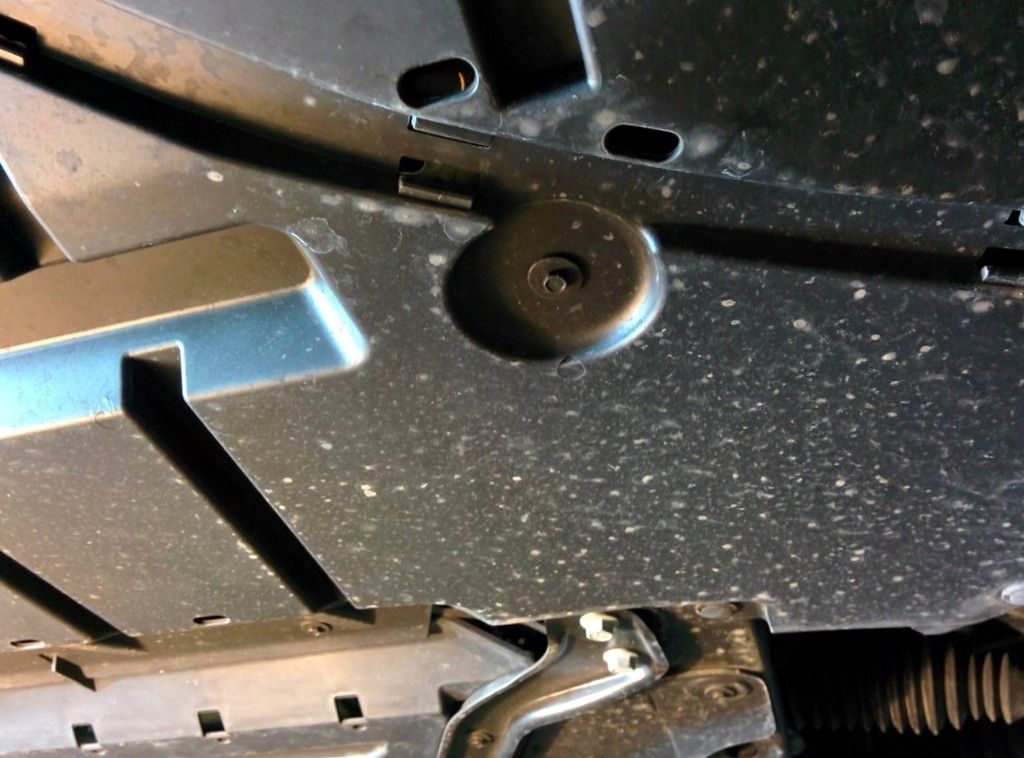
You should remove these two pull tabs on one side
remove these two 7mm bolts
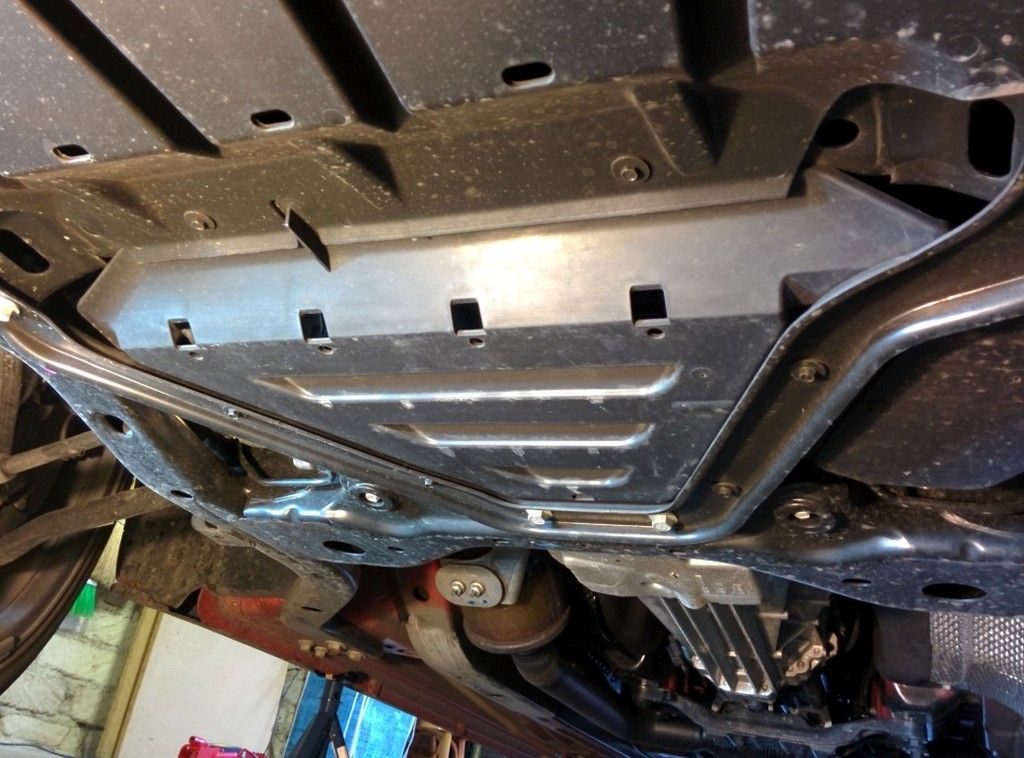
and two pull tabs on the other side
another bolt, one per side
and the four screws in those deep squares (sorry no pic)
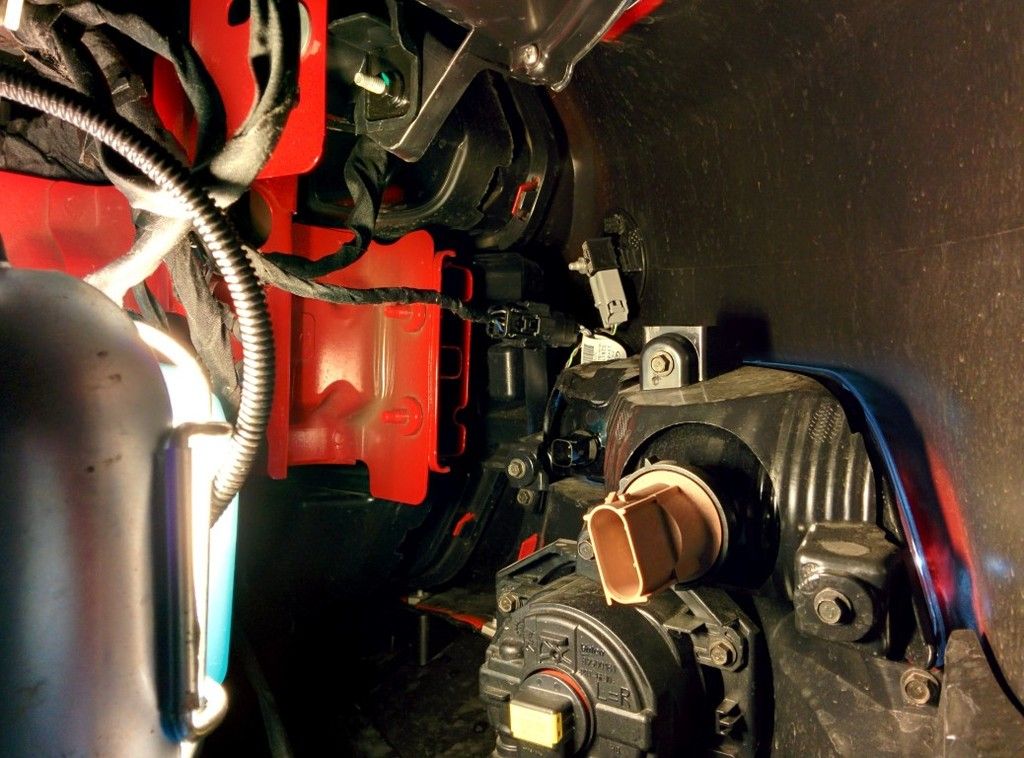
You're almost done: now you can pull the bumper from both sides, insert a hand in the fender well and disconnect turn, position and fog lights. Then lift from the front and pull the bumper apart.
ATTENTION EURO GUYS! We have one more connector, you can see at the center of the next picture, that is for pedestrian safety sensors :doh: and have a very short cable.
You should disconnect this before removing the bumper.
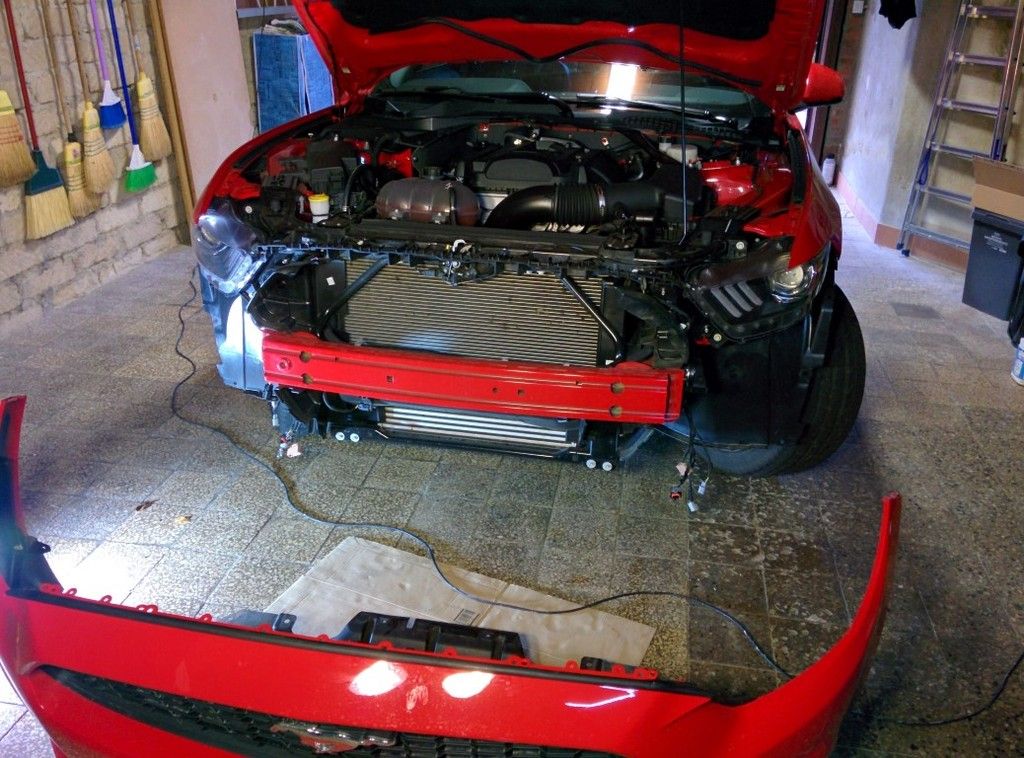
Now bumper is removed, if this is you goal, you're done!
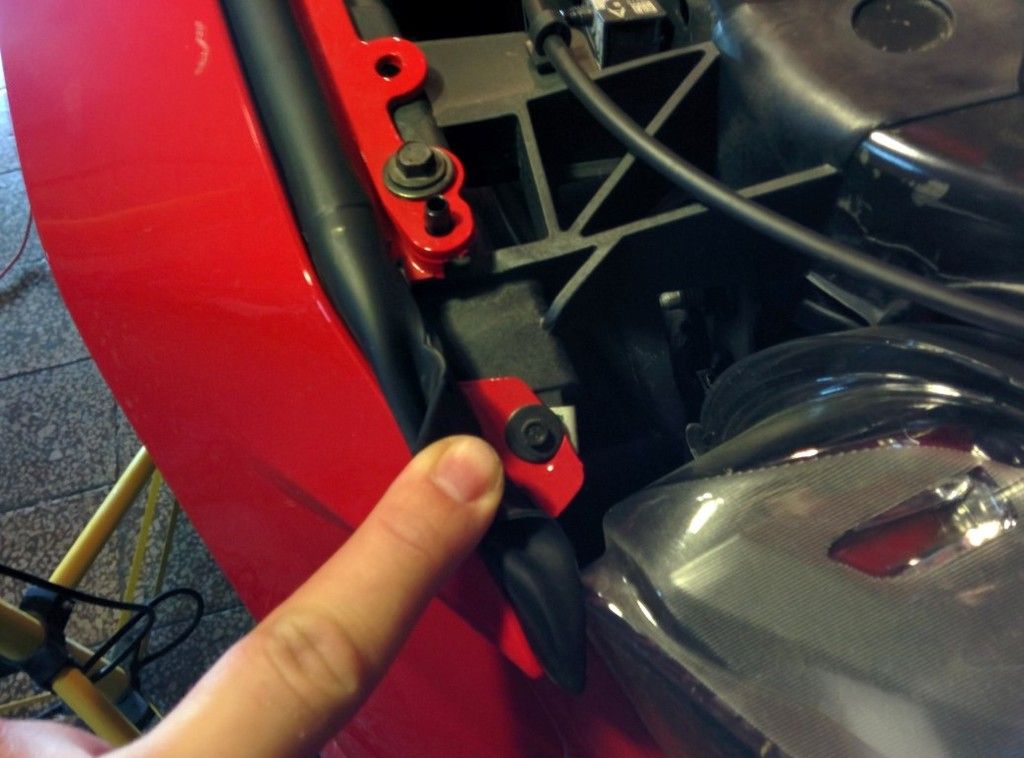
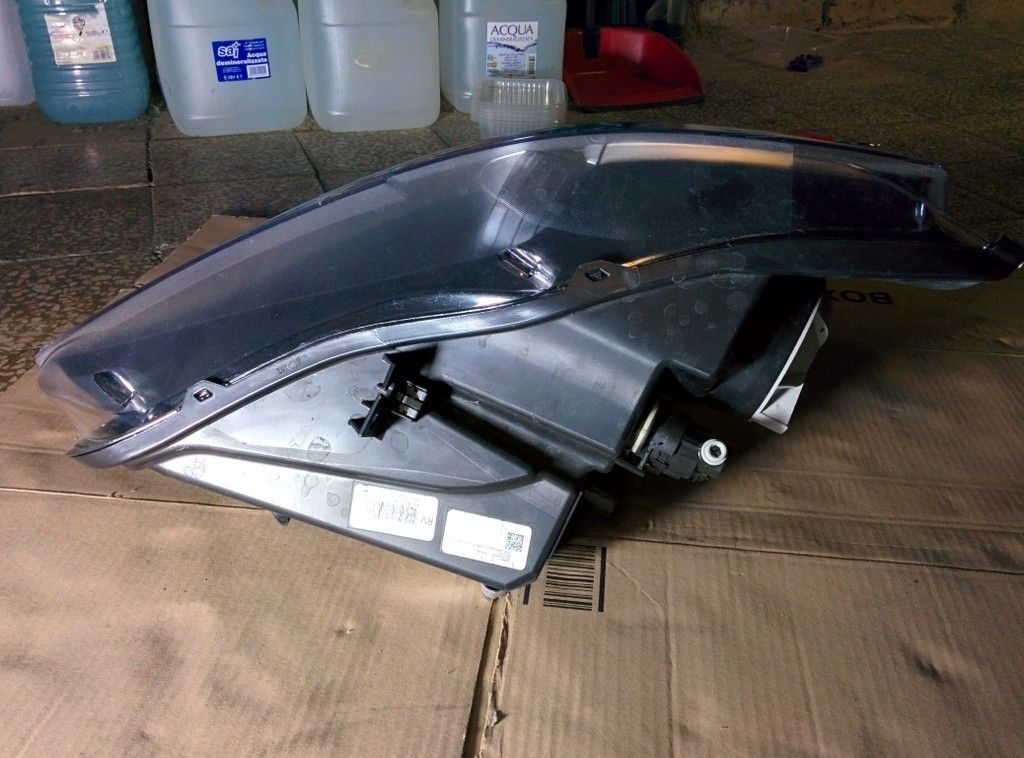
If you need to remove headlights, it's easy: remove the three 13mm bolts that you can see around the headlight housing (picture don't show the third one, on the right)
Disconnect the power connector from the back
(EURO GUYS we have a second connector for headlights height adjusting)
and pull the housing apart.
Pay attention to the metal clip near the upper bolt, don't lose it! (you can see at the center of this picture)
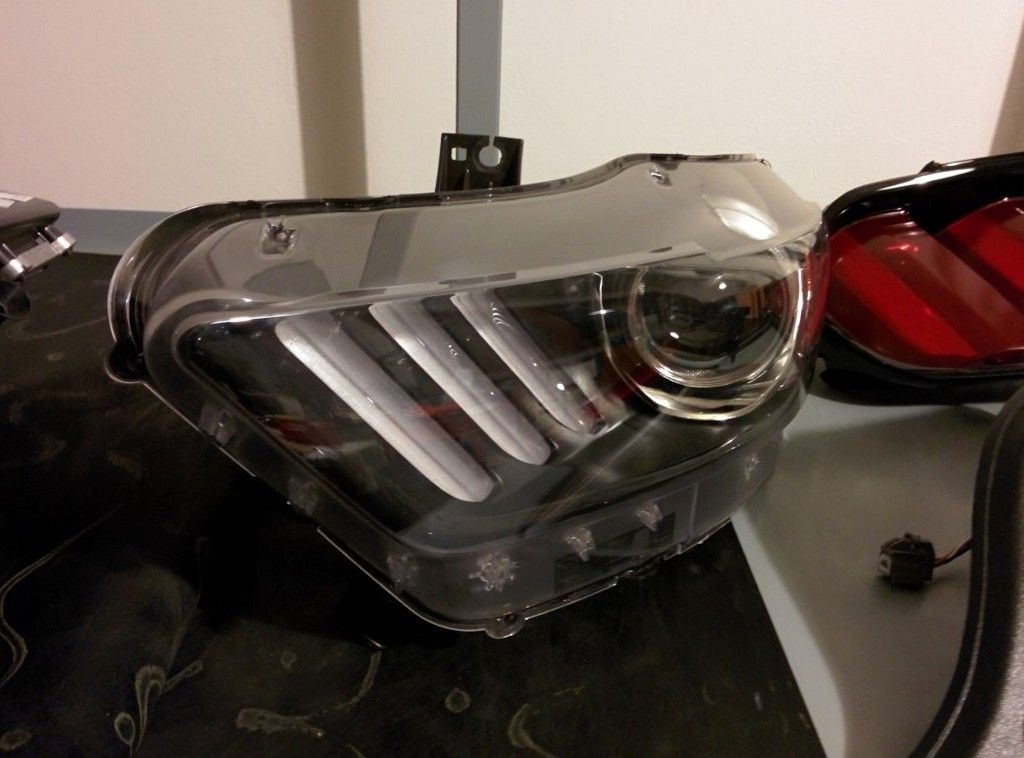
Done! Your headlights are removed :clap2:
Hope this is of help for someone
It's a temporary solution until I have time to upload pictures to some other hosting site. Thank you!
Hi guys,
I just removed headlights to get tribar drls installed (FYI 'rest of the world models come without tribar drls..) so I search for some video tutorials. I found a couple with mixed information so I thought I can integrate those info with some pictures.
Don't know if these two guys are M6G members..!
[ame]
This video is ok, you can watch only the first 6:45 min that explain how to remove front bumper.
Another great video here:
[ame]
It's not hard, but there are two 7mm bolts, one per side, that will keep you busy for long time. Be careful NOT to do as the second video explains, simply pull bumper without removing these bolts because you will broke the clips.
Here are my addition to those videos.
First of all, if you can, put your car on jack stands. Front will be higher so you can easily reach screws under the bumper.
Remove the pull tabs on the upper cover
Inside the wheel well, in addition to the 3 pull tabs mentioned in the videos, do yourself a favour and remove all the tabs you can see!! This will help you a lot on pulling apart the well cover and reaching the damn 7mm bolt.
I removed the other 3 pull tabs
That bolt is so well hidden that I haven't got it in this picture, but this is the area
After that you can remove the upper bolts, don't forget the two hidden by the rubber
Bottom side: you don't need to remove all the screws, especially the most forward ones since these only keep in position the splitter.
Sorry for the bad pictures here, but even with car on jack stands it's not easy.
You should remove these two pull tabs on one side
remove these two 7mm bolts
and two pull tabs on the other side
another bolt, one per side
and the four screws in those deep squares (sorry no pic)
You're almost done: now you can pull the bumper from both sides, insert a hand in the fender well and disconnect turn, position and fog lights. Then lift from the front and pull the bumper apart.
ATTENTION EURO GUYS! We have one more connector, you can see at the center of the next picture, that is for pedestrian safety sensors :doh: and have a very short cable.
You should disconnect this before removing the bumper.
Now bumper is removed, if this is you goal, you're done!
If you need to remove headlights, it's easy: remove the three 13mm bolts that you can see around the headlight housing (picture don't show the third one, on the right)

Disconnect the power connector from the back
(EURO GUYS we have a second connector for headlights height adjusting)
and pull the housing apart.
Pay attention to the metal clip near the upper bolt, don't lose it! (you can see at the center of this picture)
Done! Your headlights are removed :clap2:
Hope this is of help for someone
Sponsored
Last edited: