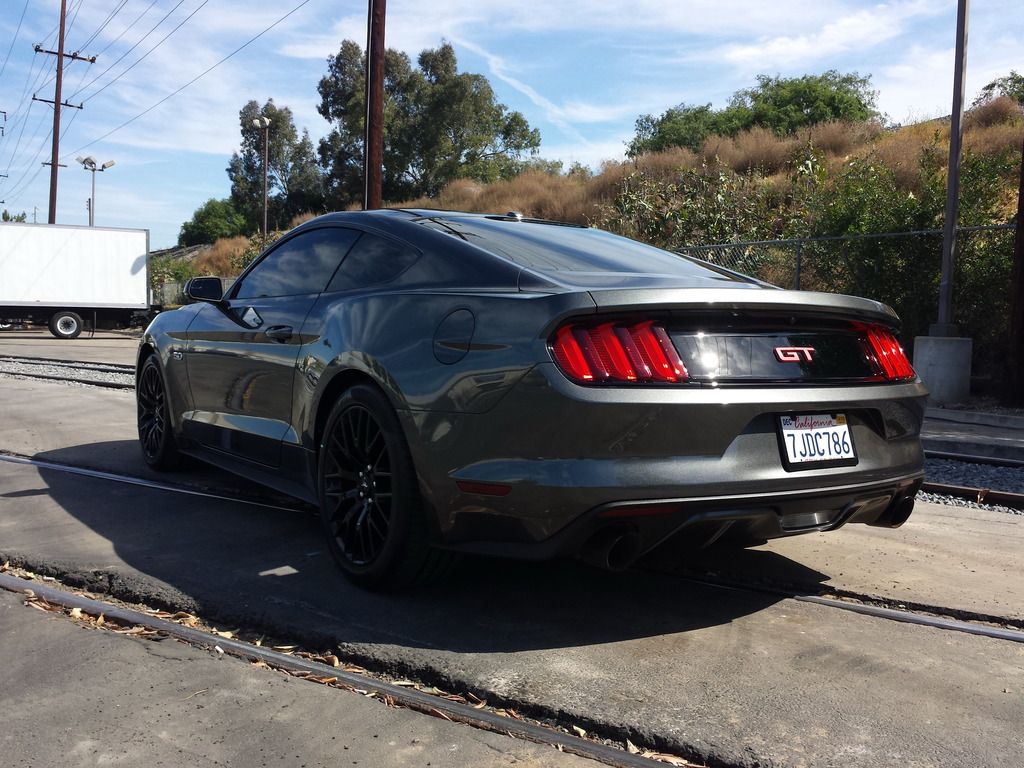
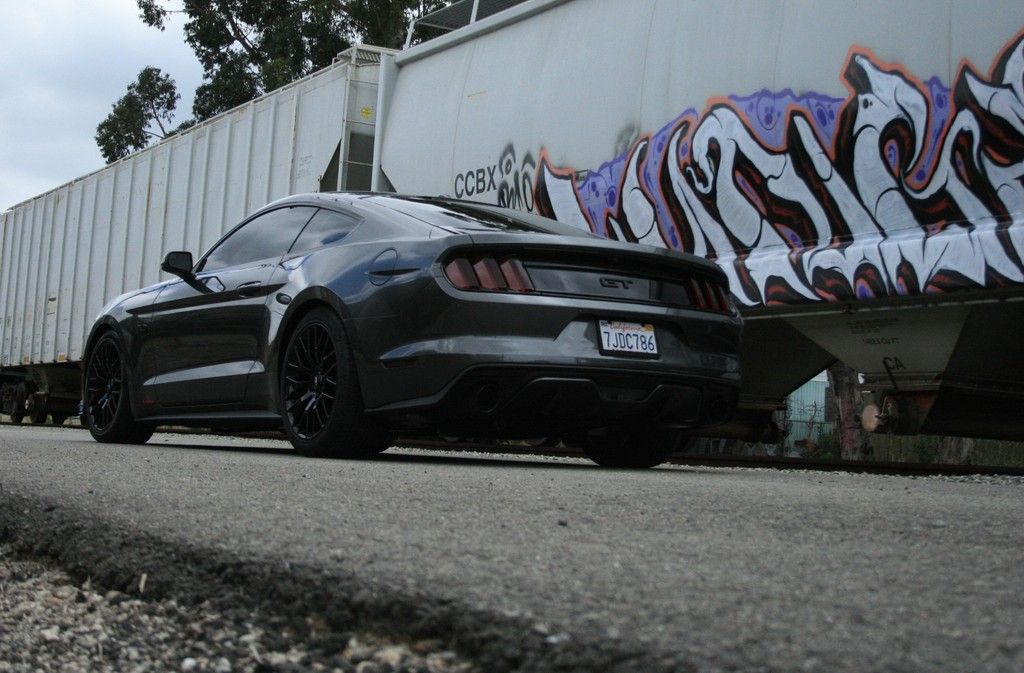
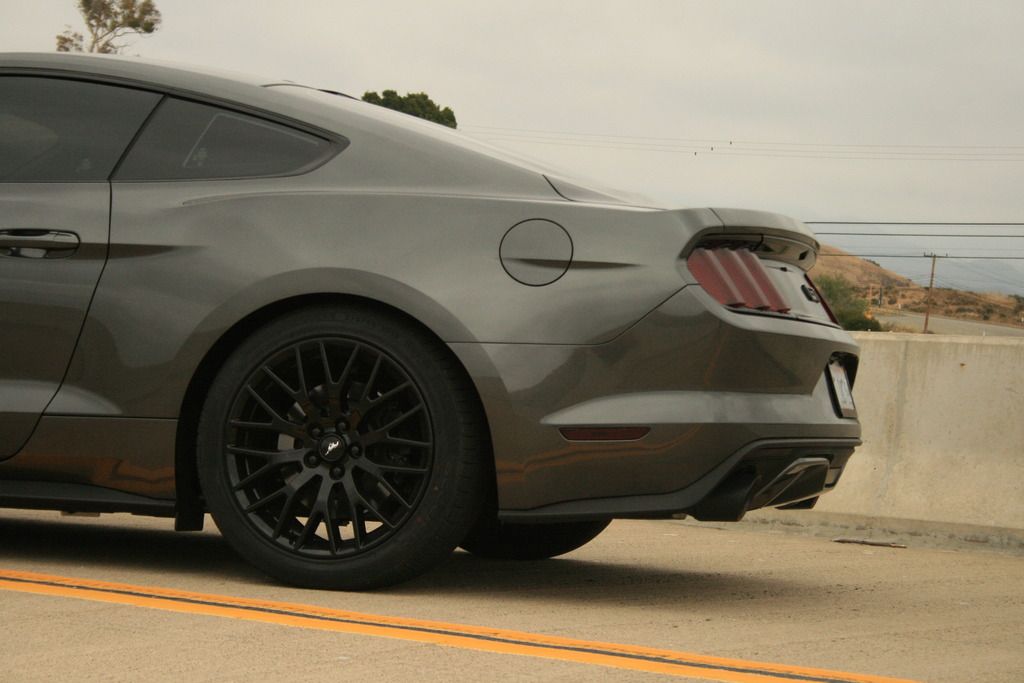
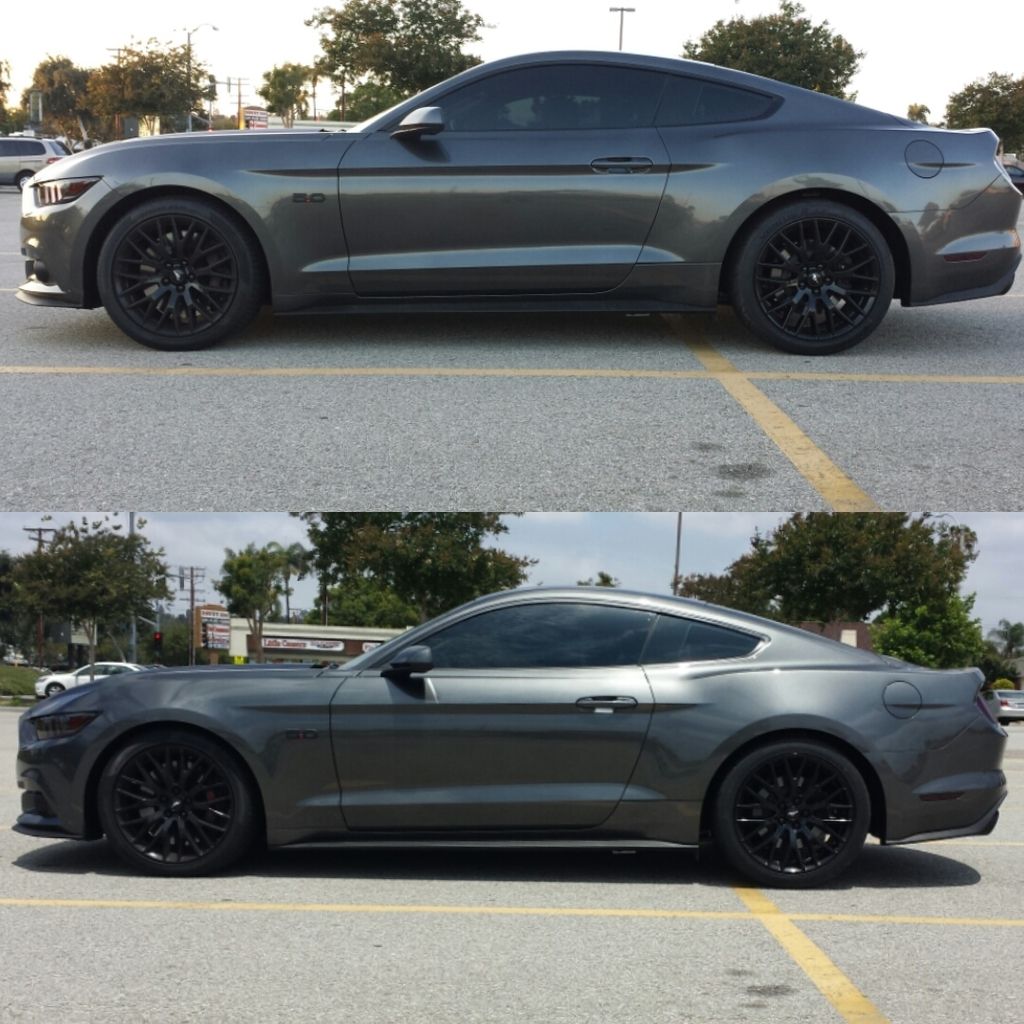
The Menace
No it's not that Fast...
- Joined
- Apr 24, 2015
- Threads
- 4
- Messages
- 167
- Reaction score
- 108
- Location
- California
- First Name
- Danny
- Vehicle(s)
- Mustang GT
- Thread starter
- #1
Current list of Mods I can think of other than that she is stock
IRS, Frame Stiffening, Handling:
ISC Suspension N1 Coilovers
Coyote Performance Racing Front Sway Bar End Links
Steeda IRS Subframe Bushing Support
Steeda IRS Subframe Support Braces
Steeda IRS Subframe Alignment Kit
Steeda Extreme G-Trac K-Member
Steeda Ultra Lite Chassis Jacking Rails
Steeda Front and Rear Sway Bars
Steeda Front and Rear Billet Sway Bar Mounts
Steeda Vertical Links
Steeda Adjustable Toe Links
Steeda Adjustable Differential Bushing Insert System
Steeda MT 82 Bushing
Engine, Performance & Dress:
Gibson Black Ceramic Cat Back
Steeda Tri-Ax Race Short Throw Shifter
Steeda Restrictorless Cold Air Intake
Steeda 91 Octane Tune
Steeda Hood Struts
Steeda Strut Tower Brace
Moroso Coolant Expansion Tank
UPR Single Valve Oil Catch Can Separator
UPR Billet Strut Tower Caps
Exterior/Interior:
GT350 Steering Wheel
RTR Side Rocker Splitters
RTR Rear Diffuser
MMD Rear Window Louvers
Roush Side Scoops
UPR Satin Black Emblems
Lights Full Vinyl Tint
15% Tint all around
Black Lug Nuts
So this will be my official Build Page so I can track the progress or lack thereof on this project. Also check out @projectmenace if you are into instagram
Brief About Me… I Am 36, married with 2 kids. One 16 year old son and one 8 year old daughter. I am Born, Raised and still live in SoCal. I love Guns, Watches, Knives and vehicles be it a 4x4 or a lowered sports a car or anything in between. While I have always had some sort of fun vehicle this is my first Ford and therefore my first Mustang. This is my first car over 400WHP. My 04 Dodge RAM wash pushing about 385 to the wheels. I just came out of my first and only foreign car a turboed Hyundai Genesis Coupe which was only pushing about 230RWHP. I Miss the Turbo Spool and BOV sound… And with that said some kind of FI is the end result of this build. This build will have burst of momentum and then slow down. depending on if I get any help from vendors and suppliers and let’s face it if my wife lets me do what I would like to do… so feel free to keep reading a brief how I got to this car or skip down to Phase #4 and start seeing some pictures. Thanks for reading if you do. feel free to ask some questions i will try my best to answer.
Phase#1 the OLD CAR
It all started In February of 2014 when my Hyundai was starting it’s lemon Law suit for the Factory Brembo Brakes failing on the car a total of 8 times. Long story but after 4 times in the dealer each time except the first the replaced something… long story short my attorney did not want to pursue the case considering the modifications to the car. So Hyundai attorney wrote me a letter saying they fixed the problem and the car is 100% properly functioning so I sold the car which was paid off. I kept all my Stock stuff so I parted the car out which is where I ended up with my mod money I currently have/spent…
Phase#2 the Hunt.
Being a father of 2 I was originally looking at the Twin Turboed Taurus SHO. Come on AWD twin blown V6 what’s not to like heated and cooled Messaging seats WTF…. Anyways looking at ford because my Sister in Law has been with Ford for 30 years and it is the only way I can get an almost 50K car for what I can actually afford. I test drove a bunch of cars. 13/14 Mustang GT, 14 and 15 STi and WRX, 14/Camaro, 14 SHO, 14 Focus ST, 14/15 Dodge Challenger and Charger, and probably some other cars but long story longer One day now in September I jokingly Text my Wife “I have narrowed it down to the SHO or the 2015 Fastback. “And I sent her picture of both the car’s interior and exterior and she immediately text me back and said get the Fastback. At this time I will tell you I own a Chevy Tahoe and a Jeep Wrangler Unlimited so we have 2 four door family cars already…
Phase#3 the Order
So September 25th 2014 I talked to the GM over at Fairway Ford in Placentia California and got a rough Idea of the price and options. Obviously the 15 was not out on the street yet so I could not physically see anything or drive it. And driving let’s face it with all the Hype of what the 15 was supposed to be driving the 13 and 14 in test drives was not going to do it justice. So I figured Eff it what do I have to loose. So I ordered it and on 9/29/14 I got my first email saying I ordered it but still was not assigned a VIN. Finally on 11/12/14 I finally got notification that I received a VIN but no ETA. Then as with my luck (if I did not have bud luck I would not have any luck at all) the they told me it would be in first week of December but then it was stuck on a train and then I was told I would have it on Pearl Harbor day but that did not happen and then Finally I got the call on 12/10/14 that the car was on its way and to come down and pick it up. So I got there before my car did and sat around for a few hours watched them off load it with only 3.2miles on the odometer I was sure I was the only one to ever drive this car…. Of course before I bought it, they had a GT with the same package I got and they threw me the keys and let me take it out for a while. Needless to say I enjoyed the drive…
The first days of owning my Mustang… Poor little girl has no idea what is about to happen to her…
At the dealer

This thing may as well be a 4x4... look at that wheel gap.

The next day at the office. Kind of sucked it rained the first several days… Again that wheel gap tho...

Take a look at this end, cuz it will probably be the last time you ever see her look this chrome...


Enough of the boring stuff
Phase#4 The Build
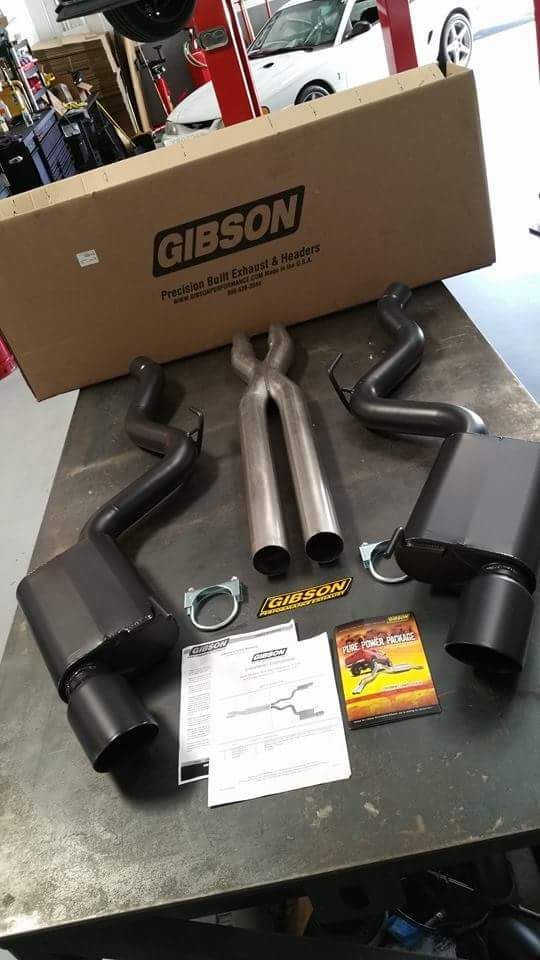
Obviously it did not take long to start working on the car. I won a free install at a Christmas party at 281 Motorsports in Placentia. And promptly ordered my Black Ceramic Coated Gibson Cat Back Exhaust on 12/16/14 with the holidays and shops being busy it took a few weeks for me to get and then there was the whole K&N thing… K&N took my Car 1/7/2015 for R&D they had the car for almost 2 weeks. I assume to play around with the car… They needed it stock for baseline tests. Anyways after I got the car back I promptly made my appointment to get my Exhaust installed. I actually do not remember that date… anyways I got her back the same day and Man what a difference not only the sound but the butt dyno performance gains felt huge.
281 Motorsports installation before and after pictures from their Facebook page.
BEFORE as if you could not tell…


If I remember we shaved a total of 12 pounds off during installation?
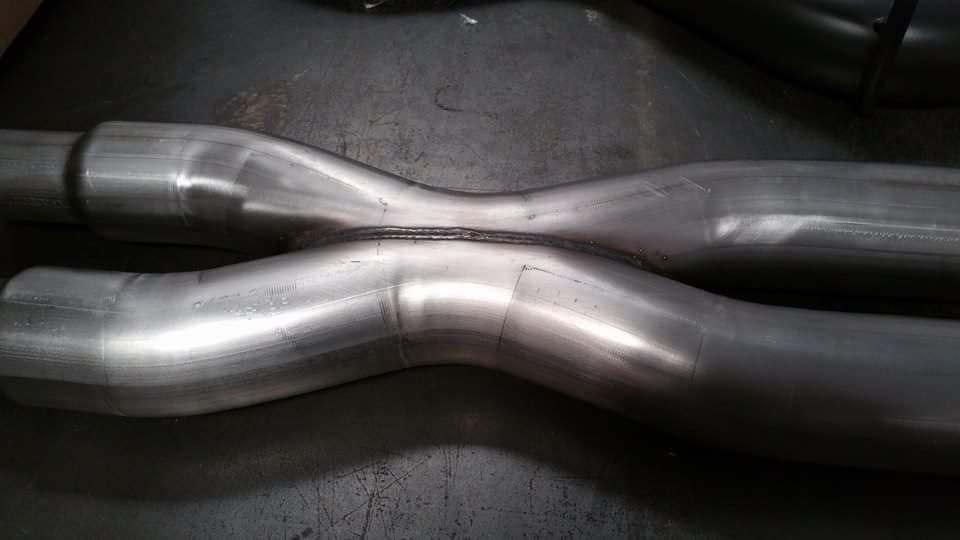
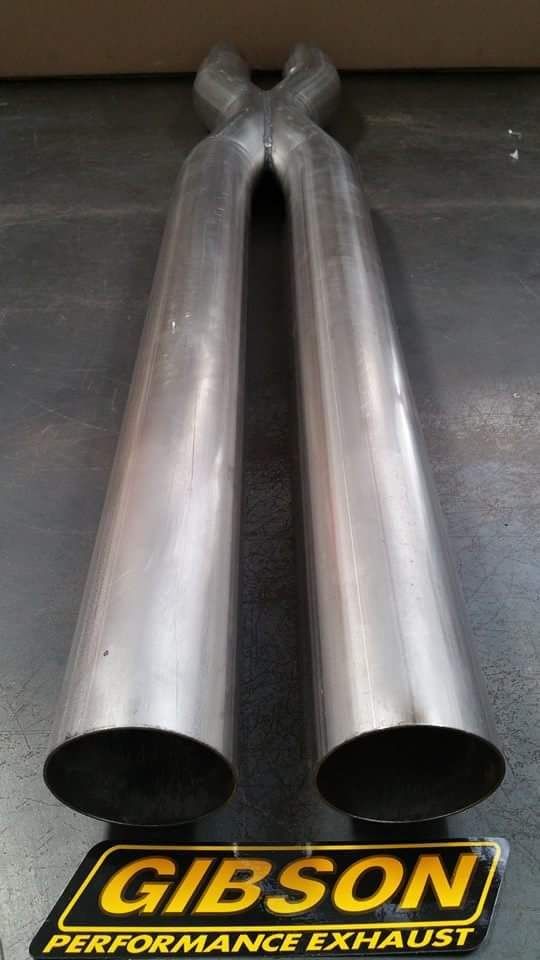
This one piece exhaust was fun to get home…

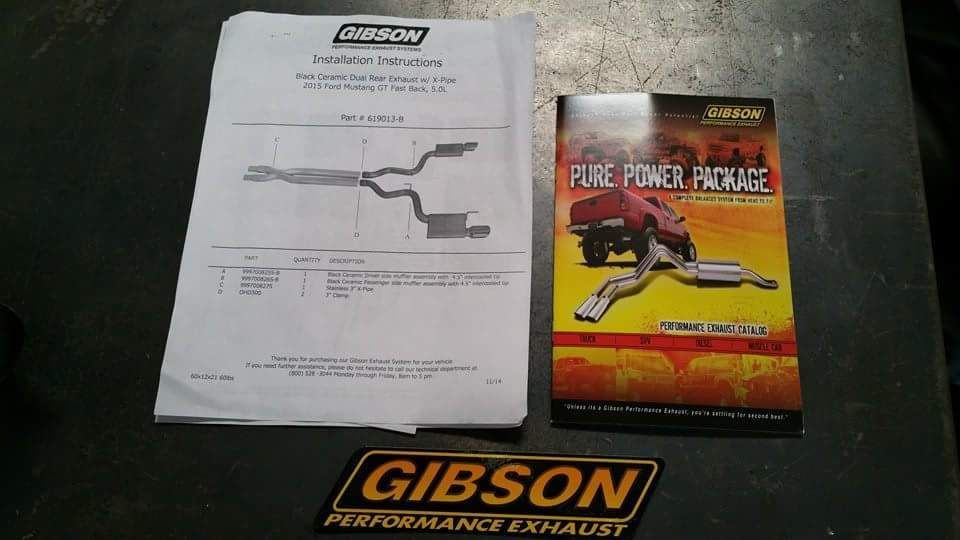
Gibson exhaust really came through on this one. Great product, easy installation sound is great I now have about 5,500 miles on the system and it still sounds great.


It’s the little things. MADE IN THE USA


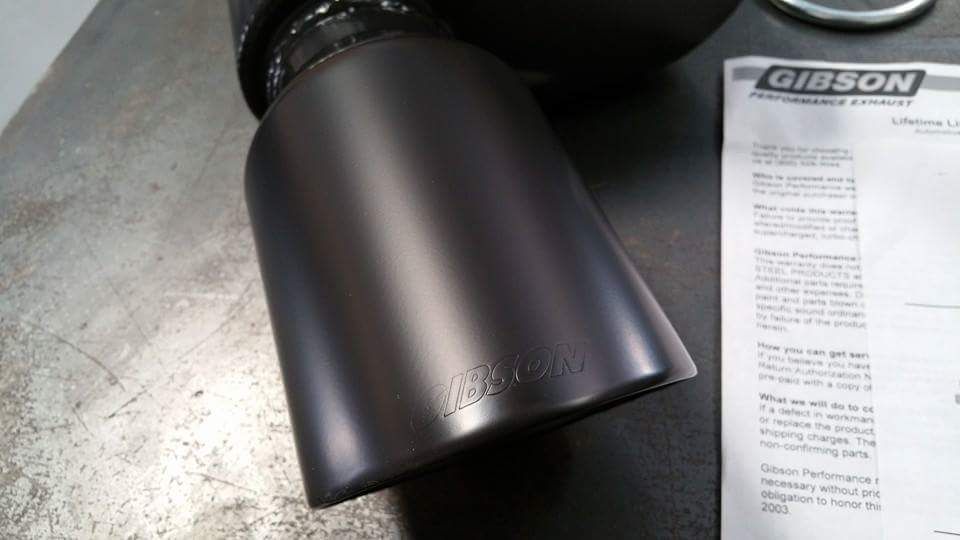
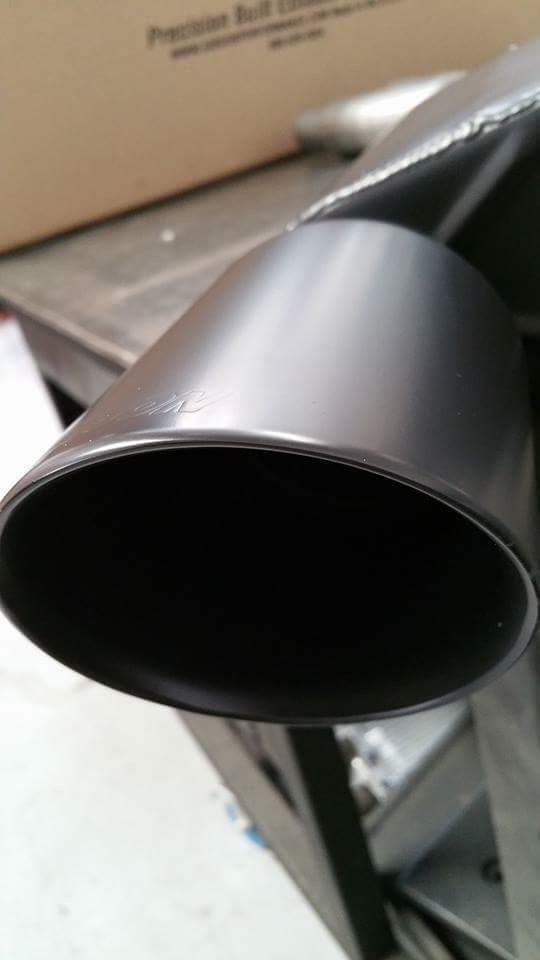
Looks just amazing here…


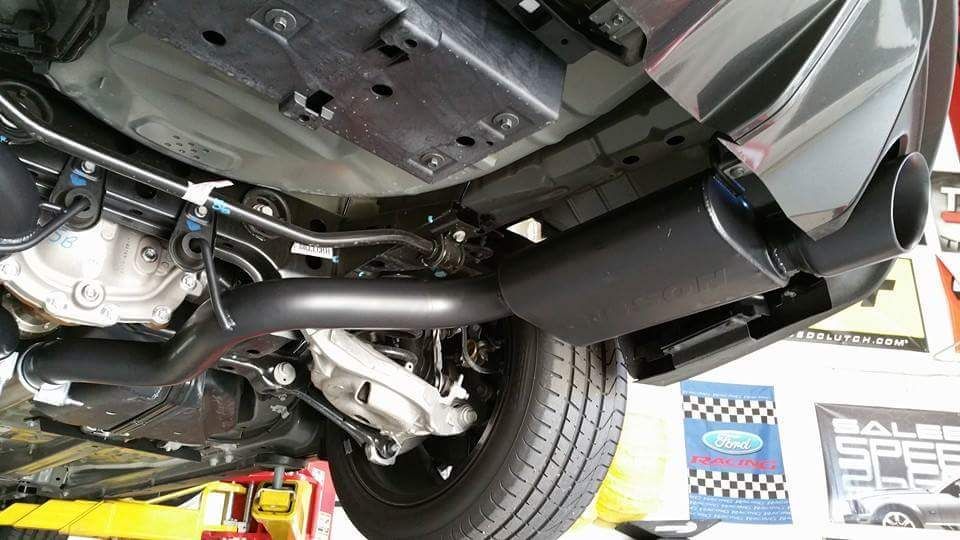
It still looks this clean I swear…

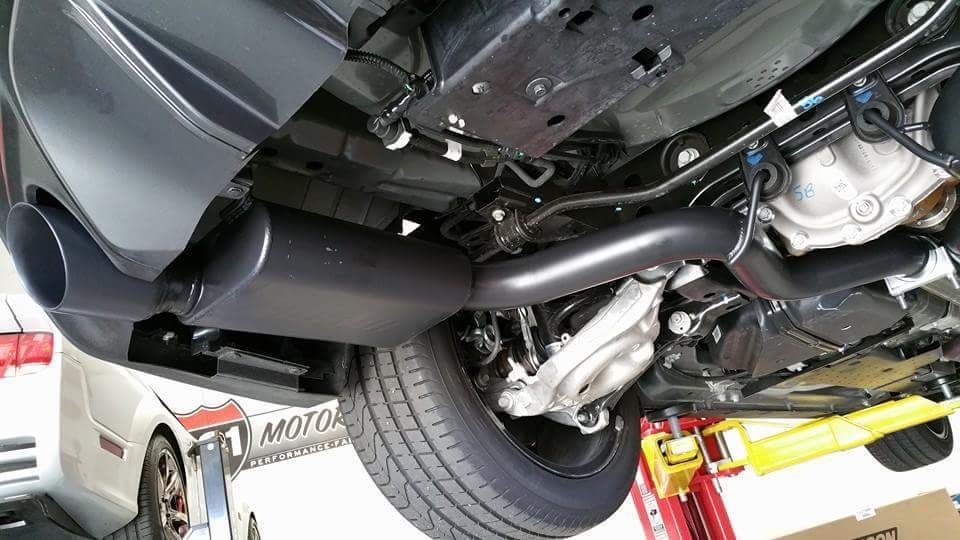
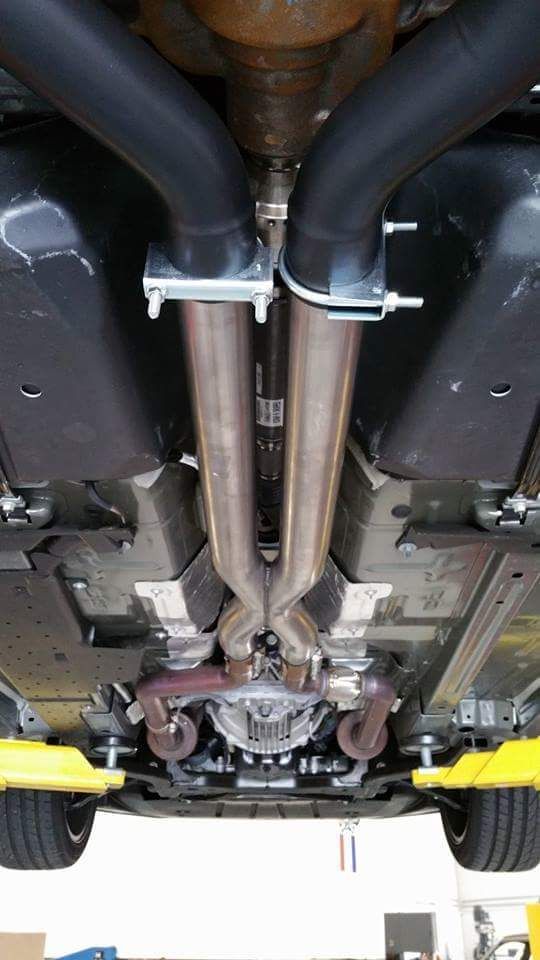
You will see later as I get going on the build I turn this clamp to the side. Not sure why 281 left it like this and not sure why Gibson supplied these style clamp on the kit?

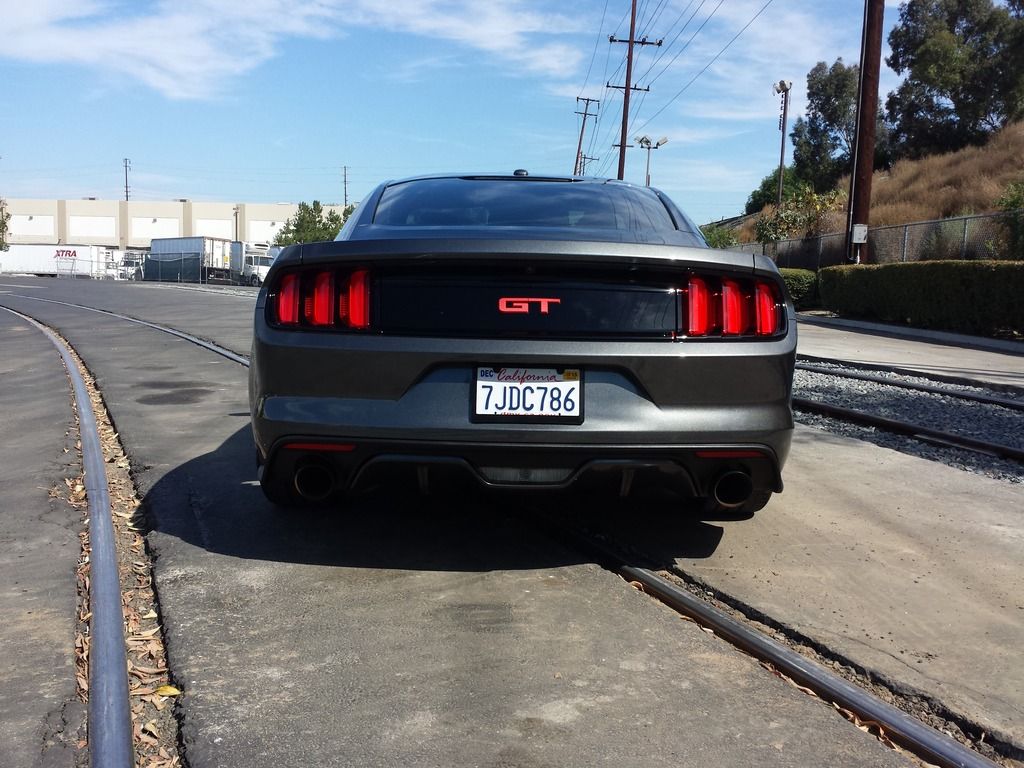
The tips really fill the factory exhaust cut outs very well and that Black Ceramic finish just blend right in.

So after surviving the Holidays it was time to resume. In the process of selling the Hyundai I may have mentioned it was mildly built. So the whole reason why I do all my own work and keep all my factory parts is because I enjoy returning the car to stock selling it for a fair price and then yea you guessed it sell all the old parts. So at this point in time i am going to start to spend some of the money.
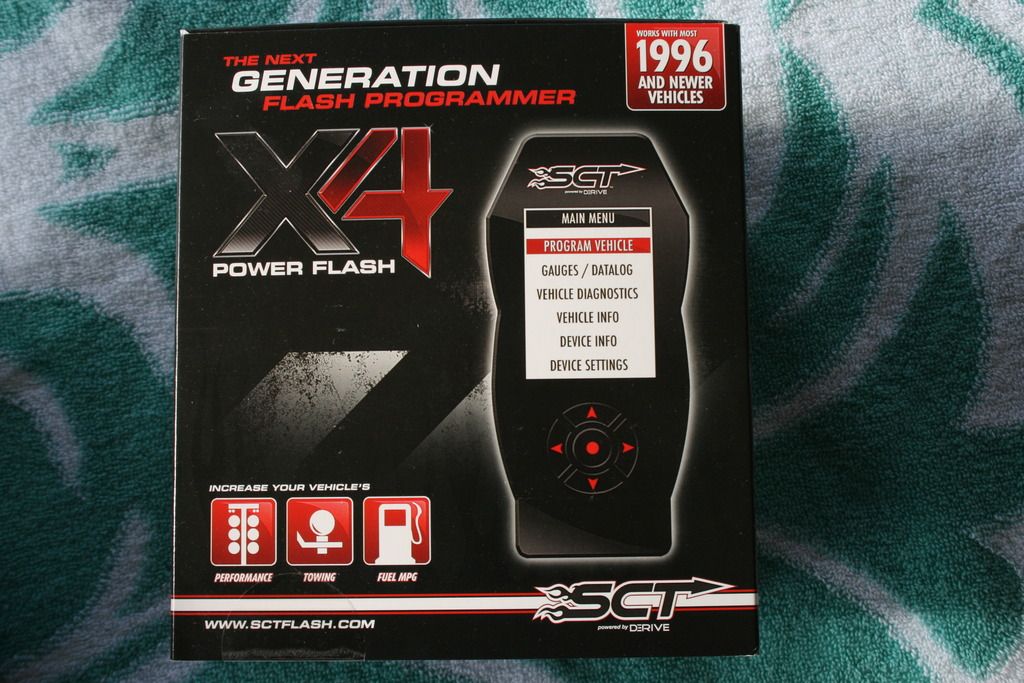
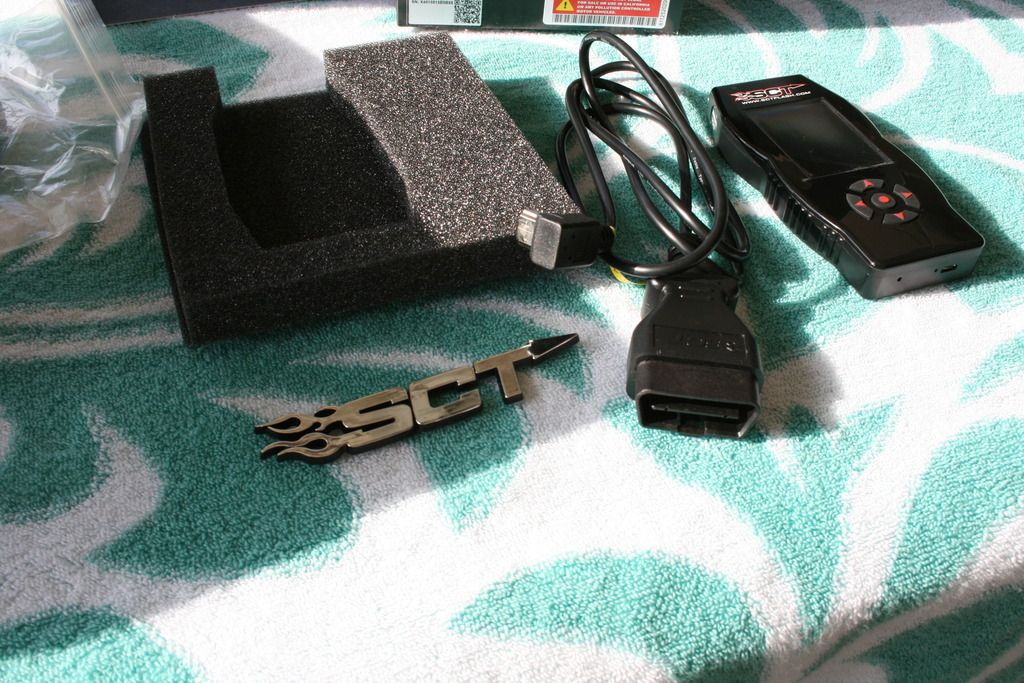
Justin from VMP Superchargers came thru with NOPE not a supercharger… but Yes a SCTX4 Tuner with three of his custom tunes loaded on it. Justin is a stand up dude. He provides customer service that is well, Great! He is there for me pretty much every time I need him except once and that was a race weekend. So can’t blame him there…
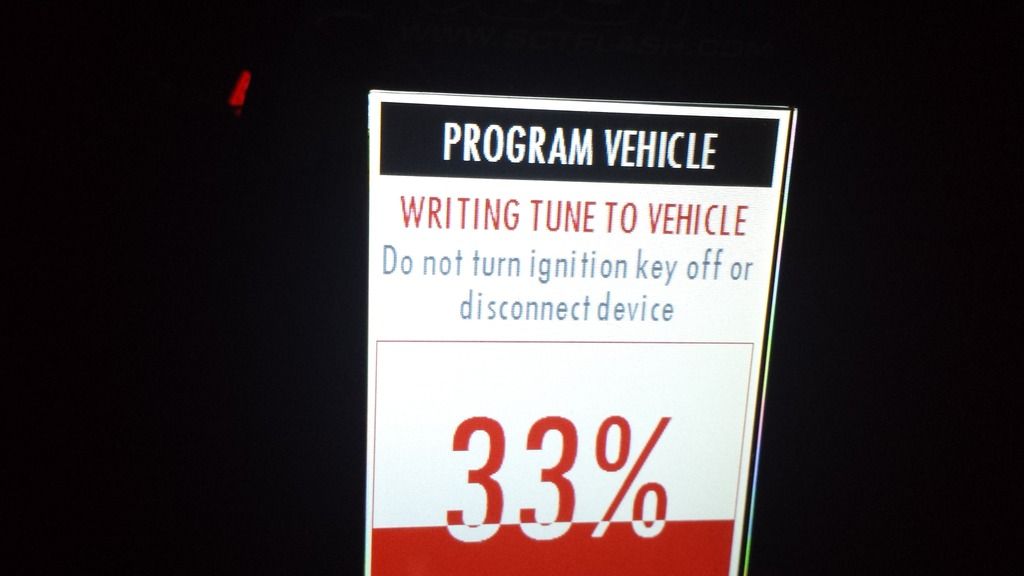
All I have to say is the 91 tune is night and day difference from stock improved throttle response for beginners. It was cool because I paid attention to the AFR gauge, Intake inlet things like that before and after.
This showed up today 2/20/2015 this could not have been any easier to use literally done in 30 minutes. Instant madness to the pedal…


Someone is about to be going a little faster 0-60… and then some.

So let’s rewind for a second before I got the Tuner the K&N R&D Team Came… Long story a buddy of mine from the office knows one of the guys who works R&D so he got me in the door. They took the car bone stock Before Jason at 281 got his hands on her… So anyways Long story longer After a total of 13 days 10 were the original R&D days then fast forward to March and they took her again for three days for actually CARB Approval piece install, installation pictures for their instructions Dyno test etc. I have not seen the installation instructions myself but chances are it is The Menace that is in there…


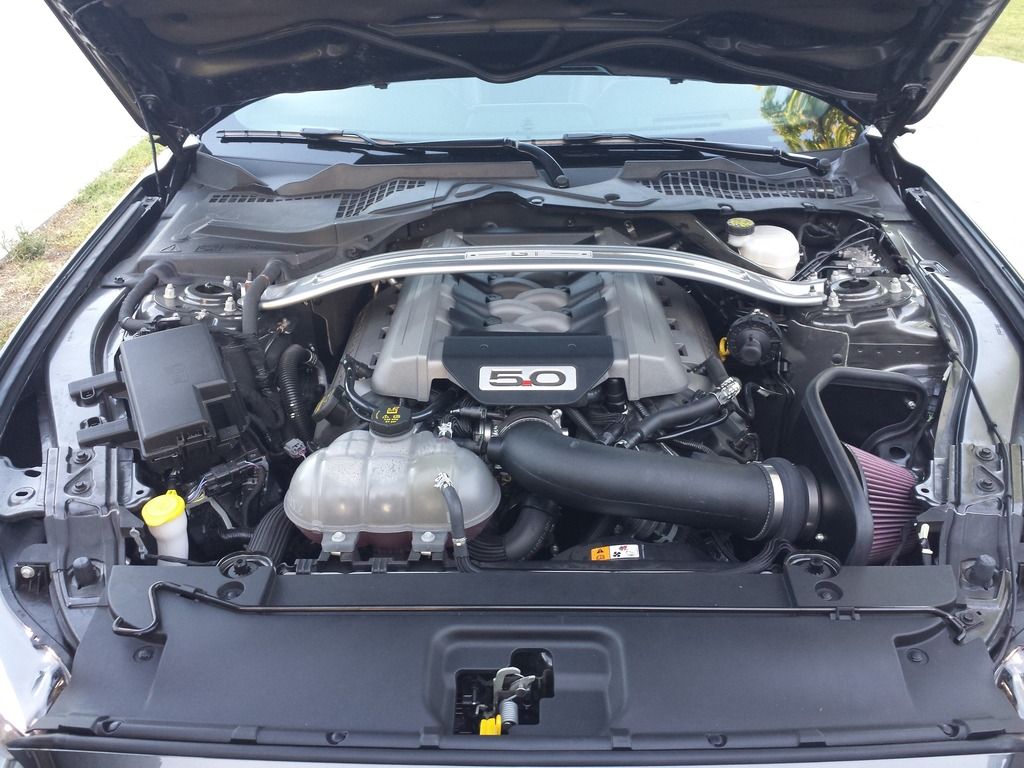
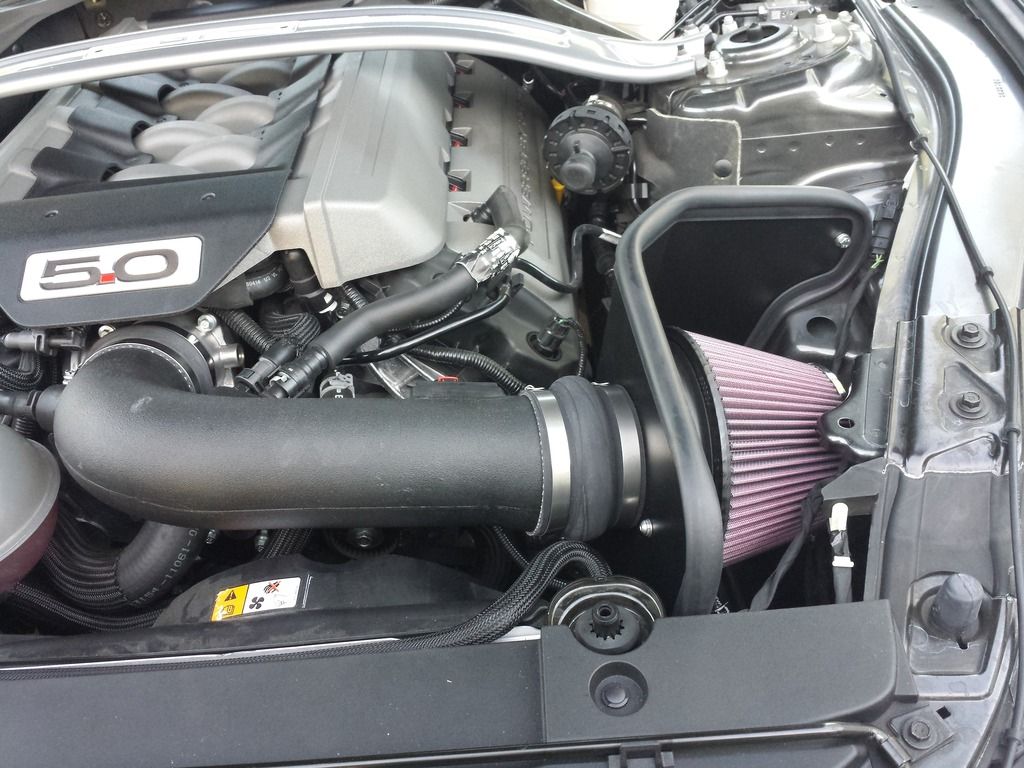
Okay so to bring you up to speed to date I have a Gibson Cat Back, VMP 91 Octane tune and the newly installed K&N Intake.
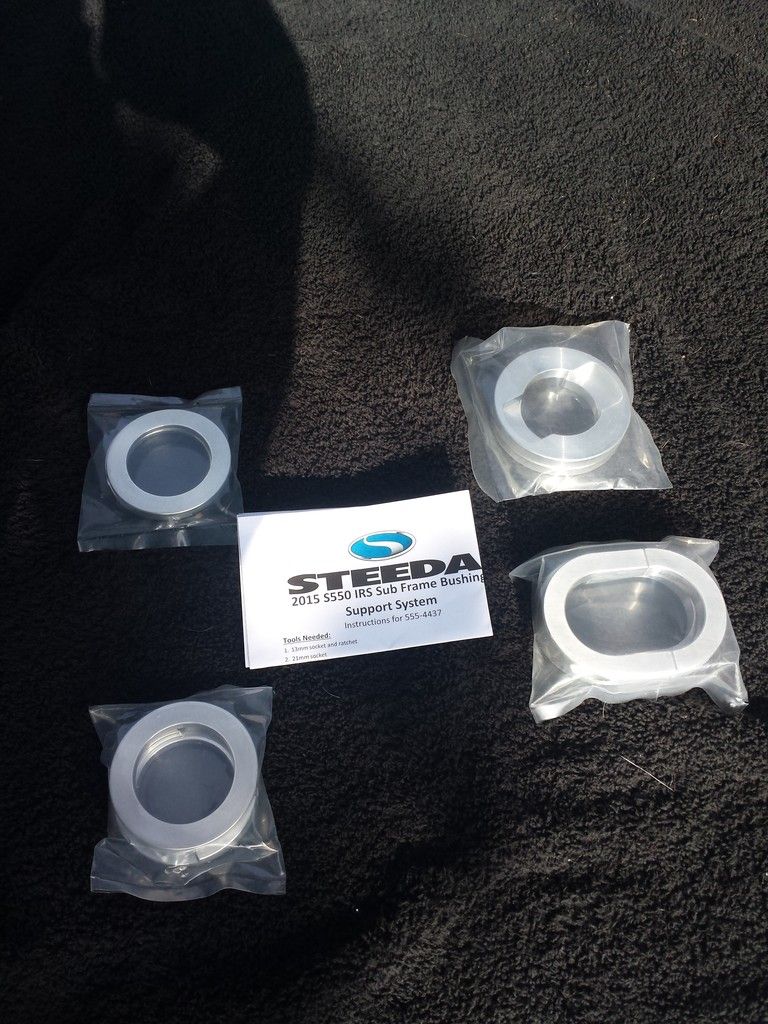
So April time rolls around and I am just feeling the itch to continue so I do some research on lowering springs, chassis stiffeners and other suspensions components to help plant the current power The Menace is making. I figure this time I am going to start from the ground up I am going to start to build the suspension starting with the IRS. Well long time manufacture of aftermarket Mustang parts Steeda Autosports keep coming up. They seemed to be the only ones on the market that were both Making and Providing a full line up for the IRS. So I decided to give them a call and see what we could come up with in the mean time I ordered some of the easier to obtain in my price range parts like the IRS Subframe Bushing Support System PN#555-4437 and the IRS Subframe Alignment Kit PN#555-4438. The alignment kit is a fun installation if you like to get dirty. It is an easy install for the most part. I ran into a few issues here and there but all in all it took me about 3 hours start to finish from getting the car off the floor to putting it back on the ground. Should have taken 2 hours if I figured out how to get the flathead wedged in the correct spot sooner. On the short side of the collar (the only part that is split in 2) that goes towards the inside of the car, you can get your midsized flat head just behind it, on the inside of the collar closest to the rubber bushing. Using a lube on the rubber bushing you can do a little prying on it and the small ring just glides right around the bushing. Man I wish I took a picture so simple yet so hard to explain. I will try to put some kind of pdf snap shot or something together to try to explain better.
MADE IN THE USA

Un-packaging the quality looks great I wish I took more pictures But as usual I was pressed for time on the weekend. FYI I work way too much during the week and trying to squeeze time in to work on The Menace when I should be spending time with the family makes for some quick installations or it is my butt…

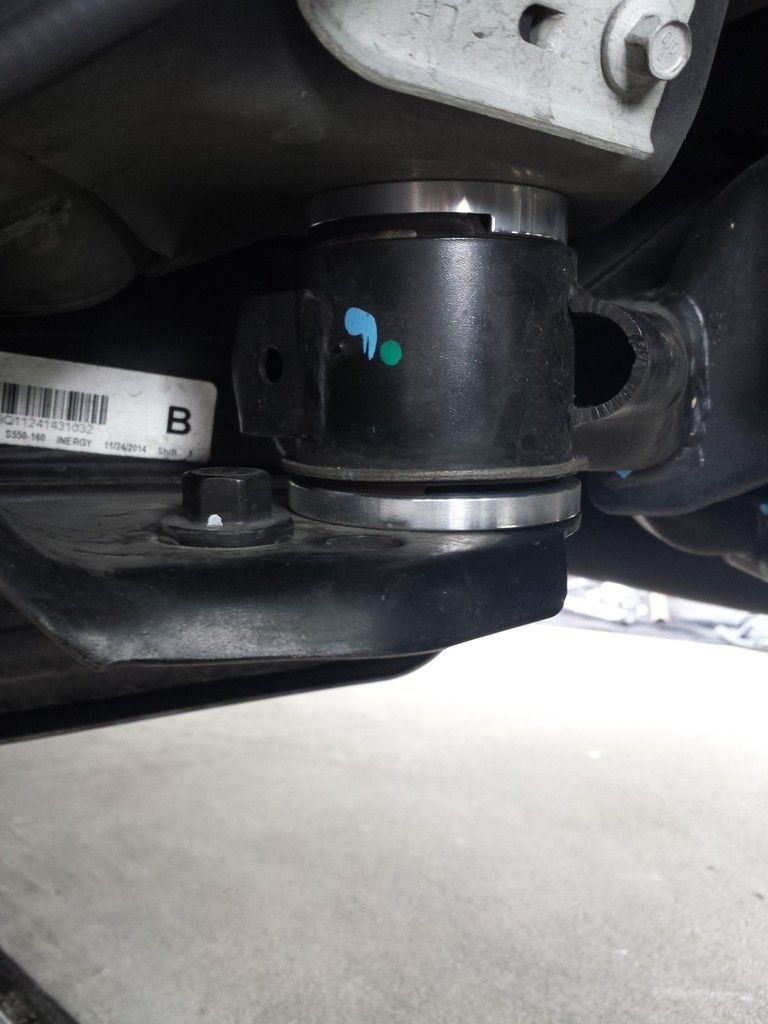
Front Bushing supports installed

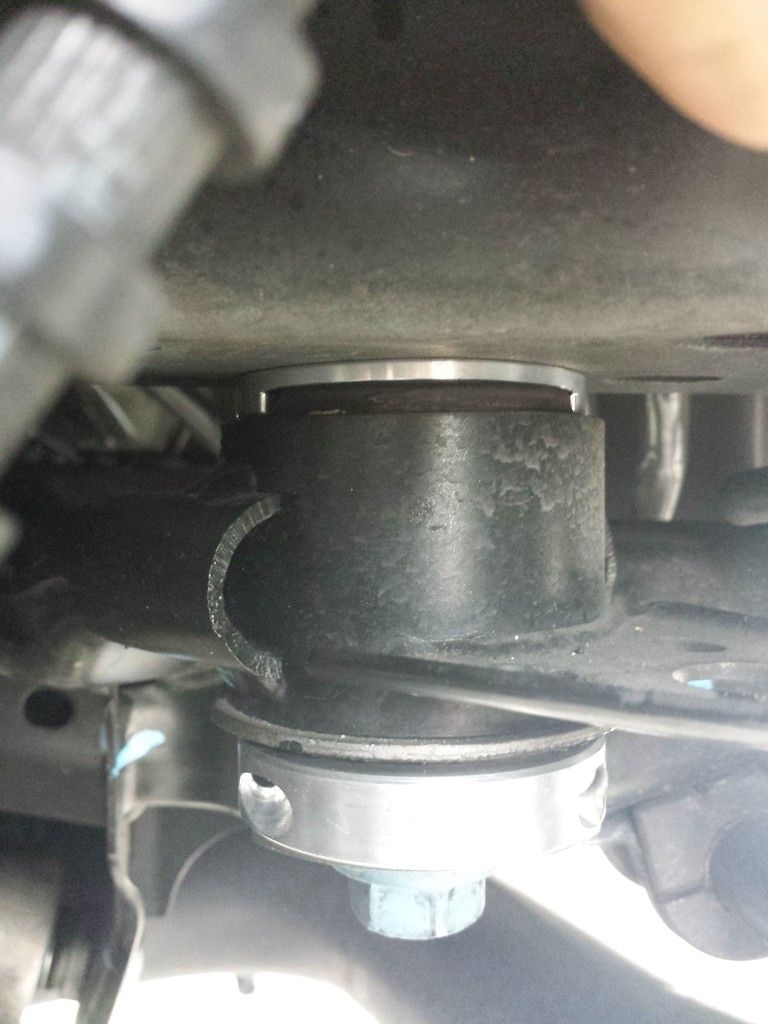
Rear Bushing Support installed

Let me say it was definitely noticeable. There was one spot I hit every day leaving work that would cause me to get a little wheel hop going if I was getting on it. Well in that situation the wheel hop was definitely taken care of with the Steeda Autosports IRS Subframe Bushing Support System. But let’s face for what I want to build this is just the beginning… And this car was going to be done different and right… I have always just done a build quick cheap and fast using whatever I could afford at the time I had money burning a hole in my pocket. I put chines parts on my Jeep that were half the price as others. Those parts failed caused other damage I had to repair and in the long run put the expensive part on anyway… Cheap Parts being replaced was a common thing on my other 2 builds…
So I drove around with the IRS Subframe Bushing Support System installed for the next two weeks while I tried to build a relationship with David over at Steeda. So I put together My Build list that in total it is 3 pages. He reviewed it and we discussed some options and moved some things around. So at this point after talking with David over the week I decided that I wanted to do this car right and that as long as Steeda was going to be there for me I would continue to purchase and install their parts on my car. Steeda Autosports has definitely been there to help out. So much so this build thread has taken this long to get going because I am busy installing parts. So with that said David and Patrick have been a big help all the time. I swear I talk to David 3 times a week. I was quick to buy the IRS Subframe Support Braces PN#555-5754. This part was extremely simple to install took me longer to get the car of the ground than what it took to install this.

I know I have more pictures somewhere of how they were packaged and all that I will keep my eye out for them…
After I installed the Steeda IRS Subframe Support Braces again an instant notice in handling performance was felt. Kind of hard to explain but the cornering is just tighter; the back end wants to follow you around. Body roll is less present when I slalomed around some light posts in one of my neighborhood large open parking lots. All around for the price this is one of those additions you just have to put on your S550.
Of course after seeing the quality of the IRS Subframe Support Braces Then Came the Extreme G-Trac K-Member Brace PN#555-5532. That along with Front and Rear Sway Bars PN#555-1017 and what else to top off the those giant blue beauties but none other than the S550 Billet Front and Rear Sway Bar Mount Kit PN# 555-8149and at this point I am in this deep on the order so may as well throw in a set of Progressive Steeda Sport Springs PN# 555-8210. After getting multiple prices all more than I thought it should be I figured I would take this on my own over the course of a weekend. And so it begins. This overall took me about 6 hours. I did have to make a couple stops to buy $40.00 worth of required tools to make your life easier and to install the G-Trac. 18MM hex key was one of those tools…
So first went the rear of the car. Super simple I was in an out in about 2 hours. Including removal of IRS Subframe Support Braces, Sway Bar and Springs and installation of the new Steeda Autosports Sway Bar and Billet Mounts, Springs and re-installing the IRS Subframe Support Braces. Torqued and dropped back onto the floor. Then I split for 4 hours to a company picnic.
Front and Rear Steeda Sway Bars

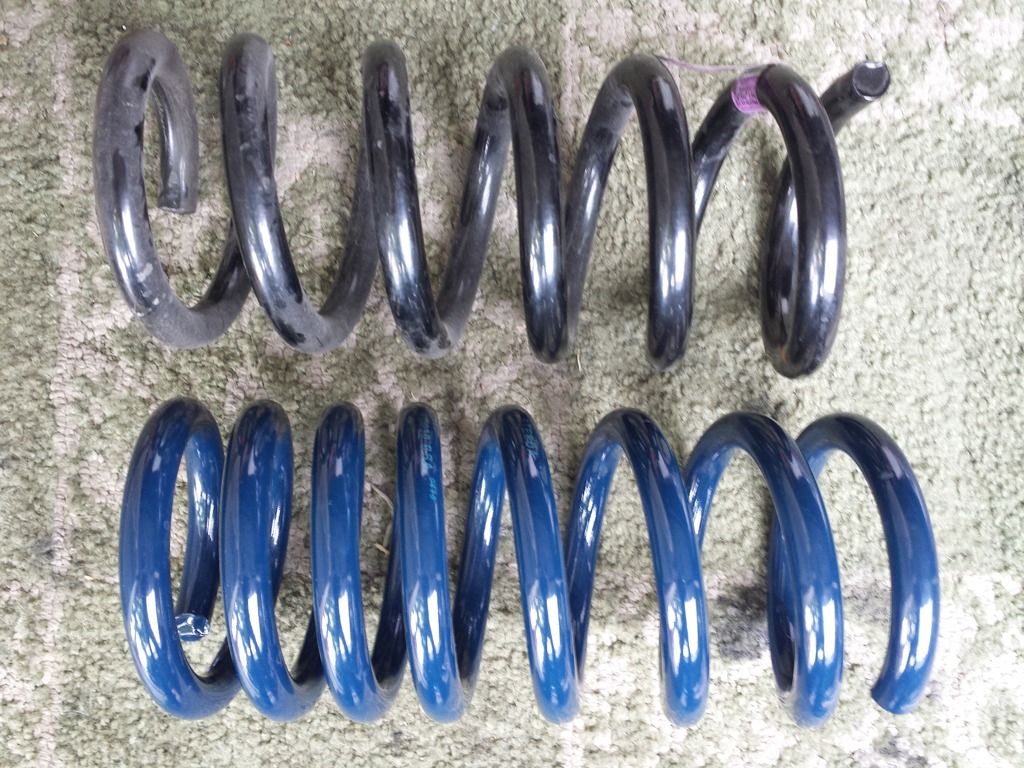
Front and Rear Coils comparison

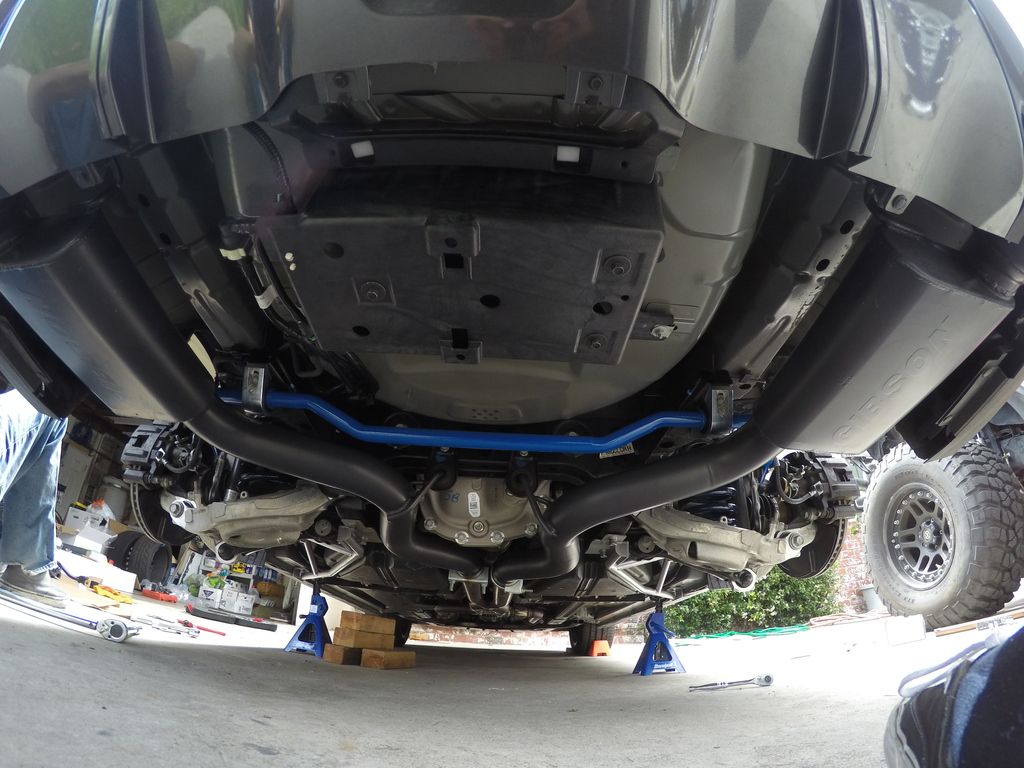
Here you can see the IRS Bushing support, Billet Sway Bar mount, Rear Sway Bar and the Progressive Lowering spring.


Here is a comparison of the rear sway bars next to each other. I apologize in advance. As the night went on after the picnic I got frustrated and stopped taking as many pictures… rear is picture heavy front is not… The factory one looks to be about 3/4” around and the new Steeda Bar is 1-1/8”


From bottom to top. Factory mount, Steeda Supplied mount, Steeda Billet Aluminum mount

Factory coils vs. Steeda Progressive Coils

Whole shot of the undercarriage looking nice and shiny may I add. That Ceramic Gibson exhaust is holding up nicely with about 5500 miles on it now.

Next came the front. I knew this would be a pain in the ass going in so I thought I was prepared but boy it was a little harder than I thought until gave up for the night. Then started over in the AM and things got much, much easier with the day light things came apparent and problems from the night before were easily conquered. This took me about 4 hours total Saturday and a few hours on Sunday still to button up a few issues I was having.
The front sway bar playing a little peekaboo this thing is a 1-3/8” diameter where the factory one looks to be 1-1/8”

Blurry but you get the idea how beastly this set up is becoming…

Nice close up of the G-Trac Gusset plate that connects and ties this brace together. This Extreme G-Trac Brace was even easier than the rear subframe braces. Seriously it took all of 15 minutes being the car was already off the ground.


Notice they put a nice little bend in the DOM to help tuck the Extreme G-Track up as high as they could. It is those little things the manufactures do that makes you know they are still thinking about the end user.

Another shot after I turned that Exhaust clamp to the side. I started to add these red rubber caps to the bolt heads. I found them at my office in a box and knew I would find a use for them…

My next order should be coming soon so please stay tuned. I will be updating this a few days behind my Instagram account. So again go follow that if you are on the gram. @projectmenace
Okay so to bring you up to speed to date I have a
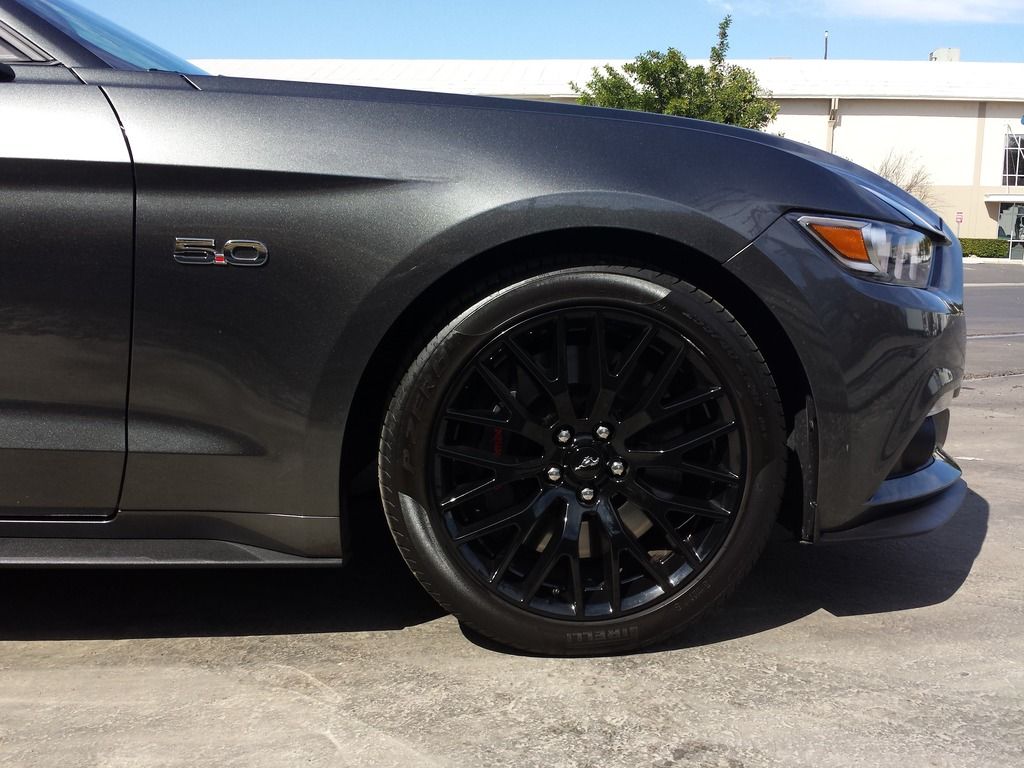
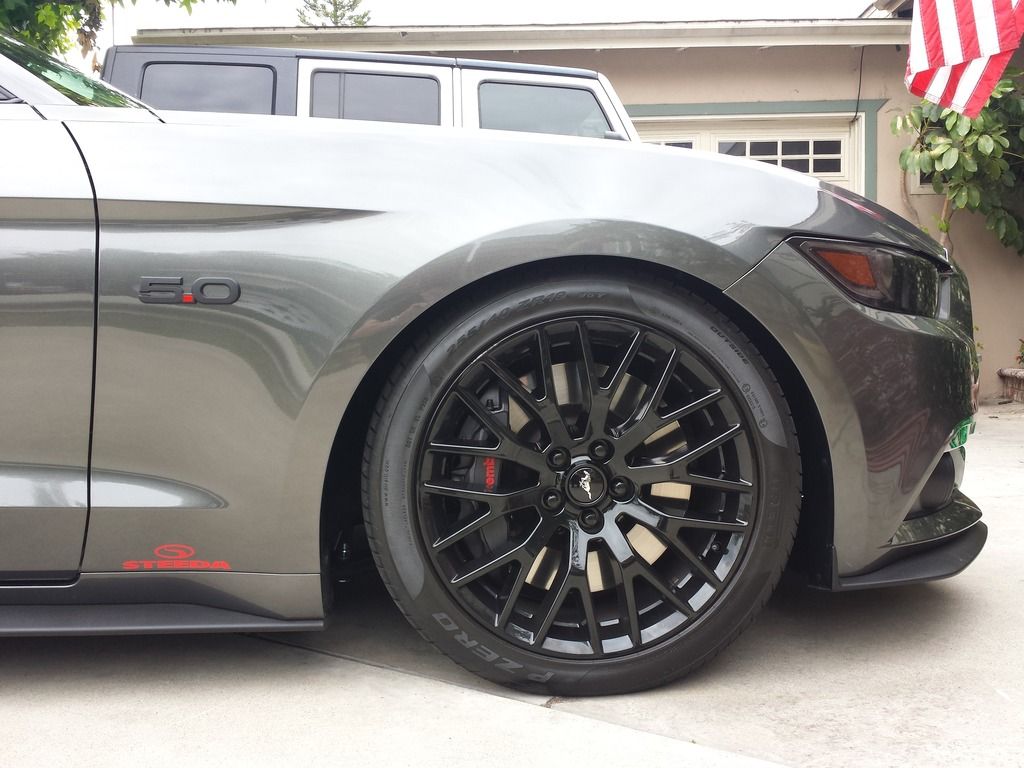
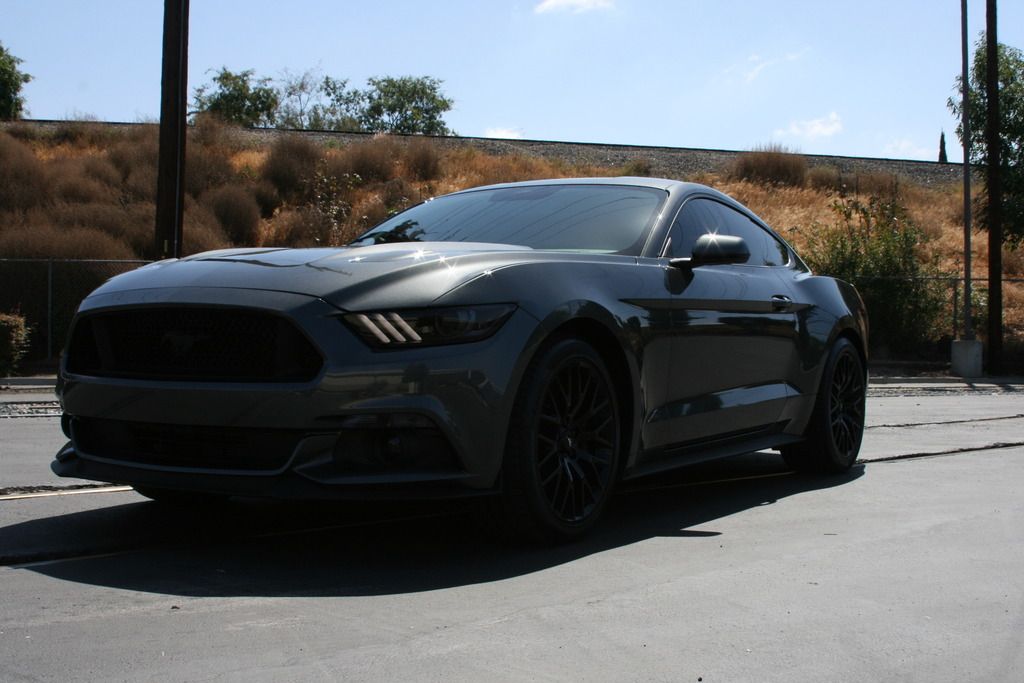
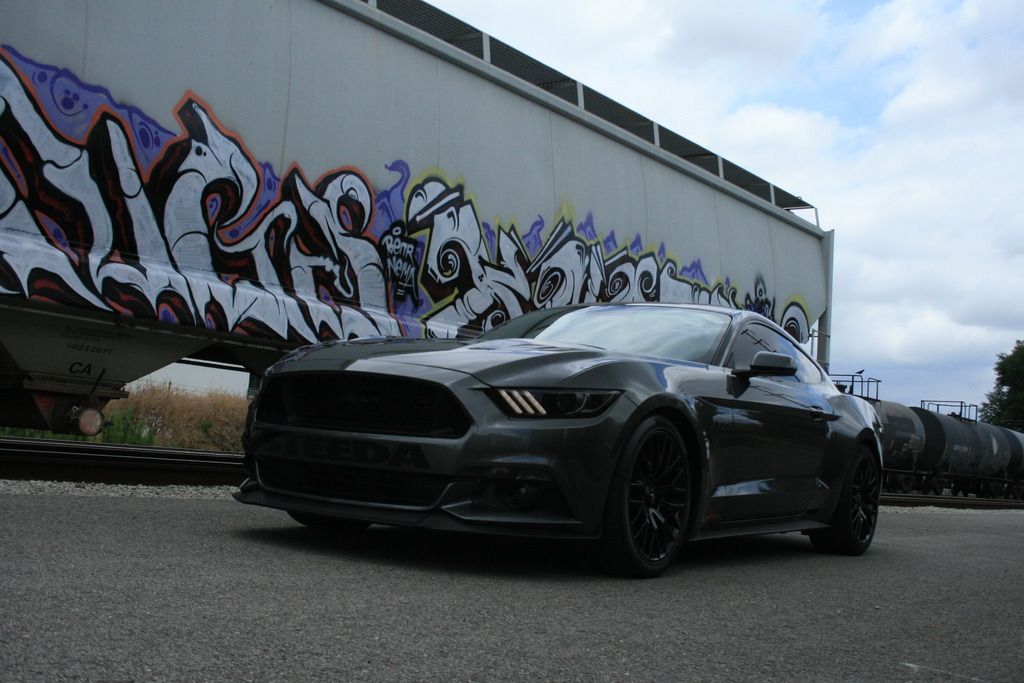
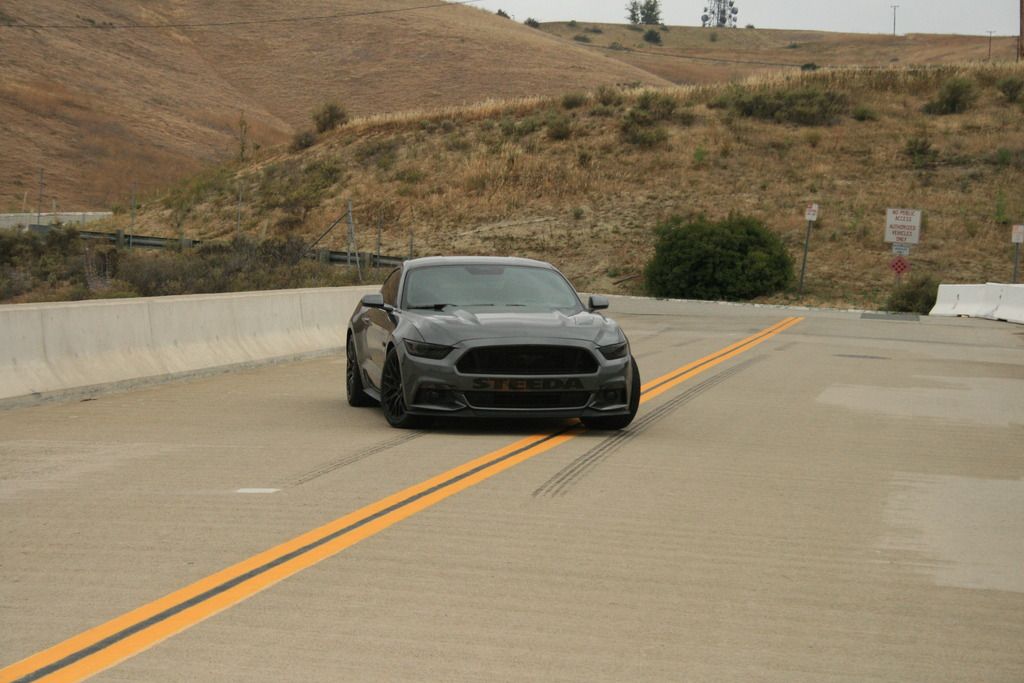
Gibson Cat Back, VMP 91 Octane tune, K&N Intake, Steeda Front and rear sway bars with billet mounts, Steeda IRS bushing support Kit, Steeda Lowering springs, Steeda Extreme G-Trac Brace, Steeda IRS subframe Braces. Blacked out emblems and Gun Smoke vinyl on every light on the car. I think that is it. For Now…
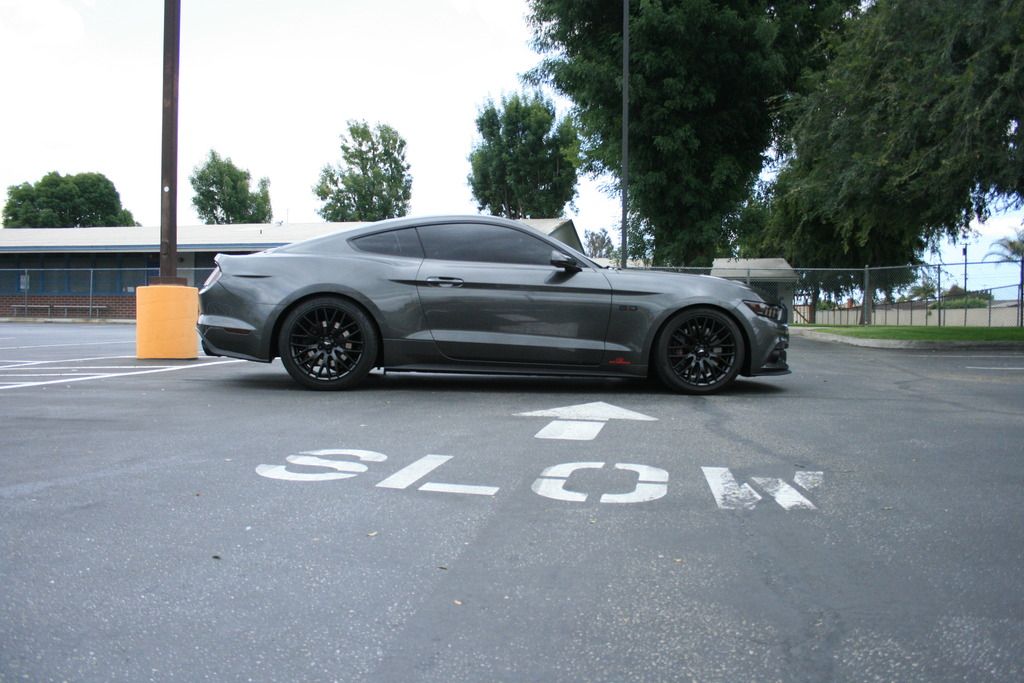
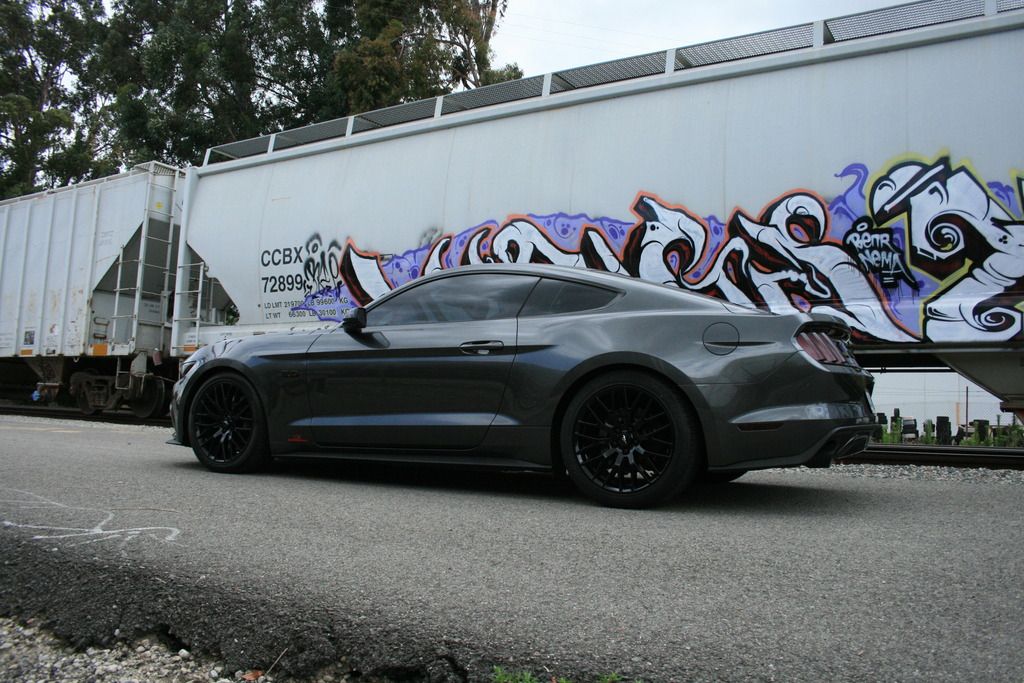
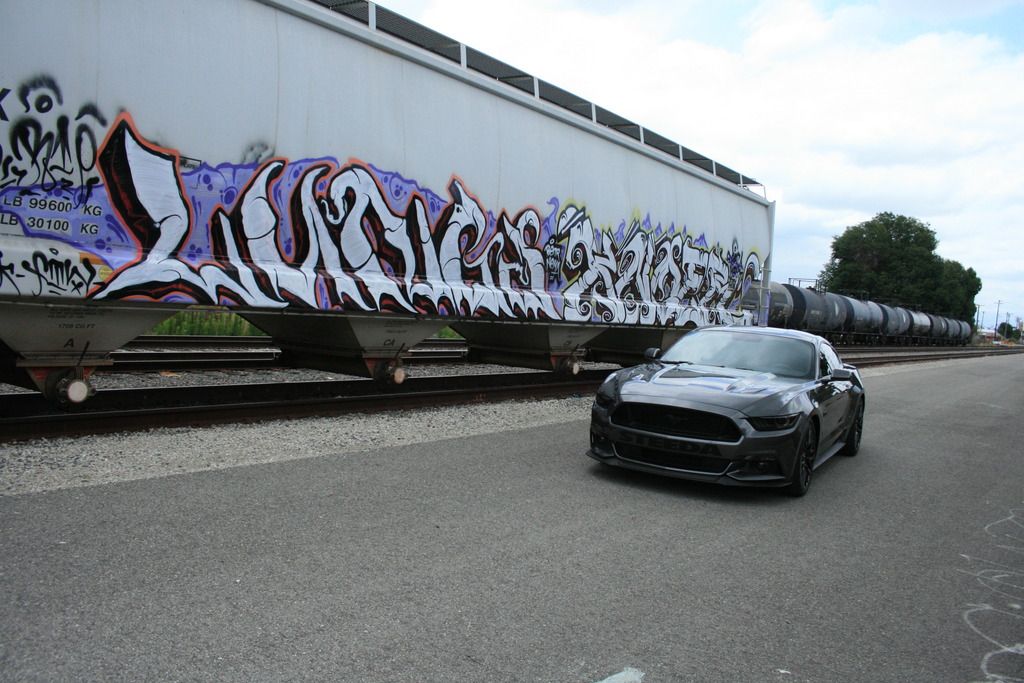
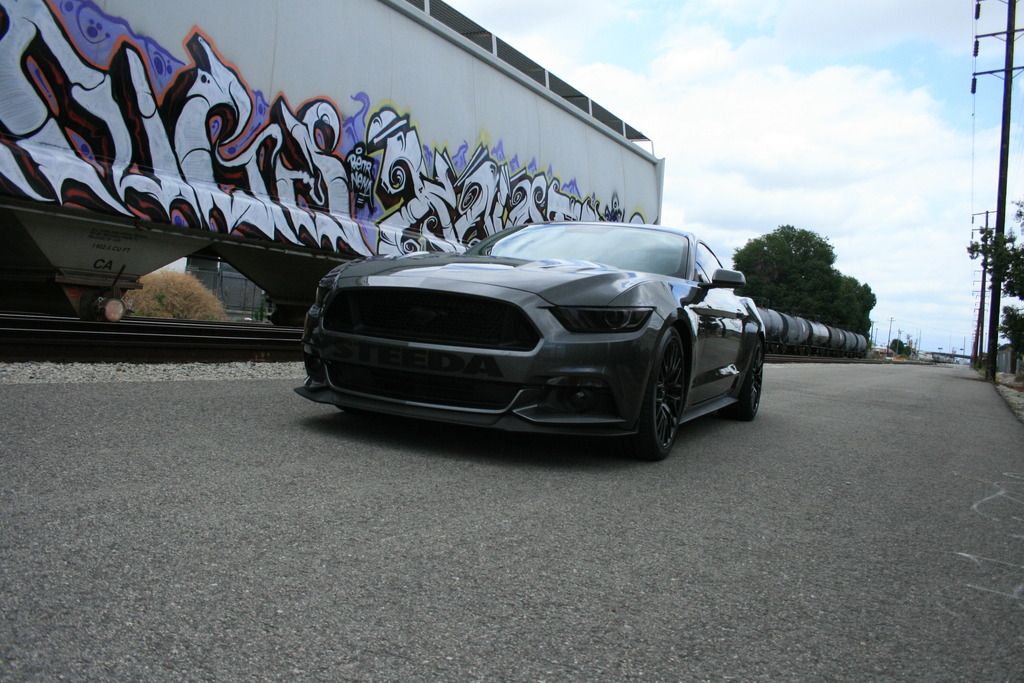
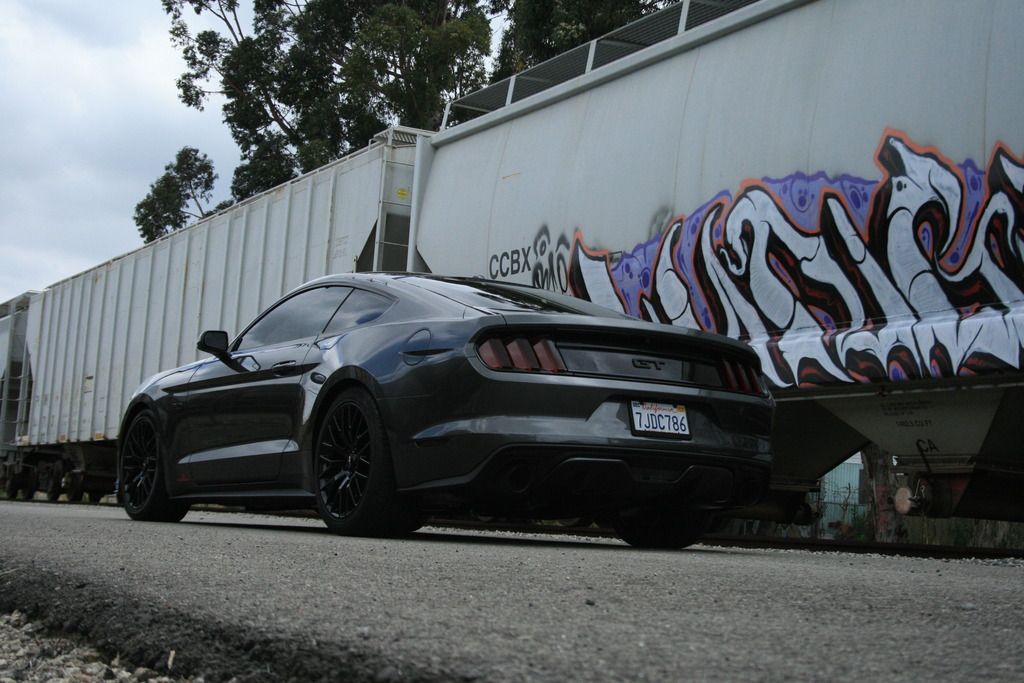
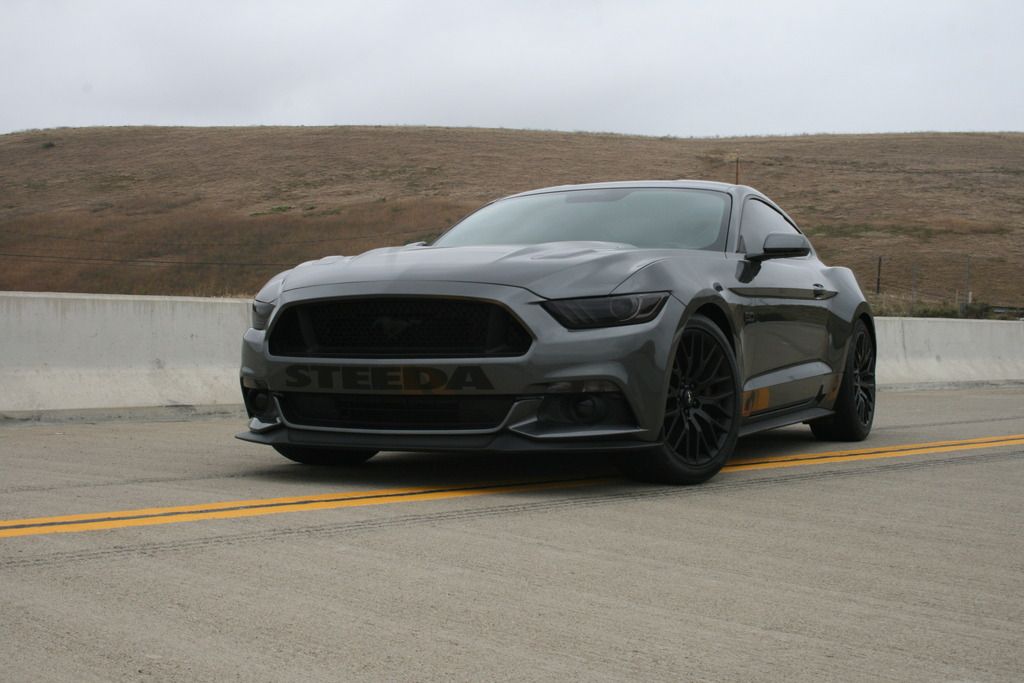
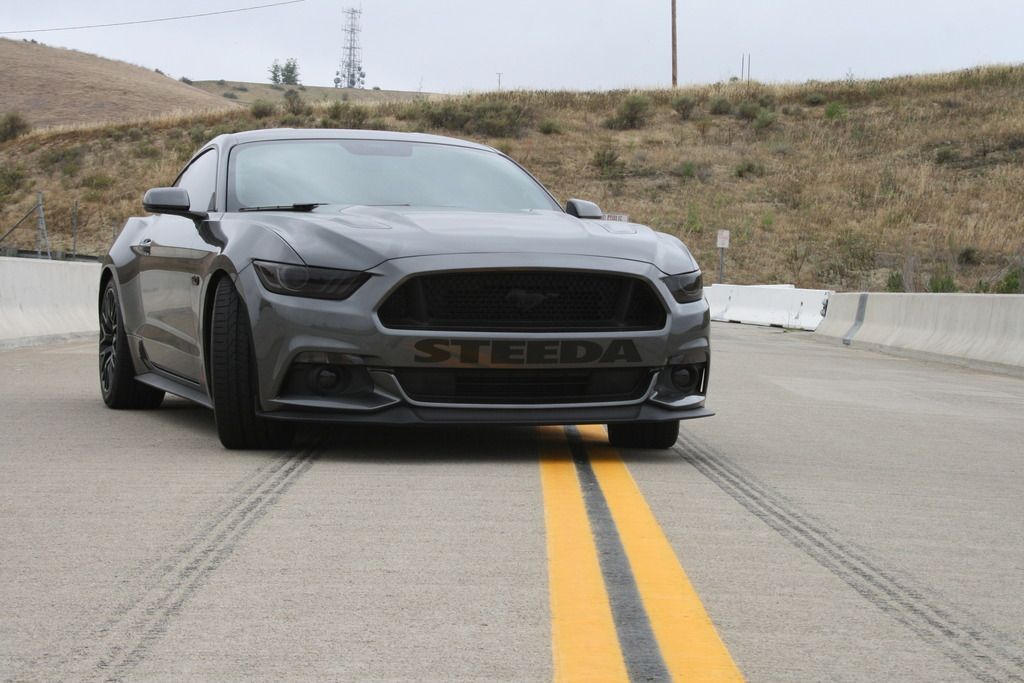
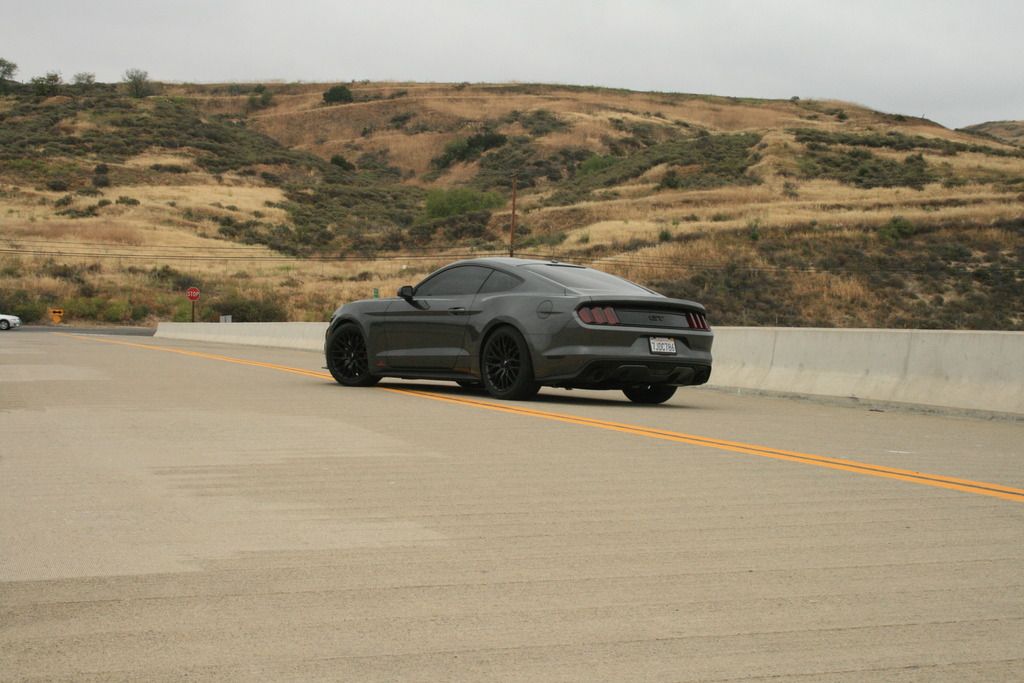
Here are some after shots. It definitely shows the progress on the car.


IRS, Frame Stiffening, Handling:
ISC Suspension N1 Coilovers
Coyote Performance Racing Front Sway Bar End Links
Steeda IRS Subframe Bushing Support
Steeda IRS Subframe Support Braces
Steeda IRS Subframe Alignment Kit
Steeda Extreme G-Trac K-Member
Steeda Ultra Lite Chassis Jacking Rails
Steeda Front and Rear Sway Bars
Steeda Front and Rear Billet Sway Bar Mounts
Steeda Vertical Links
Steeda Adjustable Toe Links
Steeda Adjustable Differential Bushing Insert System
Steeda MT 82 Bushing
Engine, Performance & Dress:
Gibson Black Ceramic Cat Back
Steeda Tri-Ax Race Short Throw Shifter
Steeda Restrictorless Cold Air Intake
Steeda 91 Octane Tune
Steeda Hood Struts
Steeda Strut Tower Brace
Moroso Coolant Expansion Tank
UPR Single Valve Oil Catch Can Separator
UPR Billet Strut Tower Caps
Exterior/Interior:
GT350 Steering Wheel
RTR Side Rocker Splitters
RTR Rear Diffuser
MMD Rear Window Louvers
Roush Side Scoops
UPR Satin Black Emblems
Lights Full Vinyl Tint
15% Tint all around
Black Lug Nuts
So this will be my official Build Page so I can track the progress or lack thereof on this project. Also check out @projectmenace if you are into instagram
Brief About Me… I Am 36, married with 2 kids. One 16 year old son and one 8 year old daughter. I am Born, Raised and still live in SoCal. I love Guns, Watches, Knives and vehicles be it a 4x4 or a lowered sports a car or anything in between. While I have always had some sort of fun vehicle this is my first Ford and therefore my first Mustang. This is my first car over 400WHP. My 04 Dodge RAM wash pushing about 385 to the wheels. I just came out of my first and only foreign car a turboed Hyundai Genesis Coupe which was only pushing about 230RWHP. I Miss the Turbo Spool and BOV sound… And with that said some kind of FI is the end result of this build. This build will have burst of momentum and then slow down. depending on if I get any help from vendors and suppliers and let’s face it if my wife lets me do what I would like to do… so feel free to keep reading a brief how I got to this car or skip down to Phase #4 and start seeing some pictures. Thanks for reading if you do. feel free to ask some questions i will try my best to answer.
Phase#1 the OLD CAR
It all started In February of 2014 when my Hyundai was starting it’s lemon Law suit for the Factory Brembo Brakes failing on the car a total of 8 times. Long story but after 4 times in the dealer each time except the first the replaced something… long story short my attorney did not want to pursue the case considering the modifications to the car. So Hyundai attorney wrote me a letter saying they fixed the problem and the car is 100% properly functioning so I sold the car which was paid off. I kept all my Stock stuff so I parted the car out which is where I ended up with my mod money I currently have/spent…
Phase#2 the Hunt.
Being a father of 2 I was originally looking at the Twin Turboed Taurus SHO. Come on AWD twin blown V6 what’s not to like heated and cooled Messaging seats WTF…. Anyways looking at ford because my Sister in Law has been with Ford for 30 years and it is the only way I can get an almost 50K car for what I can actually afford. I test drove a bunch of cars. 13/14 Mustang GT, 14 and 15 STi and WRX, 14/Camaro, 14 SHO, 14 Focus ST, 14/15 Dodge Challenger and Charger, and probably some other cars but long story longer One day now in September I jokingly Text my Wife “I have narrowed it down to the SHO or the 2015 Fastback. “And I sent her picture of both the car’s interior and exterior and she immediately text me back and said get the Fastback. At this time I will tell you I own a Chevy Tahoe and a Jeep Wrangler Unlimited so we have 2 four door family cars already…
Phase#3 the Order
So September 25th 2014 I talked to the GM over at Fairway Ford in Placentia California and got a rough Idea of the price and options. Obviously the 15 was not out on the street yet so I could not physically see anything or drive it. And driving let’s face it with all the Hype of what the 15 was supposed to be driving the 13 and 14 in test drives was not going to do it justice. So I figured Eff it what do I have to loose. So I ordered it and on 9/29/14 I got my first email saying I ordered it but still was not assigned a VIN. Finally on 11/12/14 I finally got notification that I received a VIN but no ETA. Then as with my luck (if I did not have bud luck I would not have any luck at all) the they told me it would be in first week of December but then it was stuck on a train and then I was told I would have it on Pearl Harbor day but that did not happen and then Finally I got the call on 12/10/14 that the car was on its way and to come down and pick it up. So I got there before my car did and sat around for a few hours watched them off load it with only 3.2miles on the odometer I was sure I was the only one to ever drive this car…. Of course before I bought it, they had a GT with the same package I got and they threw me the keys and let me take it out for a while. Needless to say I enjoyed the drive…
The first days of owning my Mustang… Poor little girl has no idea what is about to happen to her…
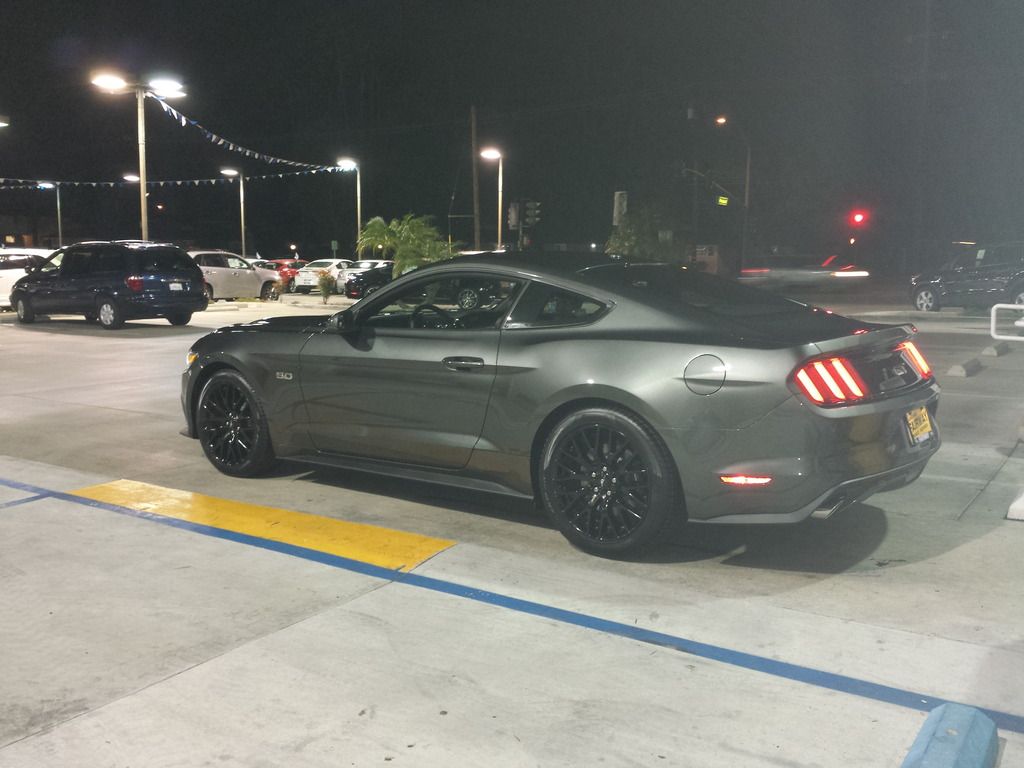
At the dealer
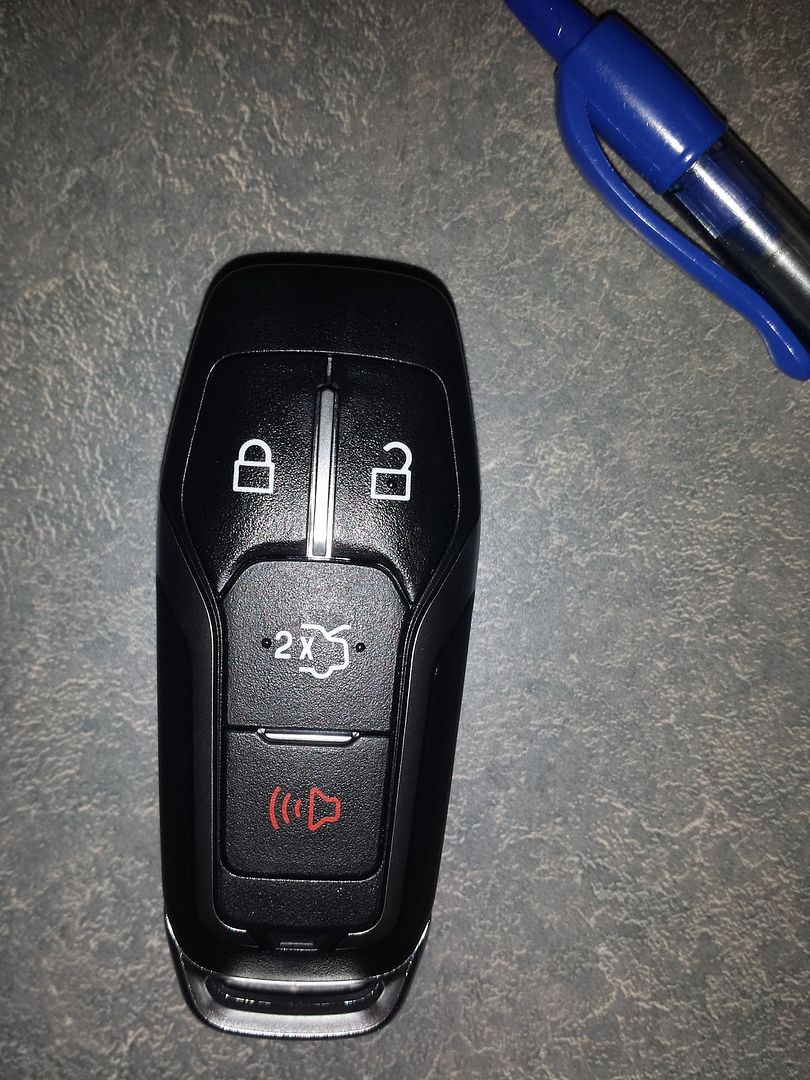
This thing may as well be a 4x4... look at that wheel gap.
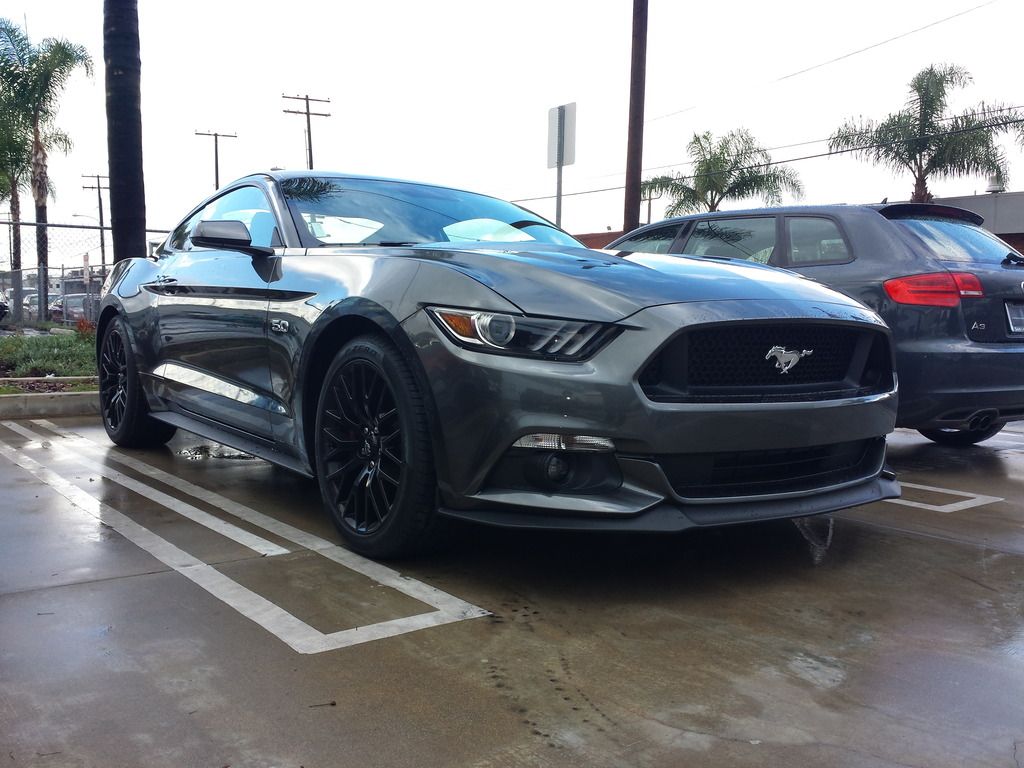
The next day at the office. Kind of sucked it rained the first several days… Again that wheel gap tho...
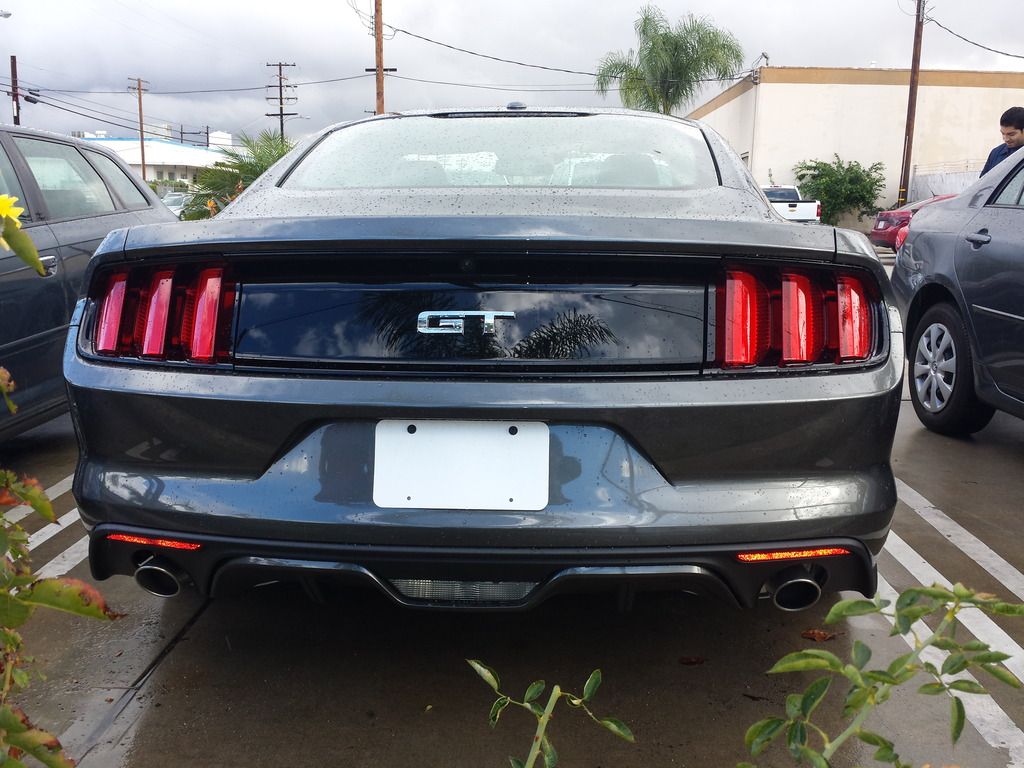
Take a look at this end, cuz it will probably be the last time you ever see her look this chrome...
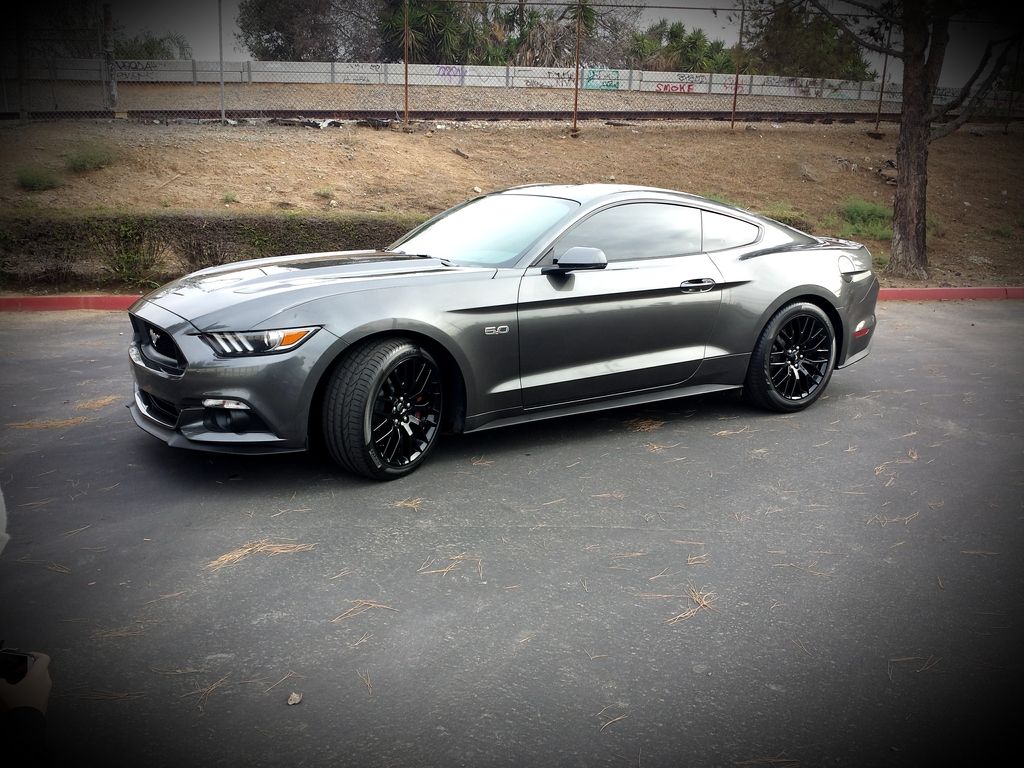
Enough of the boring stuff
Phase#4 The Build
Obviously it did not take long to start working on the car. I won a free install at a Christmas party at 281 Motorsports in Placentia. And promptly ordered my Black Ceramic Coated Gibson Cat Back Exhaust on 12/16/14 with the holidays and shops being busy it took a few weeks for me to get and then there was the whole K&N thing… K&N took my Car 1/7/2015 for R&D they had the car for almost 2 weeks. I assume to play around with the car… They needed it stock for baseline tests. Anyways after I got the car back I promptly made my appointment to get my Exhaust installed. I actually do not remember that date… anyways I got her back the same day and Man what a difference not only the sound but the butt dyno performance gains felt huge.
281 Motorsports installation before and after pictures from their Facebook page.
BEFORE as if you could not tell…
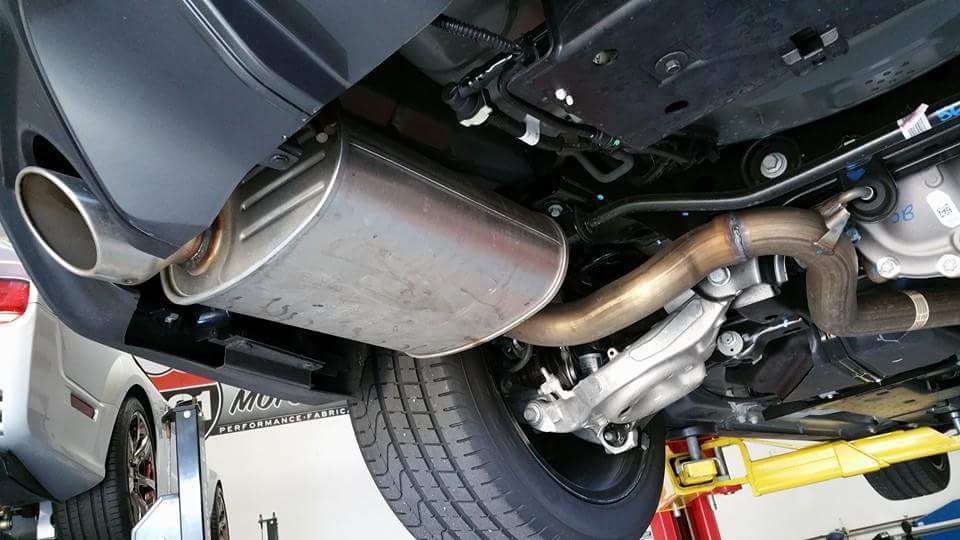
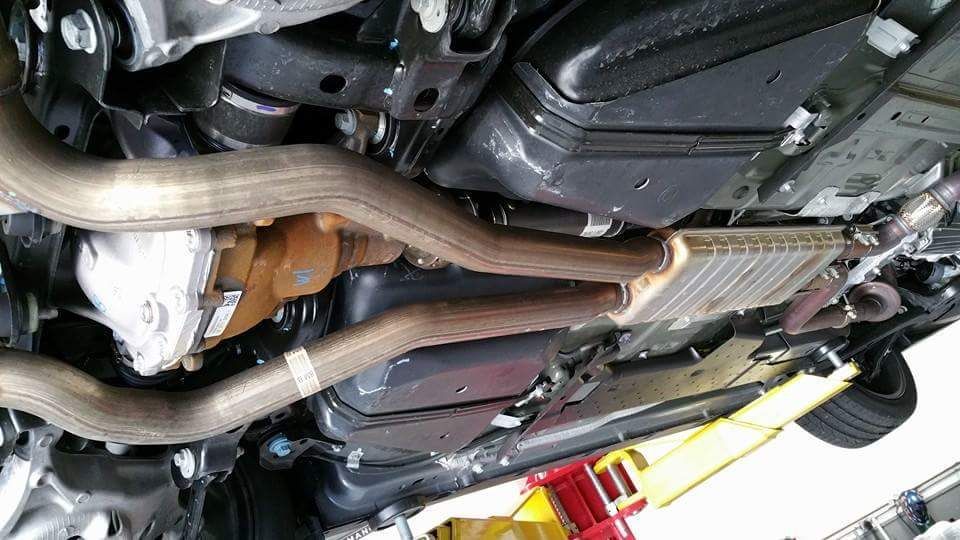
If I remember we shaved a total of 12 pounds off during installation?
This one piece exhaust was fun to get home…
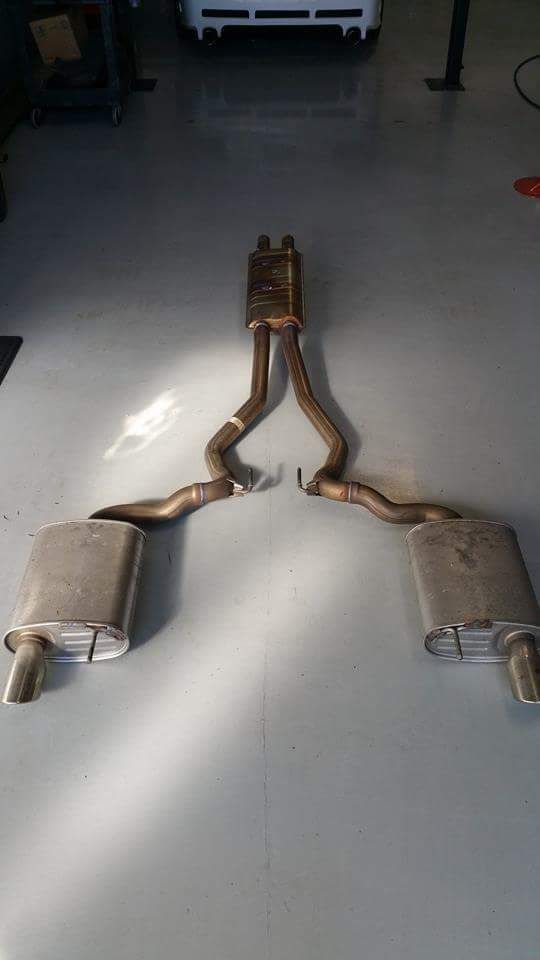
Gibson exhaust really came through on this one. Great product, easy installation sound is great I now have about 5,500 miles on the system and it still sounds great.
It’s the little things. MADE IN THE USA
Looks just amazing here…
It still looks this clean I swear…
You will see later as I get going on the build I turn this clamp to the side. Not sure why 281 left it like this and not sure why Gibson supplied these style clamp on the kit?
The tips really fill the factory exhaust cut outs very well and that Black Ceramic finish just blend right in.
So after surviving the Holidays it was time to resume. In the process of selling the Hyundai I may have mentioned it was mildly built. So the whole reason why I do all my own work and keep all my factory parts is because I enjoy returning the car to stock selling it for a fair price and then yea you guessed it sell all the old parts. So at this point in time i am going to start to spend some of the money.
Justin from VMP Superchargers came thru with NOPE not a supercharger… but Yes a SCTX4 Tuner with three of his custom tunes loaded on it. Justin is a stand up dude. He provides customer service that is well, Great! He is there for me pretty much every time I need him except once and that was a race weekend. So can’t blame him there…
All I have to say is the 91 tune is night and day difference from stock improved throttle response for beginners. It was cool because I paid attention to the AFR gauge, Intake inlet things like that before and after.
This showed up today 2/20/2015 this could not have been any easier to use literally done in 30 minutes. Instant madness to the pedal…
Someone is about to be going a little faster 0-60… and then some.
So let’s rewind for a second before I got the Tuner the K&N R&D Team Came… Long story a buddy of mine from the office knows one of the guys who works R&D so he got me in the door. They took the car bone stock Before Jason at 281 got his hands on her… So anyways Long story longer After a total of 13 days 10 were the original R&D days then fast forward to March and they took her again for three days for actually CARB Approval piece install, installation pictures for their instructions Dyno test etc. I have not seen the installation instructions myself but chances are it is The Menace that is in there…
Okay so to bring you up to speed to date I have a Gibson Cat Back, VMP 91 Octane tune and the newly installed K&N Intake.
So April time rolls around and I am just feeling the itch to continue so I do some research on lowering springs, chassis stiffeners and other suspensions components to help plant the current power The Menace is making. I figure this time I am going to start from the ground up I am going to start to build the suspension starting with the IRS. Well long time manufacture of aftermarket Mustang parts Steeda Autosports keep coming up. They seemed to be the only ones on the market that were both Making and Providing a full line up for the IRS. So I decided to give them a call and see what we could come up with in the mean time I ordered some of the easier to obtain in my price range parts like the IRS Subframe Bushing Support System PN#555-4437 and the IRS Subframe Alignment Kit PN#555-4438. The alignment kit is a fun installation if you like to get dirty. It is an easy install for the most part. I ran into a few issues here and there but all in all it took me about 3 hours start to finish from getting the car off the floor to putting it back on the ground. Should have taken 2 hours if I figured out how to get the flathead wedged in the correct spot sooner. On the short side of the collar (the only part that is split in 2) that goes towards the inside of the car, you can get your midsized flat head just behind it, on the inside of the collar closest to the rubber bushing. Using a lube on the rubber bushing you can do a little prying on it and the small ring just glides right around the bushing. Man I wish I took a picture so simple yet so hard to explain. I will try to put some kind of pdf snap shot or something together to try to explain better.
MADE IN THE USA
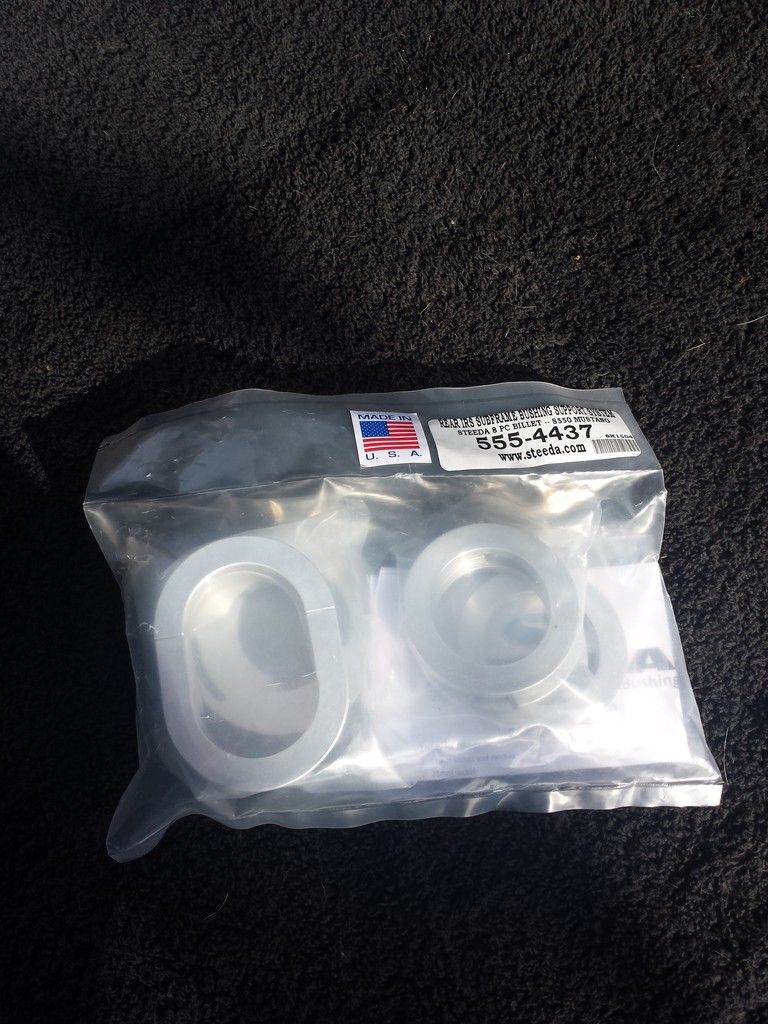
Un-packaging the quality looks great I wish I took more pictures But as usual I was pressed for time on the weekend. FYI I work way too much during the week and trying to squeeze time in to work on The Menace when I should be spending time with the family makes for some quick installations or it is my butt…
Front Bushing supports installed
Rear Bushing Support installed
Let me say it was definitely noticeable. There was one spot I hit every day leaving work that would cause me to get a little wheel hop going if I was getting on it. Well in that situation the wheel hop was definitely taken care of with the Steeda Autosports IRS Subframe Bushing Support System. But let’s face for what I want to build this is just the beginning… And this car was going to be done different and right… I have always just done a build quick cheap and fast using whatever I could afford at the time I had money burning a hole in my pocket. I put chines parts on my Jeep that were half the price as others. Those parts failed caused other damage I had to repair and in the long run put the expensive part on anyway… Cheap Parts being replaced was a common thing on my other 2 builds…
So I drove around with the IRS Subframe Bushing Support System installed for the next two weeks while I tried to build a relationship with David over at Steeda. So I put together My Build list that in total it is 3 pages. He reviewed it and we discussed some options and moved some things around. So at this point after talking with David over the week I decided that I wanted to do this car right and that as long as Steeda was going to be there for me I would continue to purchase and install their parts on my car. Steeda Autosports has definitely been there to help out. So much so this build thread has taken this long to get going because I am busy installing parts. So with that said David and Patrick have been a big help all the time. I swear I talk to David 3 times a week. I was quick to buy the IRS Subframe Support Braces PN#555-5754. This part was extremely simple to install took me longer to get the car of the ground than what it took to install this.
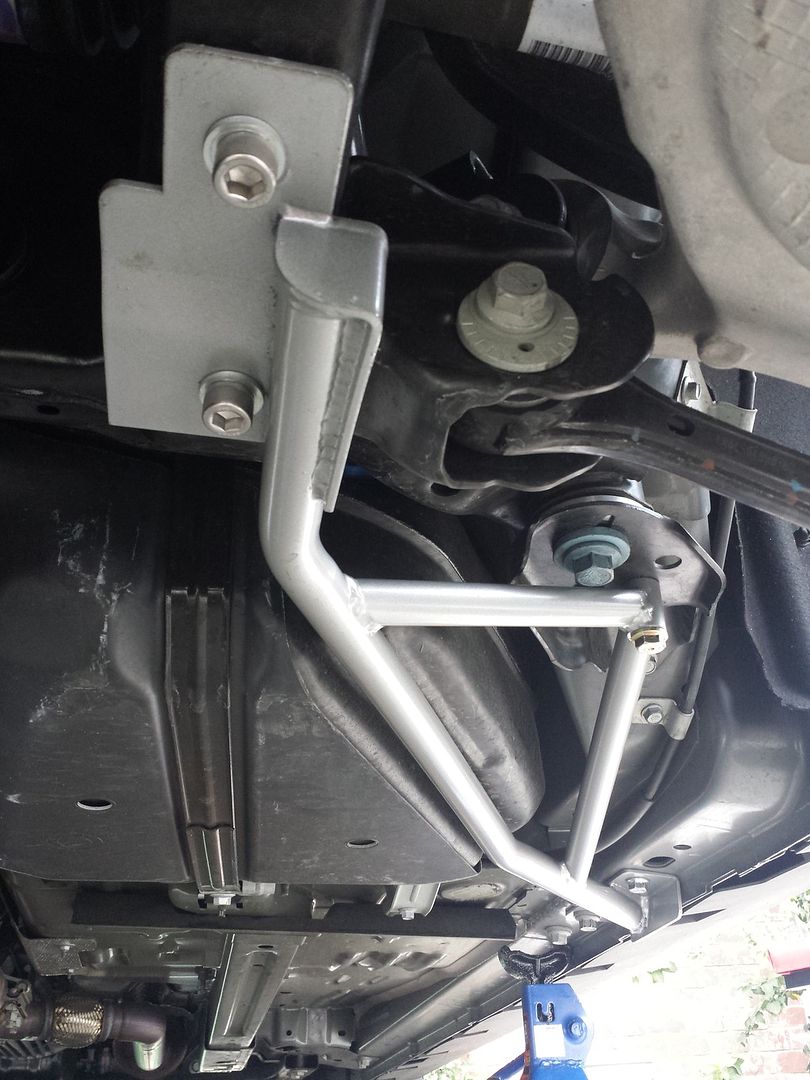
I know I have more pictures somewhere of how they were packaged and all that I will keep my eye out for them…
After I installed the Steeda IRS Subframe Support Braces again an instant notice in handling performance was felt. Kind of hard to explain but the cornering is just tighter; the back end wants to follow you around. Body roll is less present when I slalomed around some light posts in one of my neighborhood large open parking lots. All around for the price this is one of those additions you just have to put on your S550.
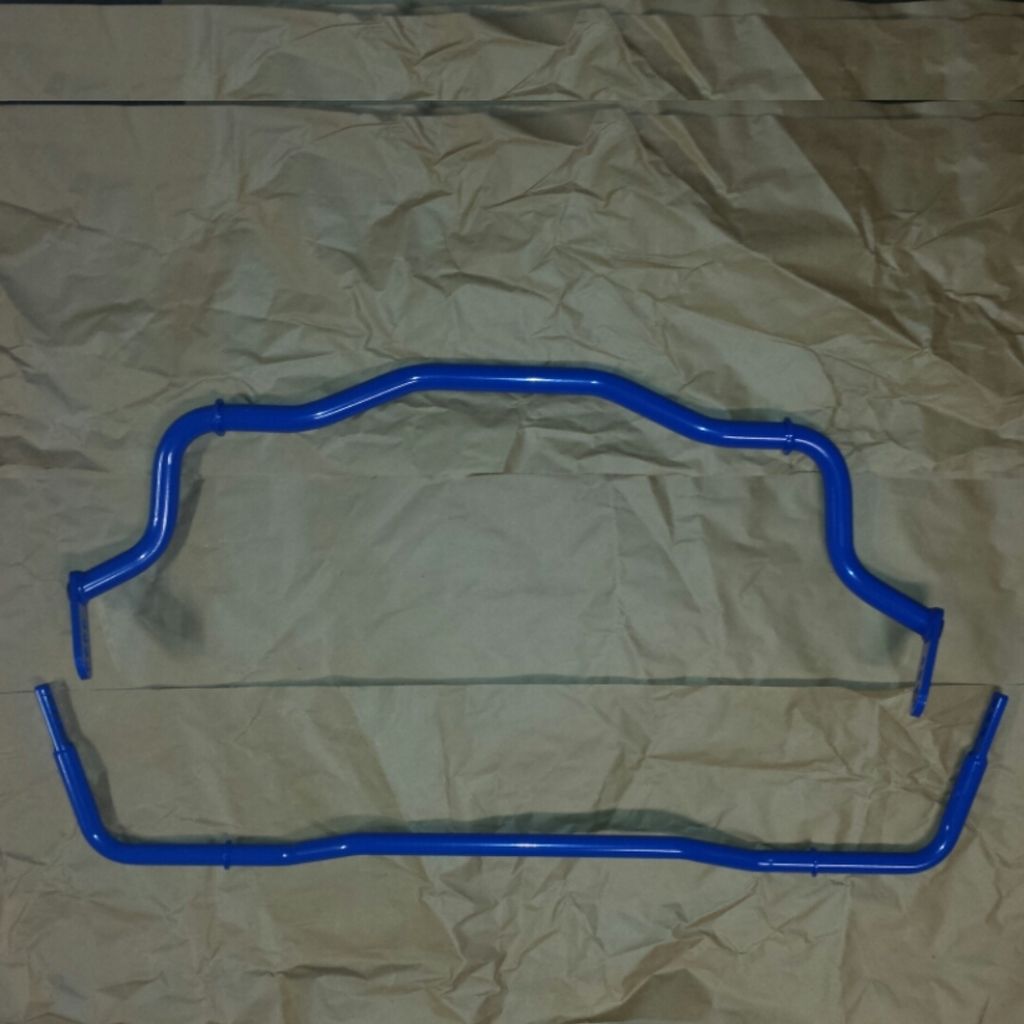
Of course after seeing the quality of the IRS Subframe Support Braces Then Came the Extreme G-Trac K-Member Brace PN#555-5532. That along with Front and Rear Sway Bars PN#555-1017 and what else to top off the those giant blue beauties but none other than the S550 Billet Front and Rear Sway Bar Mount Kit PN# 555-8149and at this point I am in this deep on the order so may as well throw in a set of Progressive Steeda Sport Springs PN# 555-8210. After getting multiple prices all more than I thought it should be I figured I would take this on my own over the course of a weekend. And so it begins. This overall took me about 6 hours. I did have to make a couple stops to buy $40.00 worth of required tools to make your life easier and to install the G-Trac. 18MM hex key was one of those tools…
So first went the rear of the car. Super simple I was in an out in about 2 hours. Including removal of IRS Subframe Support Braces, Sway Bar and Springs and installation of the new Steeda Autosports Sway Bar and Billet Mounts, Springs and re-installing the IRS Subframe Support Braces. Torqued and dropped back onto the floor. Then I split for 4 hours to a company picnic.
Front and Rear Steeda Sway Bars
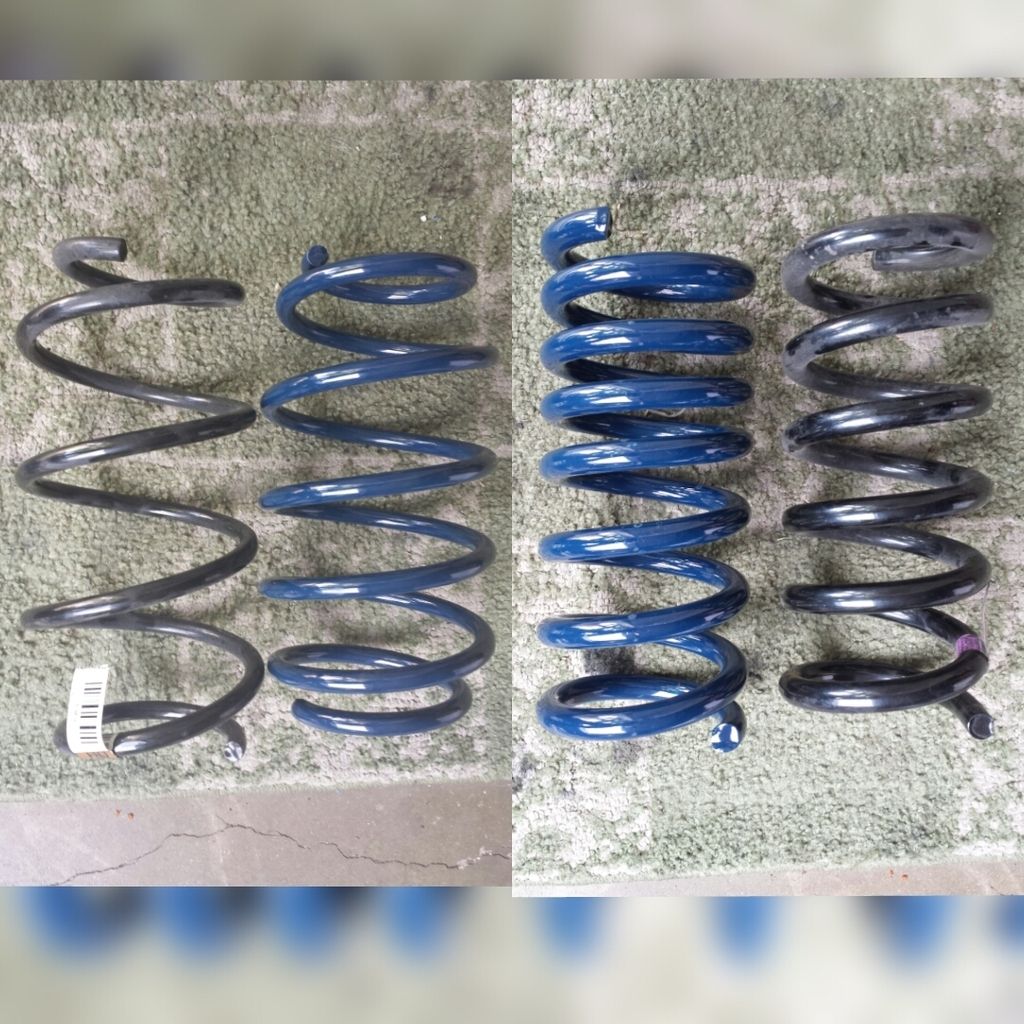
Front and Rear Coils comparison
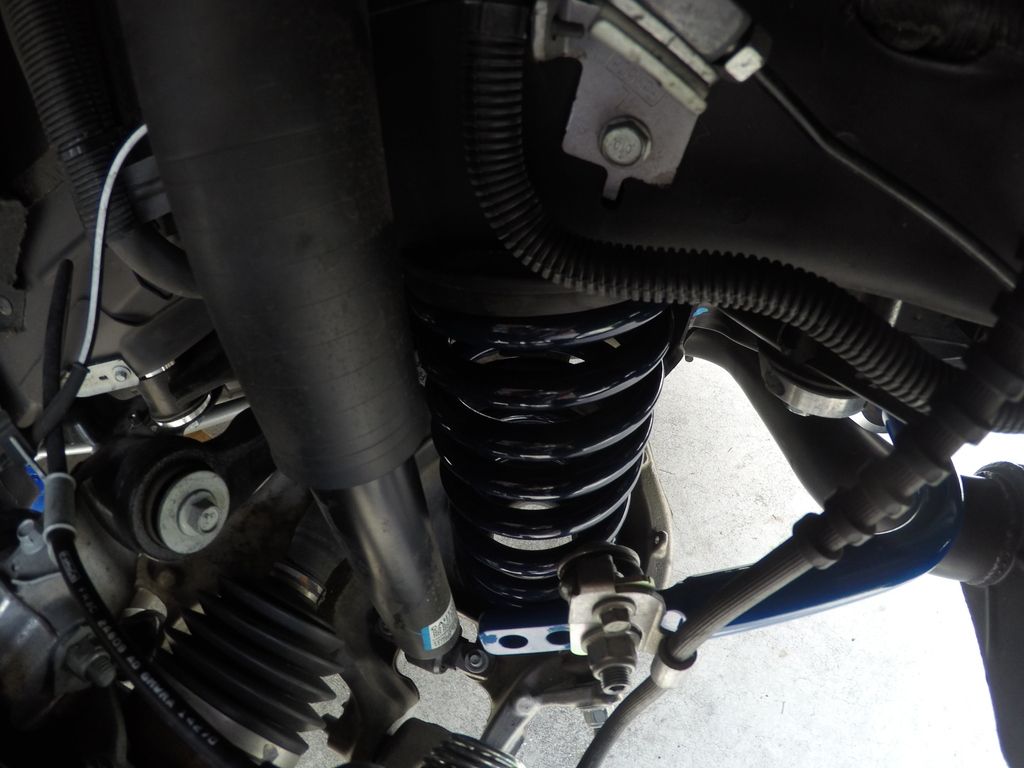
Here you can see the IRS Bushing support, Billet Sway Bar mount, Rear Sway Bar and the Progressive Lowering spring.
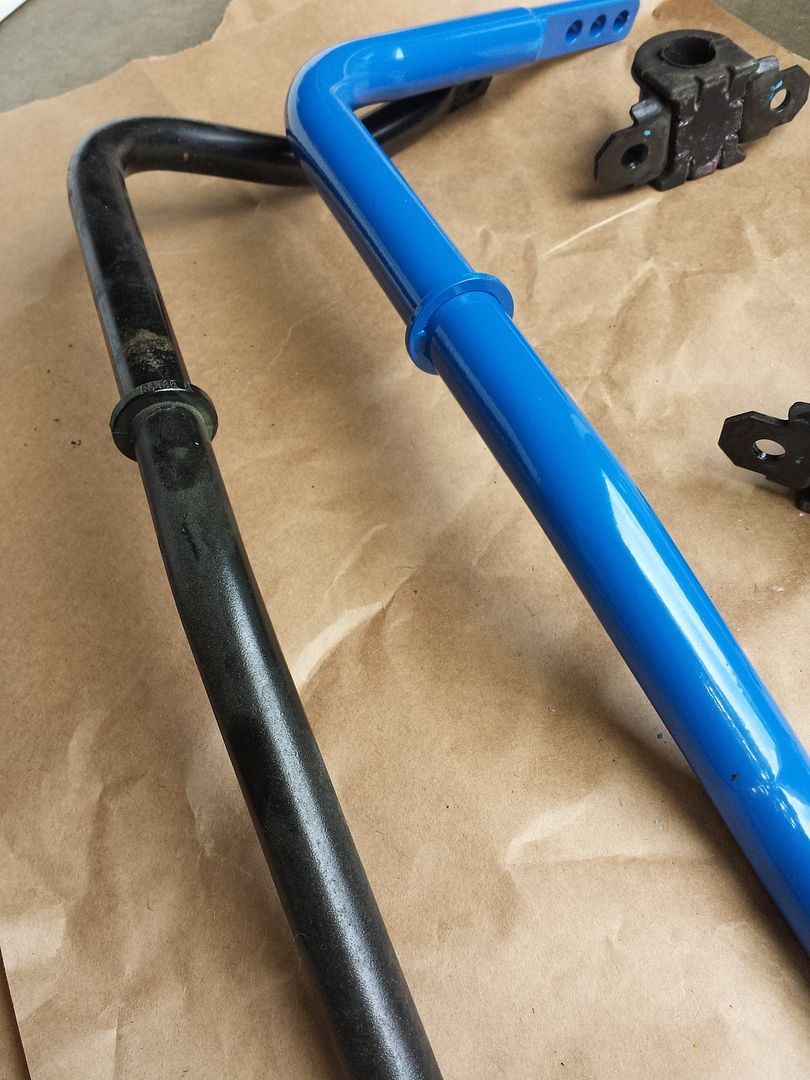
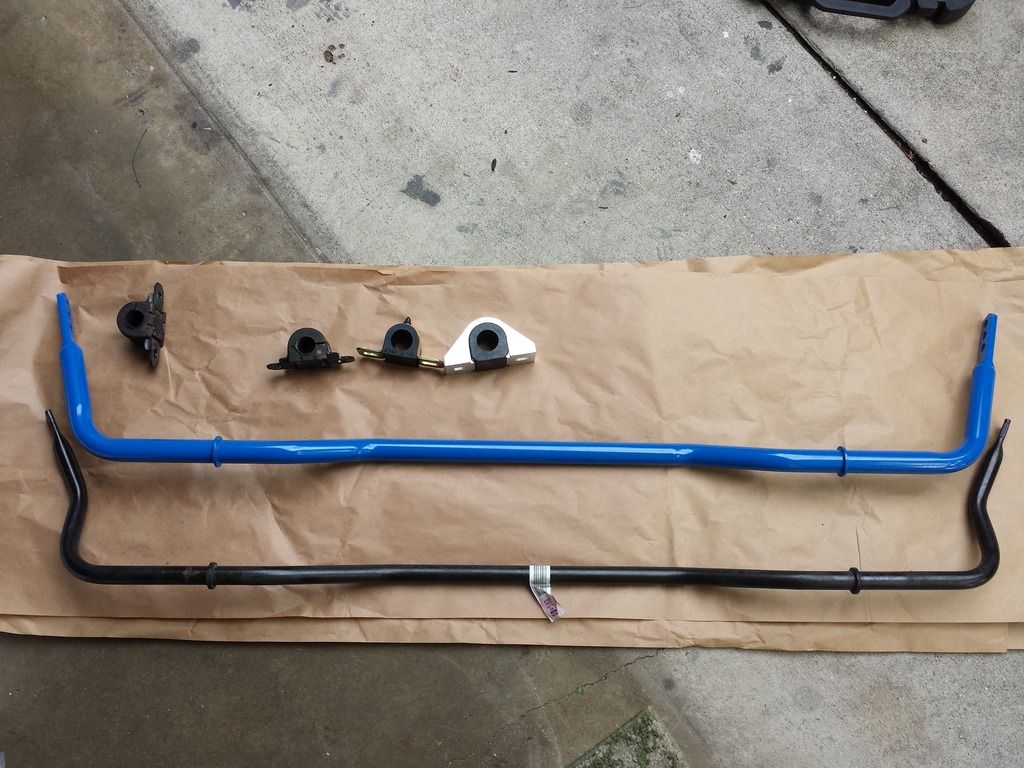
Here is a comparison of the rear sway bars next to each other. I apologize in advance. As the night went on after the picnic I got frustrated and stopped taking as many pictures… rear is picture heavy front is not… The factory one looks to be about 3/4” around and the new Steeda Bar is 1-1/8”
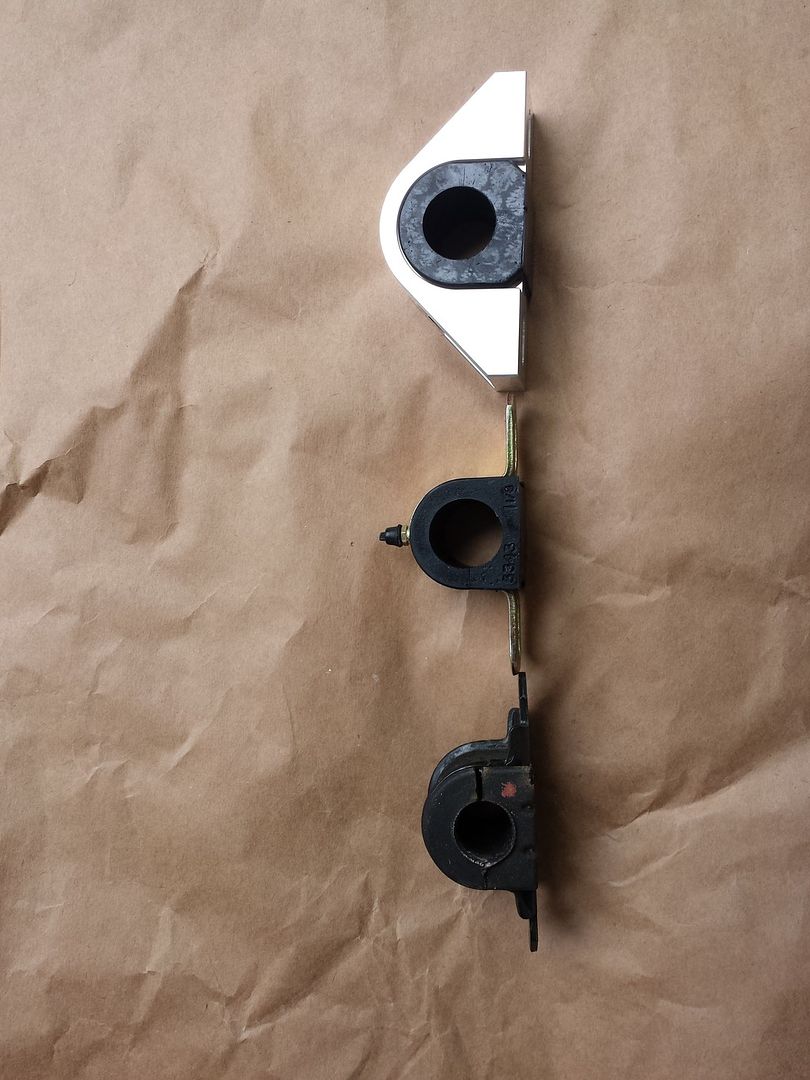
From bottom to top. Factory mount, Steeda Supplied mount, Steeda Billet Aluminum mount
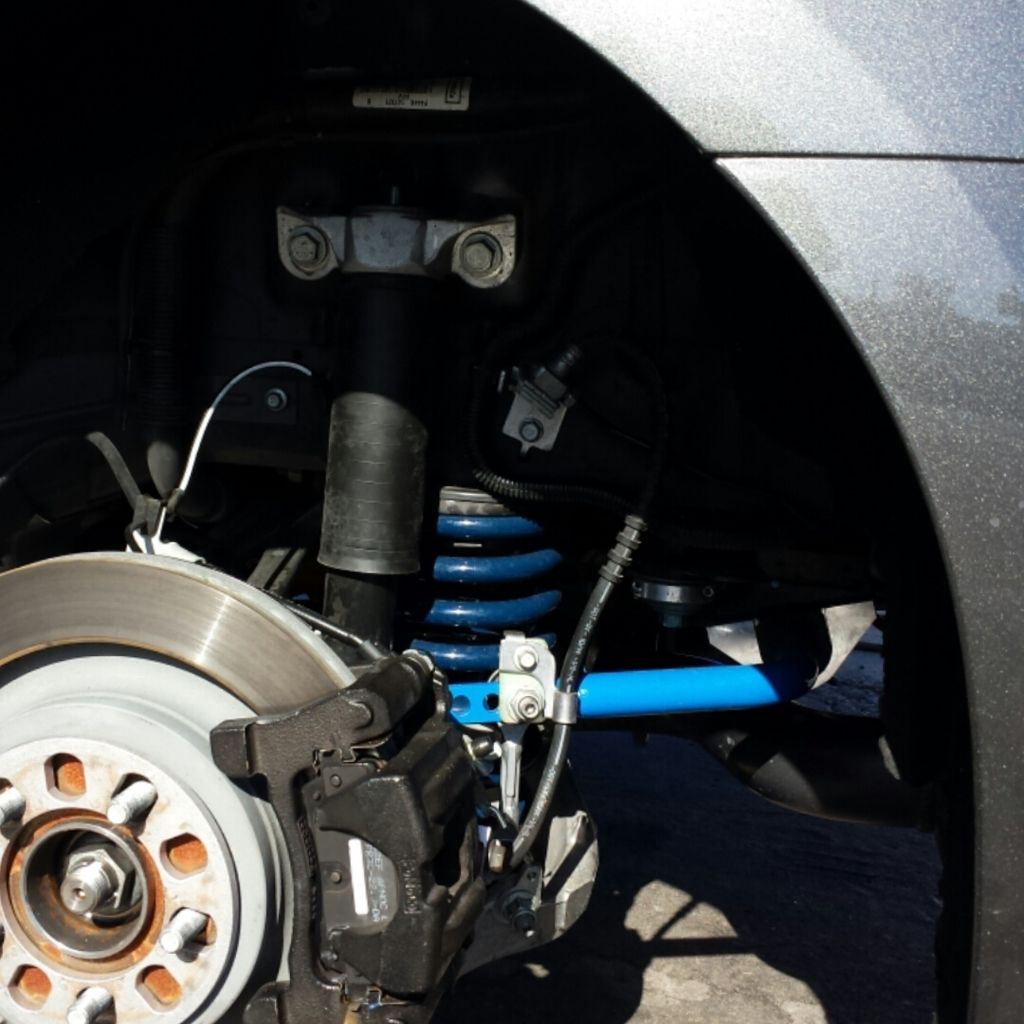
Factory coils vs. Steeda Progressive Coils
Whole shot of the undercarriage looking nice and shiny may I add. That Ceramic Gibson exhaust is holding up nicely with about 5500 miles on it now.
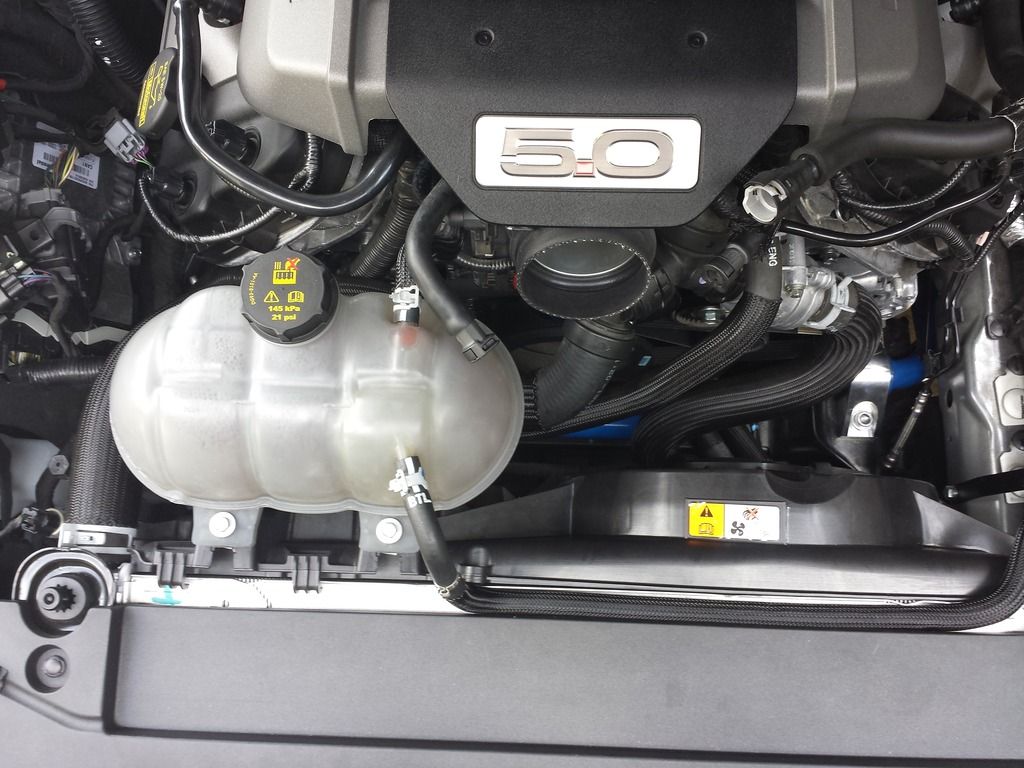
Next came the front. I knew this would be a pain in the ass going in so I thought I was prepared but boy it was a little harder than I thought until gave up for the night. Then started over in the AM and things got much, much easier with the day light things came apparent and problems from the night before were easily conquered. This took me about 4 hours total Saturday and a few hours on Sunday still to button up a few issues I was having.
The front sway bar playing a little peekaboo this thing is a 1-3/8” diameter where the factory one looks to be 1-1/8”
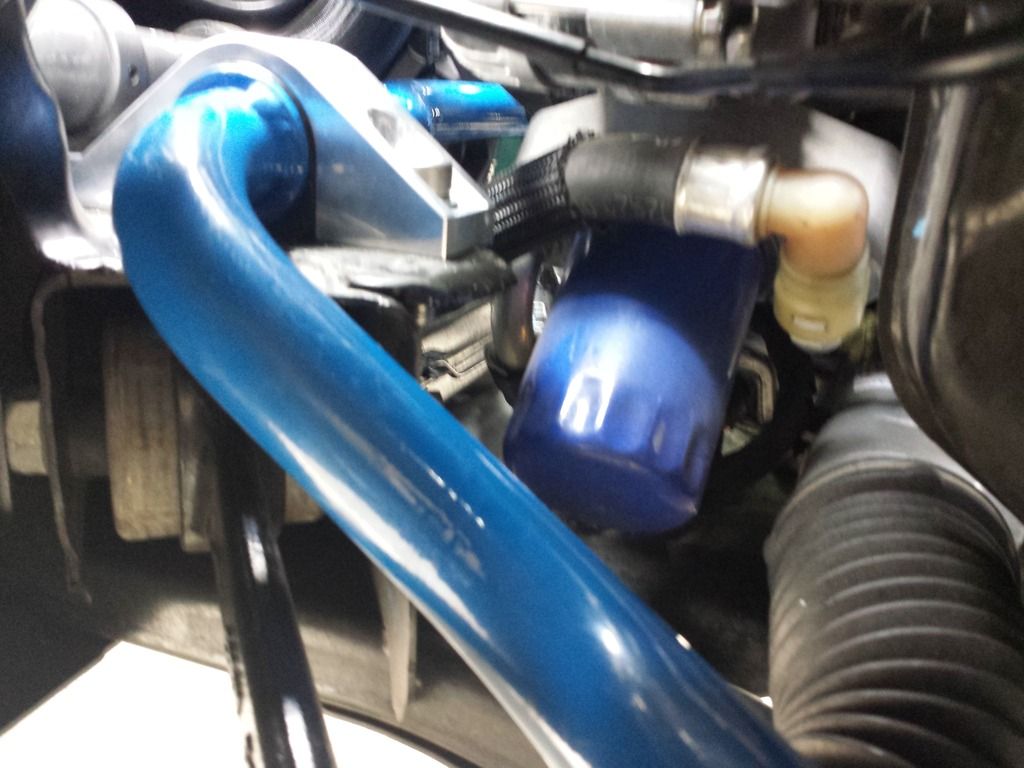
Blurry but you get the idea how beastly this set up is becoming…
Nice close up of the G-Trac Gusset plate that connects and ties this brace together. This Extreme G-Trac Brace was even easier than the rear subframe braces. Seriously it took all of 15 minutes being the car was already off the ground.
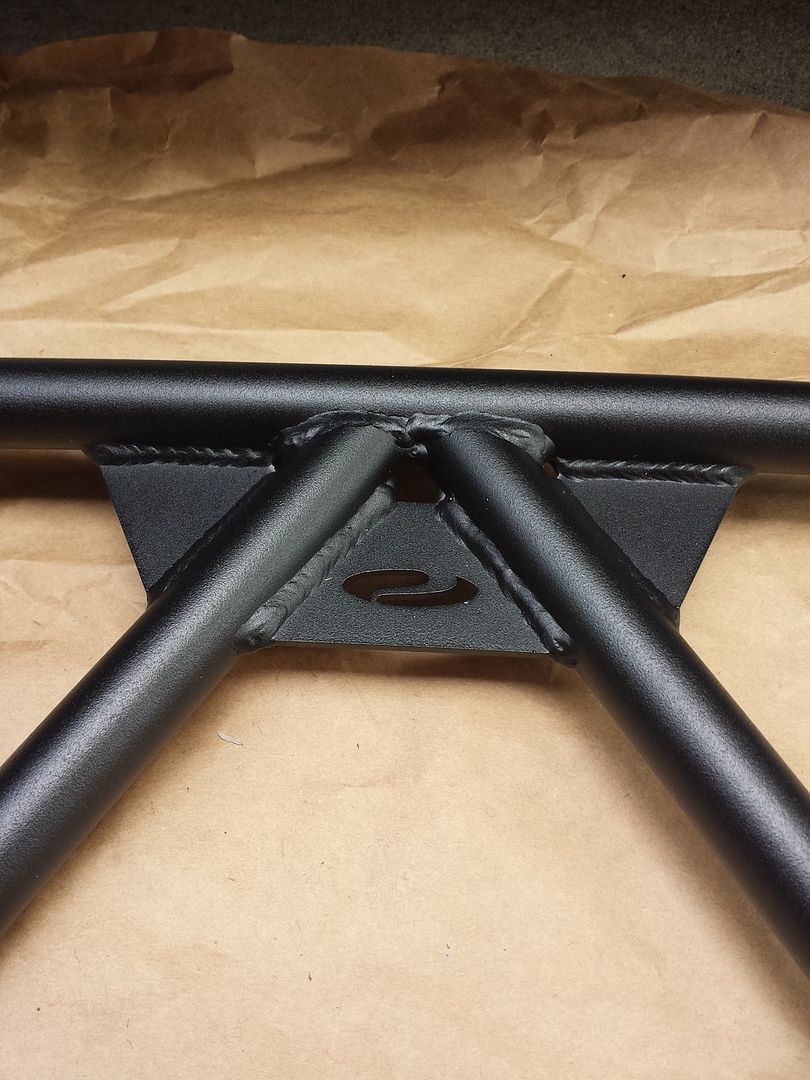
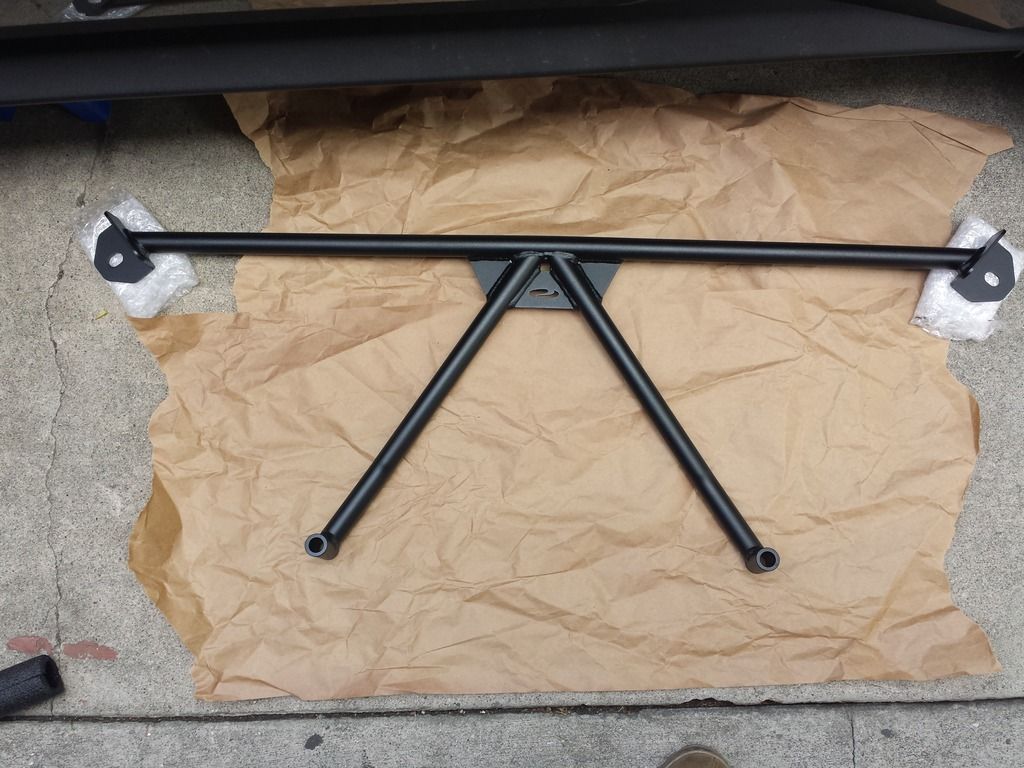
Notice they put a nice little bend in the DOM to help tuck the Extreme G-Track up as high as they could. It is those little things the manufactures do that makes you know they are still thinking about the end user.
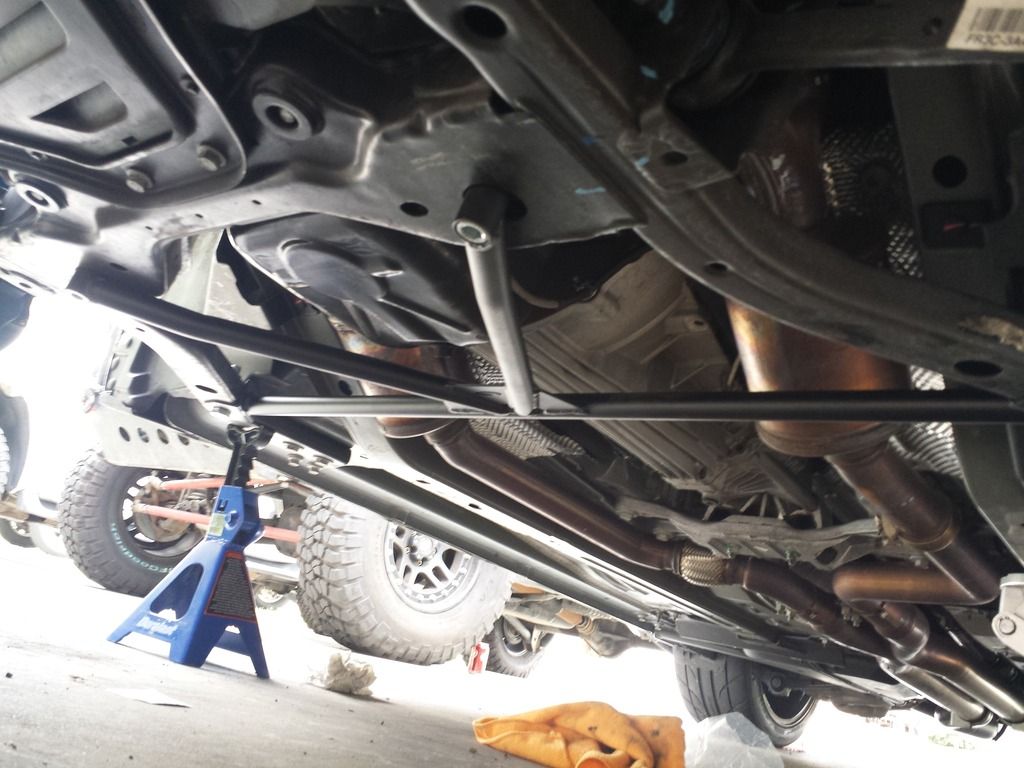
Another shot after I turned that Exhaust clamp to the side. I started to add these red rubber caps to the bolt heads. I found them at my office in a box and knew I would find a use for them…
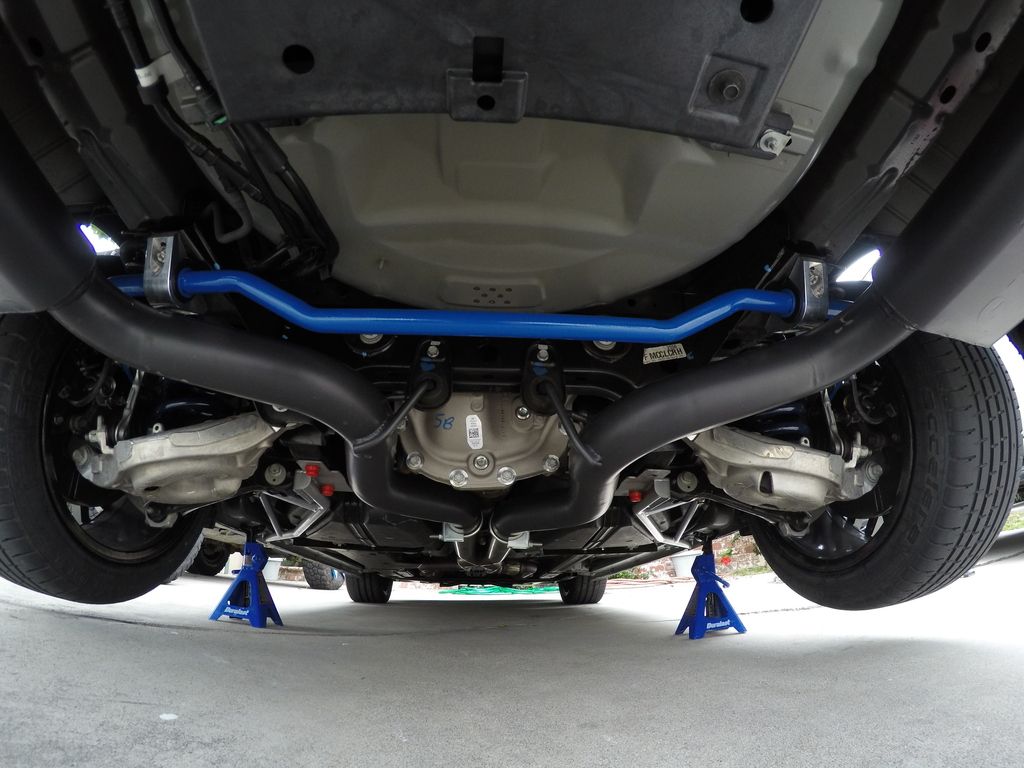
My next order should be coming soon so please stay tuned. I will be updating this a few days behind my Instagram account. So again go follow that if you are on the gram. @projectmenace
Okay so to bring you up to speed to date I have a
Gibson Cat Back, VMP 91 Octane tune, K&N Intake, Steeda Front and rear sway bars with billet mounts, Steeda IRS bushing support Kit, Steeda Lowering springs, Steeda Extreme G-Trac Brace, Steeda IRS subframe Braces. Blacked out emblems and Gun Smoke vinyl on every light on the car. I think that is it. For Now…
Here are some after shots. It definitely shows the progress on the car.
Sponsored
Last edited:


