Sponsored

Steeda Ultralite 2-Point G-Trac Brace install

suckerv

IG: @amelias550
Joined
Jan 20, 2015
Threads
41
Messages
545
Reaction score
222
Location
Brentwood, CA
Vehicle(s)
2015 Mustang GT PP Deep Impact Blue
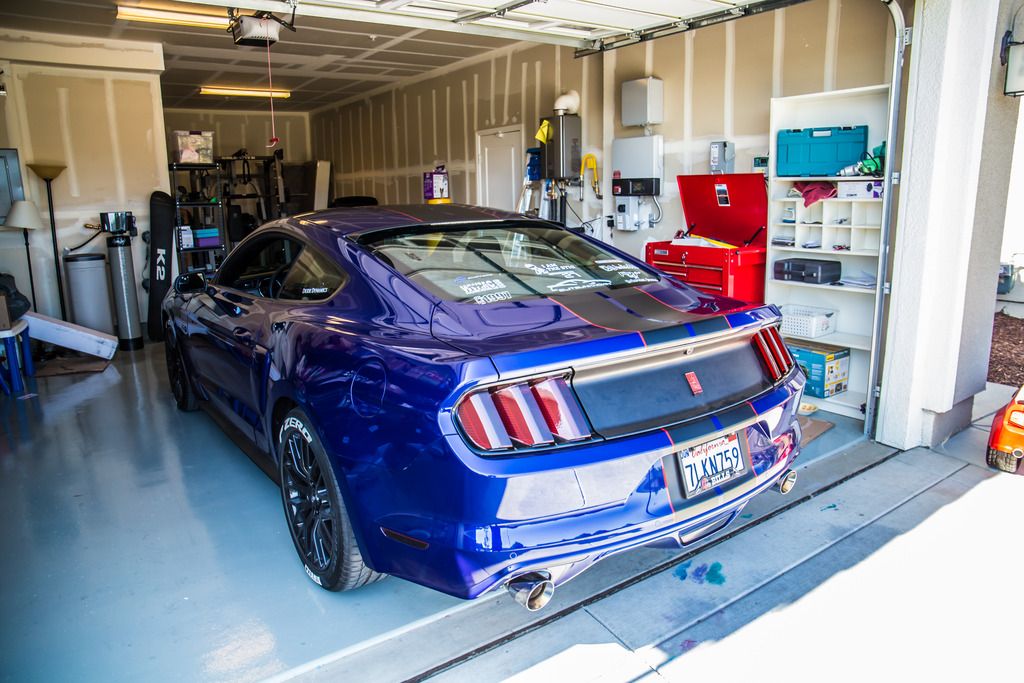
Got myself the Steeda Ultralite 2-Point G-Trac Brace today and thought I would write an install and first impressions thread. First off, I don’t track my car, and I probably never will. What I like to enjoy are the numerous twisties around where I live, and honestly I just want the best handling experience I can get. So any impressions I have about this brace are going to be only what I notice on the streets, and not in any track situation.

IMG_3495.jpg


With that being said, I was THIS close to buying the Extreme G-Trac brace when this 2-Point system came out for a fraction of the price, two less anchoring points, and a nice little weight reduction. The Ultralite comes in at 5.5 lbs, and I’m thankful it’s super light because I dropped it across my face when I was doing a test fitment.

You will need:

•Jack and jack stands (obviously)
•File, chisel, or a dremel (which I used)
•22mm socket
•22mm wrench (or an adjustable wrench which I used)
•Torque wrench

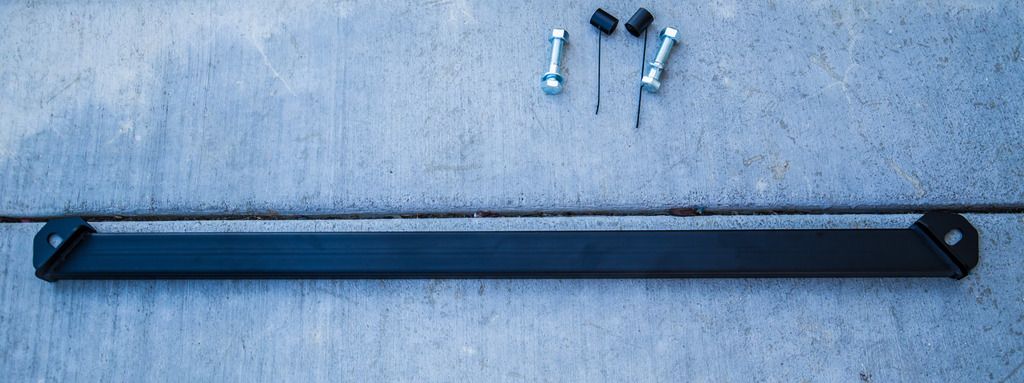
First thing you should do is pop open the package and make sure everything is there. I’m glad I double checked because the spacers had separated from the main piece and were left in the box. No biggie, but if I were distracted, it would have been a pain looking for them.

IMG_3497.jpg


IMG_3498.jpg


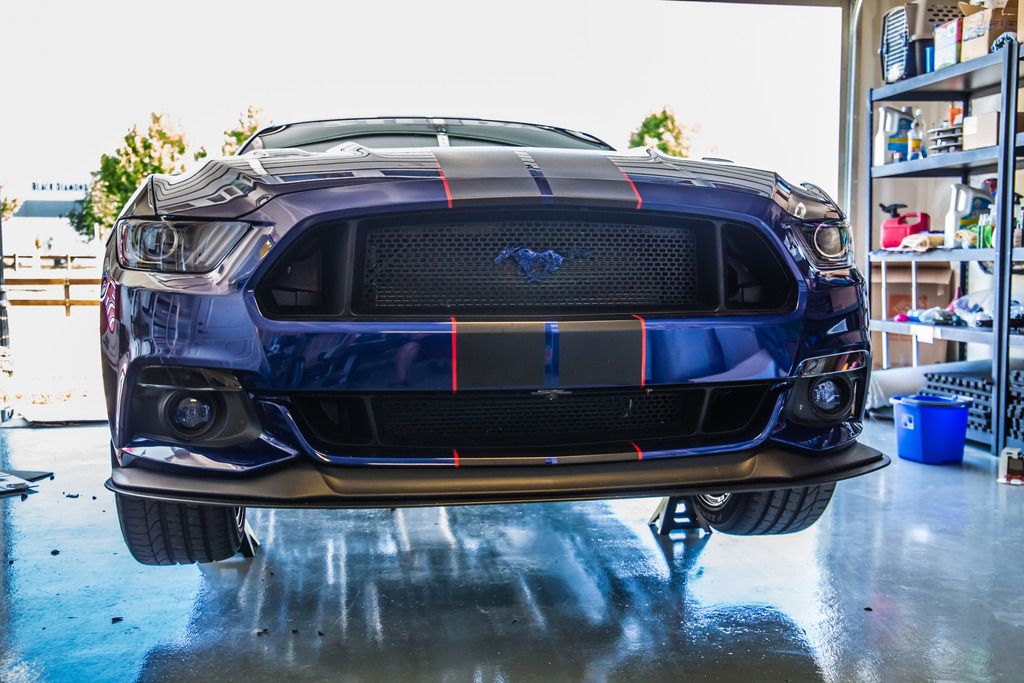
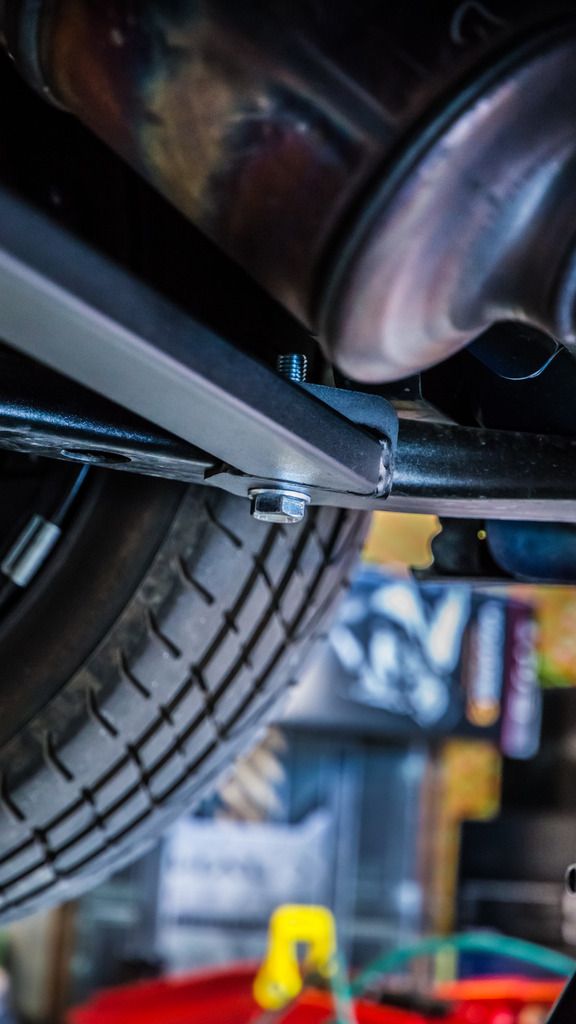
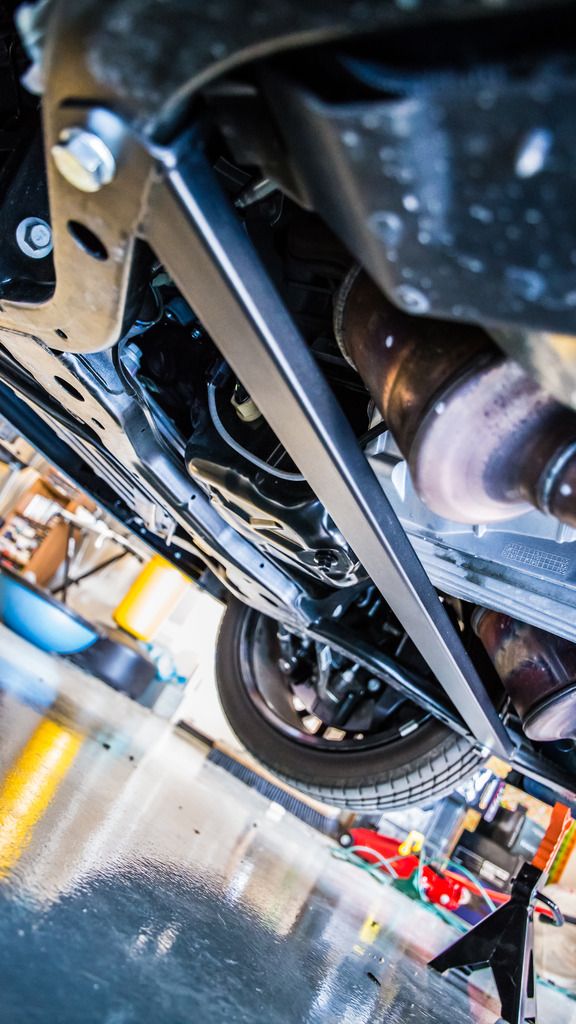
Once everything is laid out, pop your car up on some stands, and crawl under to do a test fit. The holes on the brace should line up perfectly with the outermost holes on the subframe. It mentions in the instructions that there might be some leftover slag in those holes that could make inserting the spacers problematic, so if you have any, simply shave them off with a files or chisel. I didn’t have any issues with the holes themselves, but there was a small amount of metal within the subframe “tube” that I had to shave down with a dremel in order to get the spacers in there. Take the spacers and shove them through the larger hole next to the outmost ones, and line up the spacers with the outermost subframe holes.

IMG_3501.jpg


Once the spacers are lined up, hold the brace up to the holes and insert one of the bolts up through the hole until it protrudes out the top of the subframe. Grab a nut and hand tighten from the top. Repeat for the other side.

IMG_3502.jpg


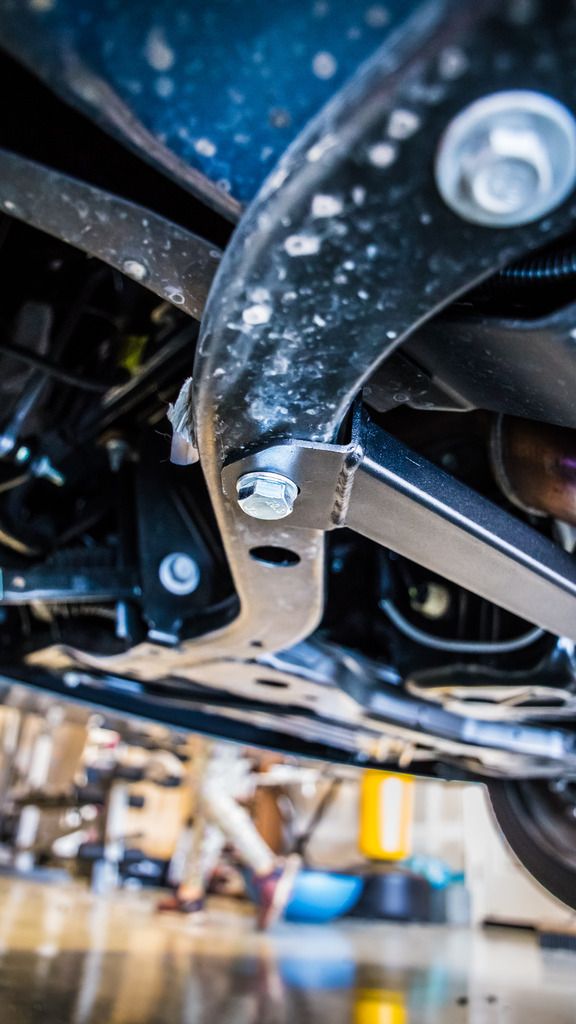
Once your brace is in place, grab a 22mm wrench or adjustable wrench, and hold the nut in place while you tighten the bolt from below with a 22mm socket. I used an impact gun so this part went pretty quickly. I torqued each bolt to 55-60 lbs. The instructions don’t mention this, but in the install video for the Extreme brace, they suggested this torque rating, so I just did it for shits and giggles. Once all is tightened, clip off the wire handles on the spacers, lower the car, and enjoy!

IMG_3503.jpg


I took the car out after installing the brace for a quick jaunt through the neighboring hills. DOes it feel any better or faster through the corners? I’d lying if I responded with “ZOMG everything is so much better!!!!” But I’ll put it this way; I’ve driven these roads hundreds of times in this car in mostly the same conditions and at the same(ish) speeds. At this point, I pretty know what each corner is “supposed” to feel like, so with that being said, adding the brace DOES feel much tighter. I’m not really going any faster into each corner, but the turns feel tighter with less body roll. I can only imagine how this handles on the track.

Long story short, it was a super easy install, and the car appears to handle corners better than stock.
Sponsored

 
Last edited:

SoCalTim

Member
Joined
Sep 14, 2015
Threads
186
Messages
3,148
Reaction score
1,626
Location
CA
First Name
Tim
Vehicle(s)
Sold : 15 GT
Nice write up, enjoyed the read!

Photo game is strong. What is your current set up?
 

Jmeo

You said member ;)
Joined
May 28, 2014
Threads
250
Messages
8,568
Reaction score
9,084
Location
Massachusetts
First Name
Jaime
Vehicle(s)
2020 GT500, 2022 F150 PowerBoost
Vehicle Showcase
2
Vey good write up thank you. I will be getting one of these in the future thats for sure.

I have one additional tip to add. Don't clip the wire off the spacers and just tuck the remaining piece up into the hole. This way if for some reason you ever change cars or sell your car and try and get some invested money back you can pull the wire down and get the spacer out. More importantly they will still be there for the next installation wether its you or someone you sold it to.

I did this when I installed my Extreme G-Track brace and I was able to sell it with the wires still attached which is good for both parties. I wish I still had the G-Track brace because the other brace I sold it for ended up not fitting with headers but it was too late before I found this out...... but thats another story lol.


Jaime
 

Old Car Guy

Well-Known Member
Joined
Oct 1, 2014
Threads
80
Messages
1,095
Reaction score
443
Location
WV.
First Name
John
Vehicle(s)
GT350 Tech Pack. AG Black Roof Black Stripes G3597
Nice write up on Steeda G-Trac Brace.

Got myself the Steeda Ultralite 2-Point G-Trac Brace today and thought I would write an install and first impressions thread. First off, I don’t track my car, and I probably never will. What I like to enjoy are the numerous twisties around where I live, and honestly I just want the best handling experience I can get. So any impressions I have about this brace are going to be only what I notice on the streets, and not in any track situation.


With that being said, I was THIS close to buying the Extreme G-Trac brace when this 2-Point system came out for a fraction of the price, two less anchoring points, and a nice little weight reduction. The Ultralite comes in at 5.5 lbs, and I’m thankful it’s super light because I dropped it across my face when I was doing a test fitment.

You will need:

•Jack and jack stands (obviously)
•File, chisel, or a dremel (which I used)
•22mm socket
•22mm wrench (or an adjustable wrench which I used)
•Torque wrench

First thing you should do is pop open the package and make sure everything is there. I’m glad I double checked because the spacers had separated from the main piece and were left in the box. No biggie, but if I were distracted, it would have been a pain looking for them.


Once everything is laid out, pop your car up on some stands, and crawl under to do a test fit. The holes on the brace should line up perfectly with the outermost holes on the subframe. It mentions in the instructions that there might be some leftover slag in those holes that could make inserting the spacers problematic, so if you have any, simply shave them off with a files or chisel. I didn’t have any issues with the holes themselves, but there was a small amount of metal within the subframe “tube” that I had to shave down with a dremel in order to get the spacers in there. Take the spacers and shove them through the larger hole next to the outmost ones, and line up the spacers with the outermost subframe holes.


Once the spacers are lined up, hold the brace up to the holes and insert one of the bolts up through the hole until it protrudes out the top of the subframe. Grab a nut and hand tighten from the top. Repeat for the other side.


Once your brace is in place, grab a 22mm wrench or adjustable wrench, and hold the nut in place while you tighten the bolt from below with a 22mm socket. I used an impact gun so this part went pretty quickly. I torqued each bolt to 55-60 lbs. The instructions don’t mention this, but in the install video for the Extreme brace, they suggested this torque rating, so I just did it for shits and giggles. Once all is tightened, clip off the wire handles on the spacers, lower the car, and enjoy!


I took the car out after installing the brace for a quick jaunt through the neighboring hills. DOes it feel any better or faster through the corners? I’d lying if I responded with “ZOMG everything is so much better!!!!” But I’ll put it this way; I’ve driven these roads hundreds of times in this car in mostly the same conditions and at the same(ish) speeds. At this point, I pretty know what each corner is “supposed” to feel like, so with that being said, adding the brace DOES feel much tighter. I’m not really going any faster into each corner, but the turns feel tighter with less body roll. I can only imagine how this handles on the track.

Long story short, it was a super easy install, and the car appears to handle corners better than stock.
Suckery, very nice write up on Steeda new Ultralite 2-Point G-Trac Brace. On Wednesday this week I also got my 2-Trac Brace on my GT350, and I also posted about how this much better and tighter the buttom feels on my 350 your write up is right on the target about this Steeda Mod Part, and yes it's very easy to put on, what I did was paint the the spacers, and the bolts and washers. Thanks and also for your input on this!!!! :thumbsup: :cheers: John
image.jpg
 

David@Steeda

Well-Known Member
Diamond Sponsor
Joined
Oct 17, 2014
Threads
78
Messages
3,433
Reaction score
1,910
Location
United States
Website
www.steeda.com
First Name
David
Vehicle(s)
Bolt-on, slammed S197
[MENTION=13551]suckerv[/MENTION] wow nice write-up, sir! Glad to see those sweet photos and please keep us updated on driving impressions as you put more miles on it! :)
 

Sponsored

OP
OP
suckerv

suckerv

IG: @amelias550
Joined
Jan 20, 2015
Threads
41
Messages
545
Reaction score
222
Location
Brentwood, CA
Vehicle(s)
2015 Mustang GT PP Deep Impact Blue
Nice write up, enjoyed the read!

Photo game is strong. What is your current set up?
Hey brotha, thanks! I'm using a Canon 6d with a 50mm and 24-105mm. I used the 24-105mm for these shots. Here's a shameless plug for my business: www.dtzphotography.com :headbang::headbang:
 
OP
OP
suckerv

suckerv

IG: @amelias550
Joined
Jan 20, 2015
Threads
41
Messages
545
Reaction score
222
Location
Brentwood, CA
Vehicle(s)
2015 Mustang GT PP Deep Impact Blue
[MENTION=13551]suckerv[/MENTION] wow nice write-up, sir! Glad to see those sweet photos and please keep us updated on driving impressions as you put more miles on it! :)
Will do! :thumbsup:
 

GTP

Deutsche Pony
Joined
May 27, 2015
Threads
196
Messages
4,418
Reaction score
2,279
Location
Indy
Website
www.BambergAudio.com
First Name
Philip
Vehicle(s)
2019 GT PP1 A10 Outrageous Orange HPDE mods
Hey brotha, thanks! I'm using a Canon 6d with a 50mm and 24-105mm. I used the 24-105mm for these shots. Here's a shameless plug for my business: www.dtzphotography.com :headbang::headbang:
But how do some of you guys get that high-contrast hyper-color retro-magazine look? I love those surreal photos of our cars!
 
OP
OP
suckerv

suckerv

IG: @amelias550
Joined
Jan 20, 2015
Threads
41
Messages
545
Reaction score
222
Location
Brentwood, CA
Vehicle(s)
2015 Mustang GT PP Deep Impact Blue
But how do some of you guys get that high-contrast hyper-color retro-magazine look? I love those surreal photos of our cars!
I'm not 100% certain what you mean, but I'm thinking you mean an HDR photo? Do you mean something like this?


If so, then this is an HDR shot. I took 7 shots of the same thing with multiple exposures ranging from -3EV all way to +3EV, then combined them in Photoshop. You get a lot of vibrance and pop with HDR with a ton of detail in the darks. Easy to go overboard, so I used them sparingly, but some situations are just perfect for HDR
 
OP
OP
suckerv

suckerv

IG: @amelias550
Joined
Jan 20, 2015
Threads
41
Messages
545
Reaction score
222
Location
Brentwood, CA
Vehicle(s)
2015 Mustang GT PP Deep Impact Blue
Suckery, very nice write up on Steeda new Ultralite 2-Point G-Trac Brace. On Wednesday this week I also got my 2-Trac Brace on my GT350, and I also posted about how this much better and tighter the buttom feels on my 350 your write up is right on the target about this Steeda Mod Part, and yes it's very easy to put on, what I did was paint the the spacers, and the bolts and washers. Thanks and also for your input on this!!!! :thumbsup: :cheers: John
I wish I had thought of that! I might do that, actually
 

Sponsored
OP
OP
suckerv

suckerv

IG: @amelias550
Joined
Jan 20, 2015
Threads
41
Messages
545
Reaction score
222
Location
Brentwood, CA
Vehicle(s)
2015 Mustang GT PP Deep Impact Blue
Vey good write up thank you. I will be getting one of these in the future thats for sure.

I have one additional tip to add. Don't clip the wire off the spacers and just tuck the remaining piece up into the hole. This way if for some reason you ever change cars or sell your car and try and get some invested money back you can pull the wire down and get the spacer out. More importantly they will still be there for the next installation wether its you or someone you sold it to.

I did this when I installed my Extreme G-Track brace and I was able to sell it with the wires still attached which is good for both parties. I wish I still had the G-Track brace because the other brace I sold it for ended up not fitting with headers but it was too late before I found this out...... but thats another story lol.


Jaime
Great tip! Kinda wish I had thought of that myself. :doh:
 

GTP

Deutsche Pony
Joined
May 27, 2015
Threads
196
Messages
4,418
Reaction score
2,279
Location
Indy
Website
www.BambergAudio.com
First Name
Philip
Vehicle(s)
2019 GT PP1 A10 Outrageous Orange HPDE mods
I'm not 100% certain what you mean, but I'm thinking you mean an HDR photo? Do you mean something like this?
...
Yes, that's it exactly. Could I find freeware to combine the multiple exposures?
 

Dominant1

Well-Known Member
Joined
Jun 17, 2016
Threads
94
Messages
3,737
Reaction score
1,127
Location
USA
First Name
Dr Frankenstang
Vehicle(s)
2016 gt/cs auto 3:55 gears
Vehicle Showcase
1
Im considering this brace after i get my long tubes installed. looks like cats come real close to the brace, and i know they say it clears aftermarket headers...
 

roadracergt

Active Member
Joined
Oct 5, 2015
Threads
2
Messages
36
Reaction score
14
Location
Detroit
Vehicle(s)
2015 Mustang GT
It looks like this one fits a little further back than the BMR for additional clearance and strength.
Sponsored


Top