- Joined
- Dec 20, 2014
- Threads
- 171
- Messages
- 1,399
- Reaction score
- 635
- Location
- Lake Worth, FL
- Website
- www.uprproducts.com
- Vehicle(s)
- 15 GT
- Thread starter
- #1
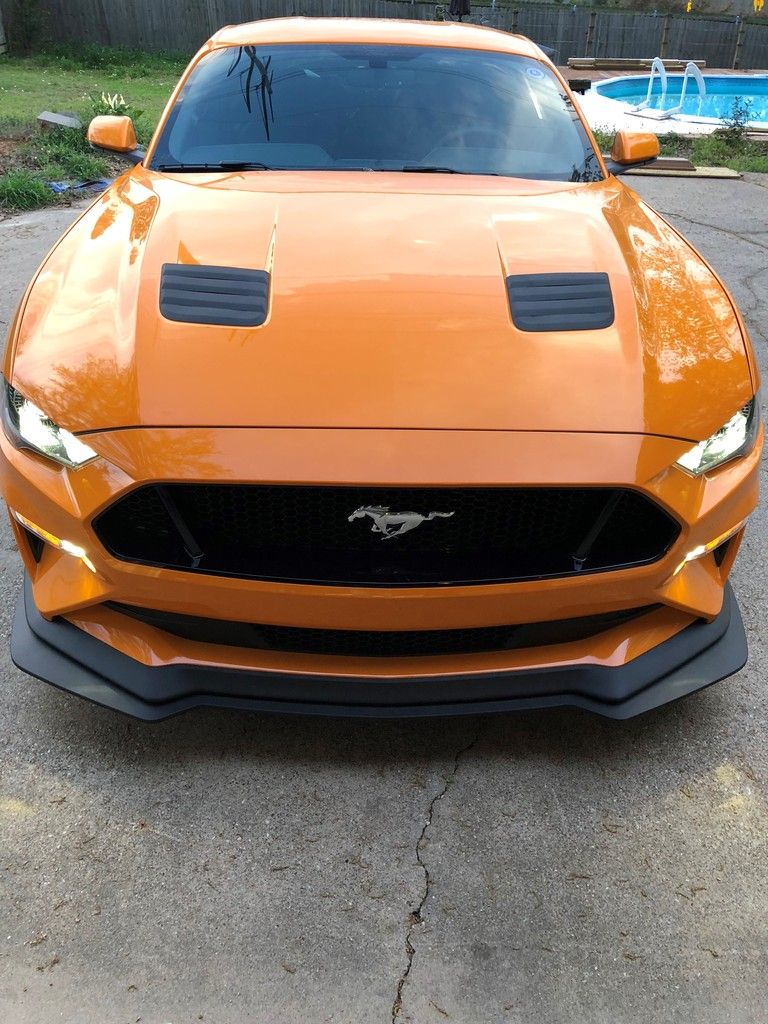
This past weekend I installed the ROUSH Performance Heat Extractors as well as the Rear bumper Difusser kit. Super happy with how they look on the car. The front bumper portions are next for install.
Both are VERY easy to install. The instructions they give you are pretty straight forward. Esp for the rear. Follow them and you are golden. Here are some pictures of it installed.


The Heat extractors for the hood, very simple to do.

Couple things I wanted to go over even though the directions are VERY straight forward, Their is a couple things you can do that makes it easier for the install.
First, like the directions, remove the hood liner. Once you remove that. You will see (4) 9mm nuts for each OEM vent.
Simply remove the nuts (the stud will be very loose but it will not fall off)

Once those are off, pull the black plastic backing off. It is held on by double sided tape but it will come off with some pressure.
Next, on the front part of ther hood, there is a small slit that is a tab. Just push it in then the factory extraftor will dall off (make sure to hold it on the back so it doesnt slide down the hood)
.
In the kit, it will come with black vynle that you will put on the hood where the factory panels went. This stuff is super thin but very flexable. Becareful laying it down. Once its put down, you can punch out the holes where the screws and alignment pins would go.
NOW....THIS IS THE BIG PART
In the directions, they want you to drill 2 holes in the hood for the back side screws. You can do this for 100% security.
I... decided I did not want to drill the hood. The kit comes with 3m tape to put along sides and back of the extrator. It still does not move with the tape and 4 screws holding it on.
Now, yes, it is backwards, but you can still see how it looks on the vent.
Once you align it with the pins, stick it onto the hood. it will cover the black vynle completely. Then go ahead and use the screws to secure it to the hood. After this, re-install the hood liner and boom... You are done.
Both are VERY easy to install. The instructions they give you are pretty straight forward. Esp for the rear. Follow them and you are golden. Here are some pictures of it installed.
The Heat extractors for the hood, very simple to do.
Couple things I wanted to go over even though the directions are VERY straight forward, Their is a couple things you can do that makes it easier for the install.
First, like the directions, remove the hood liner. Once you remove that. You will see (4) 9mm nuts for each OEM vent.
Simply remove the nuts (the stud will be very loose but it will not fall off)
Once those are off, pull the black plastic backing off. It is held on by double sided tape but it will come off with some pressure.
Next, on the front part of ther hood, there is a small slit that is a tab. Just push it in then the factory extraftor will dall off (make sure to hold it on the back so it doesnt slide down the hood)
In the kit, it will come with black vynle that you will put on the hood where the factory panels went. This stuff is super thin but very flexable. Becareful laying it down. Once its put down, you can punch out the holes where the screws and alignment pins would go.
NOW....THIS IS THE BIG PART
In the directions, they want you to drill 2 holes in the hood for the back side screws. You can do this for 100% security.
I... decided I did not want to drill the hood. The kit comes with 3m tape to put along sides and back of the extrator. It still does not move with the tape and 4 screws holding it on.
Now, yes, it is backwards, but you can still see how it looks on the vent.
Once you align it with the pins, stick it onto the hood. it will cover the black vynle completely. Then go ahead and use the screws to secure it to the hood. After this, re-install the hood liner and boom... You are done.
Sponsored