RevvdMedia
Well-Known Member
- Thread starter
- #1
Hey Guys,
I installed my RPI Designs splash guards about a week ago. I really didn't want to run splash guards, but I also didn't want to apply stoneguard to the entire side of the car. I noticed a lot of rock chips even at only about 1000 miles so I figured I would compromise and get these to save the body of the car. :shrug:
Installation.
FRONT
Here are the contents of the kit:
20150523_123028.jpg
You need to remove these three push pins. Use a thin flat head screwdriver. Start from the outside of the pin (where the notch/groove is) and work the screwdriver towards the center of the pin and pry it out. It is a two piece part - male and female - if you work the male part of pin halfway out, you can pull the whole thing as one piece by prying the female part out. The male part when all the way installed spreads the female pin end to hold it in place (sounds dirty lol).
20150523_122943.jpg
20150523_123342.jpg
20150523_123349.jpg
20150523_123442.jpg
Line up the splash guard to the holes with the rough side facing the wheel. The fronts will not fit on the rear and the rear will not fit on the front, so you shouldn't confuse the two. Once lined up, reinstall your 3 push pins (both the male and female install into the flap). Use the supplied U-clip to hold the top edge of the flap in place - the "teeth" end must go onto the metal side of the wheel well, not onto the flap.
Here they are installed:
20150523_124114.jpg
REAR
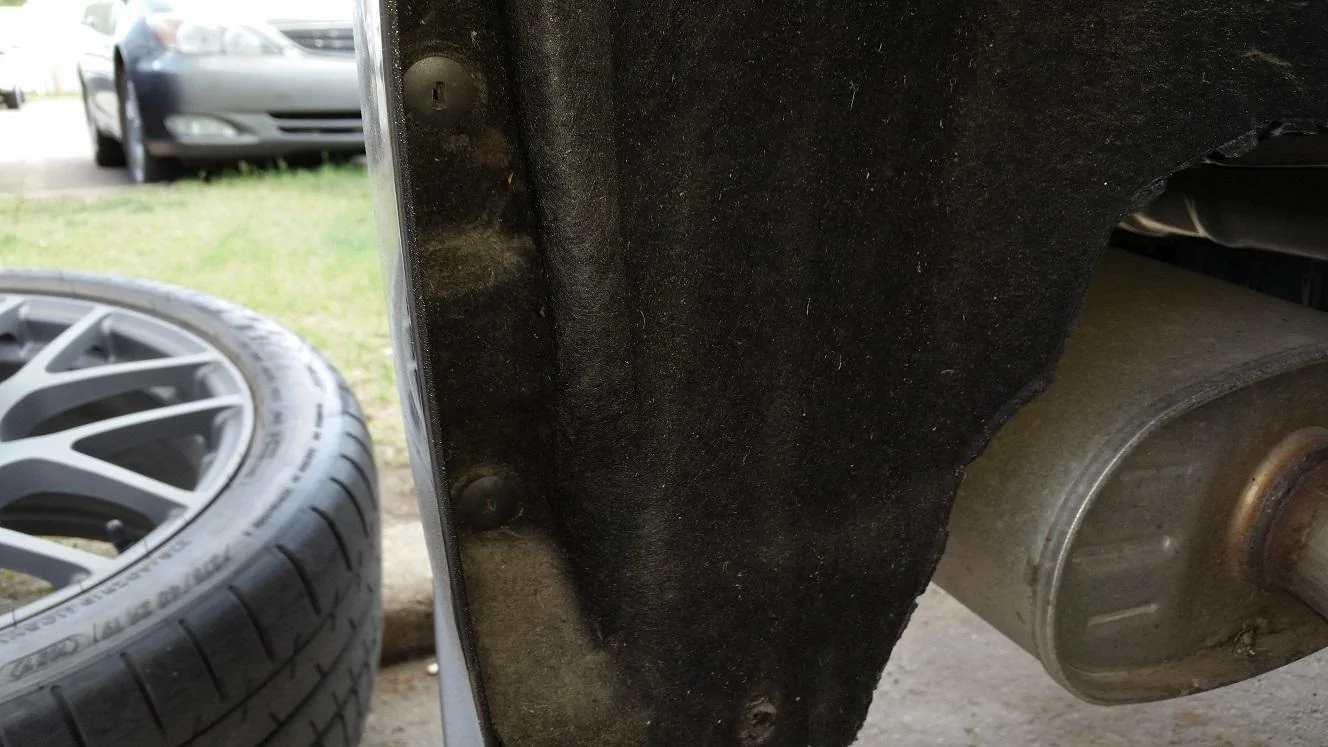
You have to remove the rear wheels to install the rear flaps. Once removed you will see 3 push pins that you will utilize. The kit makes it seem like there are 4 (since there is one re-usable one and 3 screws), but I'll be damned if I could find that fourth one...
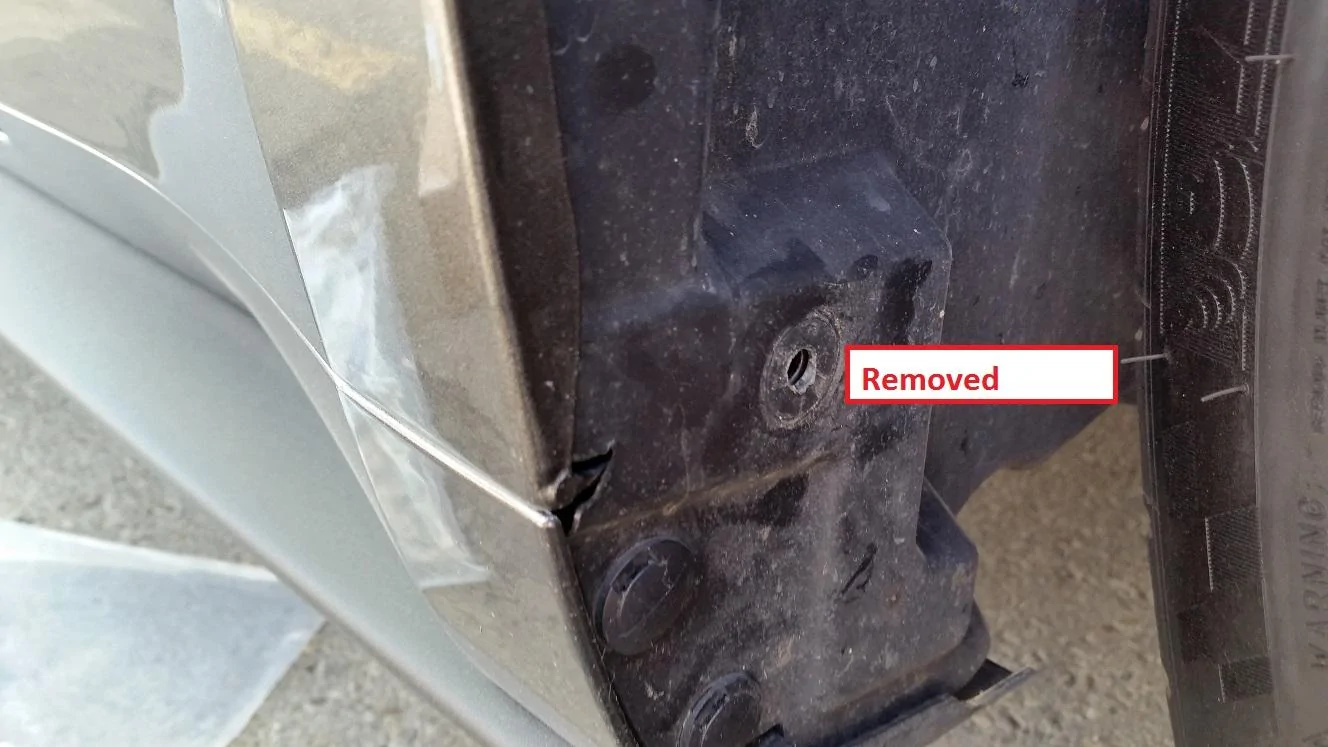
Remove these pins (the entire bottom right one, and JUST THE MALE PART for the upper two):
20150523_125653.jpg
Like this:
20150523_125846.jpg
Where is the last one???
20150523_125658.jpg
Line up the flap to the rear (with the rough side facing the wheel again). You will reuse the bottom right push pin the same way as the front. The upper two on the outer edge will have the screw drilled into the female part of the pin (order goes cupped spacer installed onto the screw, screw put through the flap, spacer on the other side of the flap, screw into the female part of the pin). You may need to cut the spacer down a bit to make the splash guard sit flush with the wheel well - otherwise it leaves a gap.
20150523_130017.jpg
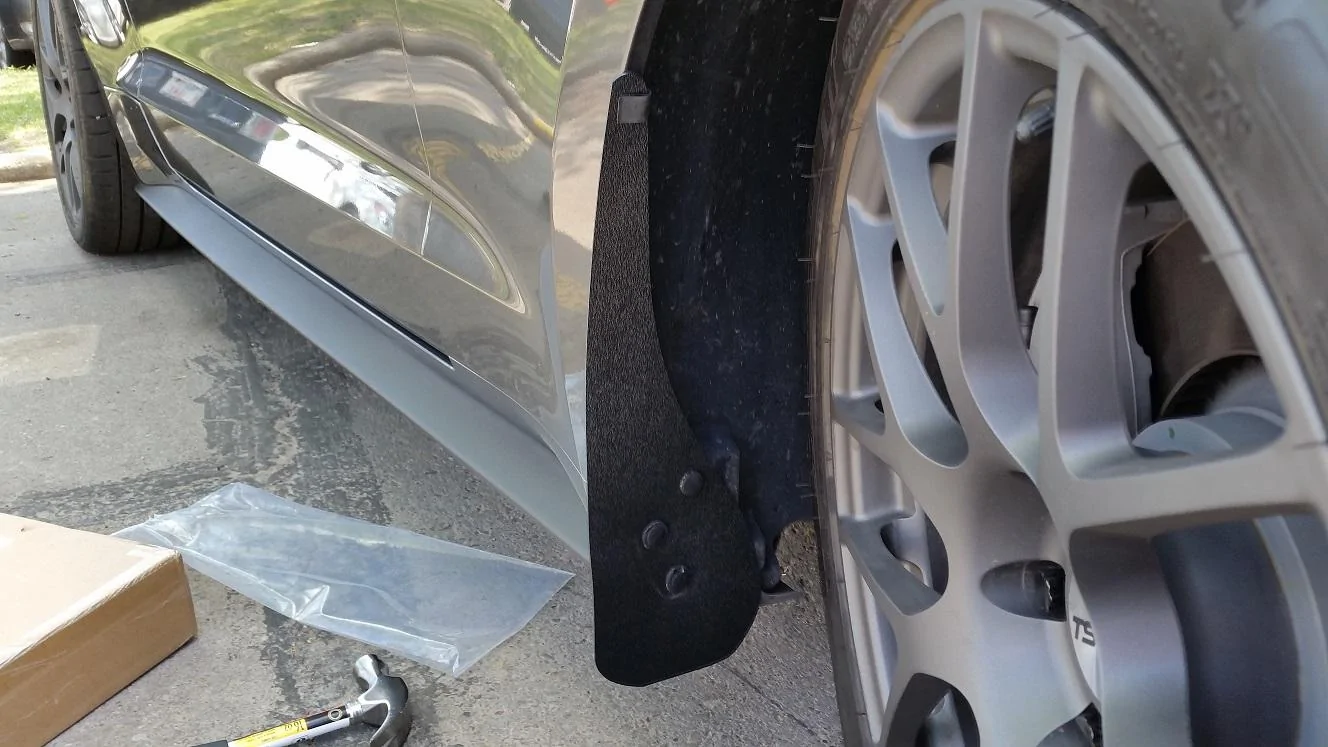
Here it is installed:
20150523_133733.jpg
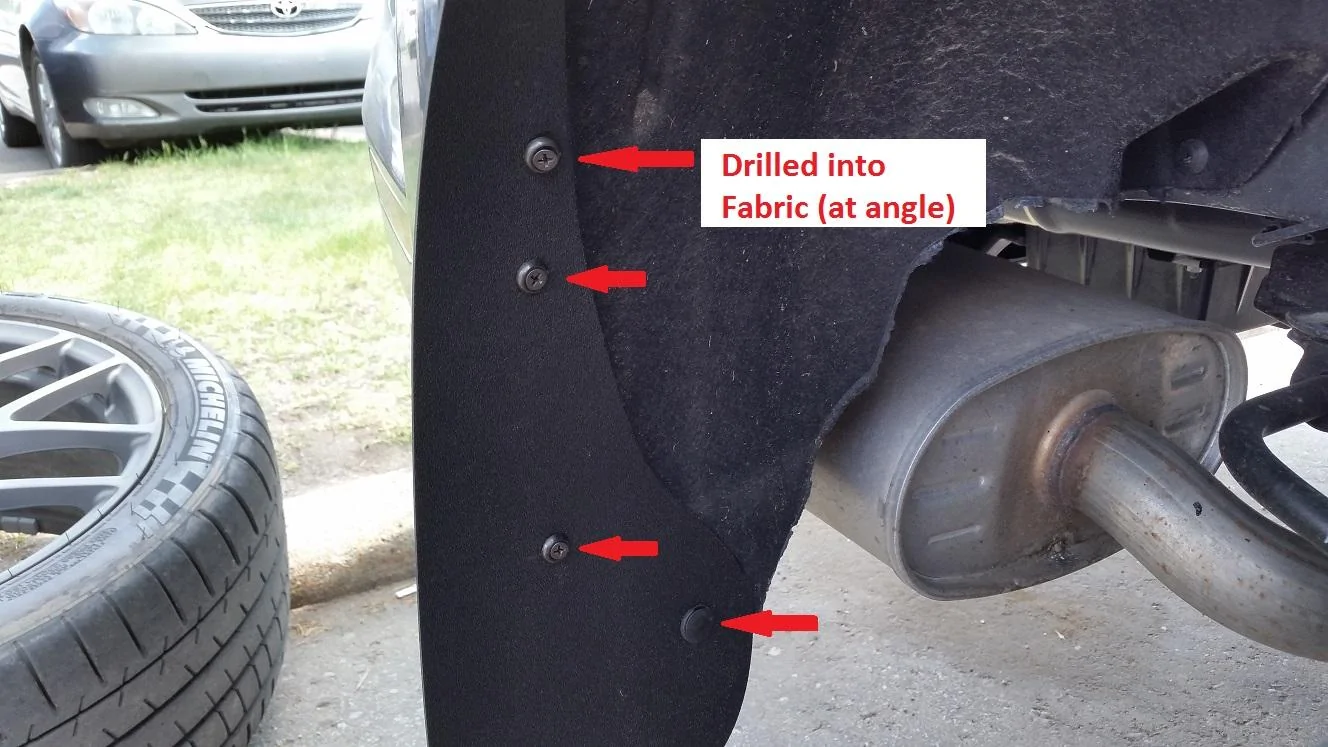
I ended up just running the last screw into the wheel well liner to get it to hold, there was nowhere else for it to install into. I did not use the spacer for this, it has held up fine since and I didn't drill into something I shouldn't have on the other side
Finishing touches - the fronts looked good enough but I deliberately pushed the tops of the rear splash guards into the wheel wells (I didn't want it to stick out like the fronts). I used some thin double sided tape to help secure the flaps to both the front and the rear, and to make sure the top of the rear flaps don't move around too much.

I installed my RPI Designs splash guards about a week ago. I really didn't want to run splash guards, but I also didn't want to apply stoneguard to the entire side of the car. I noticed a lot of rock chips even at only about 1000 miles so I figured I would compromise and get these to save the body of the car. :shrug:
Installation.
FRONT
Here are the contents of the kit:
20150523_123028.jpg
You need to remove these three push pins. Use a thin flat head screwdriver. Start from the outside of the pin (where the notch/groove is) and work the screwdriver towards the center of the pin and pry it out. It is a two piece part - male and female - if you work the male part of pin halfway out, you can pull the whole thing as one piece by prying the female part out. The male part when all the way installed spreads the female pin end to hold it in place (sounds dirty lol).
20150523_122943.jpg
20150523_123342.jpg
20150523_123349.jpg
20150523_123442.jpg
Line up the splash guard to the holes with the rough side facing the wheel. The fronts will not fit on the rear and the rear will not fit on the front, so you shouldn't confuse the two. Once lined up, reinstall your 3 push pins (both the male and female install into the flap). Use the supplied U-clip to hold the top edge of the flap in place - the "teeth" end must go onto the metal side of the wheel well, not onto the flap.
Here they are installed:
20150523_124114.jpg
REAR
You have to remove the rear wheels to install the rear flaps. Once removed you will see 3 push pins that you will utilize. The kit makes it seem like there are 4 (since there is one re-usable one and 3 screws), but I'll be damned if I could find that fourth one...
Remove these pins (the entire bottom right one, and JUST THE MALE PART for the upper two):
20150523_125653.jpg
Like this:
20150523_125846.jpg
Where is the last one???
20150523_125658.jpg
Line up the flap to the rear (with the rough side facing the wheel again). You will reuse the bottom right push pin the same way as the front. The upper two on the outer edge will have the screw drilled into the female part of the pin (order goes cupped spacer installed onto the screw, screw put through the flap, spacer on the other side of the flap, screw into the female part of the pin). You may need to cut the spacer down a bit to make the splash guard sit flush with the wheel well - otherwise it leaves a gap.
20150523_130017.jpg
Here it is installed:
20150523_133733.jpg
I ended up just running the last screw into the wheel well liner to get it to hold, there was nowhere else for it to install into. I did not use the spacer for this, it has held up fine since and I didn't drill into something I shouldn't have on the other side
Finishing touches - the fronts looked good enough but I deliberately pushed the tops of the rear splash guards into the wheel wells (I didn't want it to stick out like the fronts). I used some thin double sided tape to help secure the flaps to both the front and the rear, and to make sure the top of the rear flaps don't move around too much.


Sponsored