jbailer
Well-Known Member
- Thread starter
- #1

I got these braces after reading Nate's review. As you can see from my signature, I already have a bunch of Steeda corner fast and stop the hop goodies. I think the main benefit of these are to reduce wheel hop. That became more apparent as I did the install and saw where the connection points were. I can't really comment on how well it did there because I had already gotten rid of the wheel hop from my other parts. After my test drive though I can definitely see how these would help with that. I was amazed at how connected the rear end feels now! I really didn't think it would make that much difference in cornering but it does. There may be another added benefit but I don't want to comment on that until I can do some more testing. There's a certain road I want to test drive on before I decide. Either way I'm once again overwhelmed, a simple brace, this was the part I decided to skip originally thinking it would probably do the least.
Now for the install. I'm not going to give instructions because between Steeda's instructions that come with the braces and Bill from CJ Pony Parts video, you should get it. I will add a little color to tie them together. Notice in all of Bill's videos, the installs are ALWAYS a breeze? Well I'm not sure if it is just convenient editing so we don't see all of it and hear the curse words or if he truly does get the perfect car every time. I'll choose to believe the later because I really appreciate them.
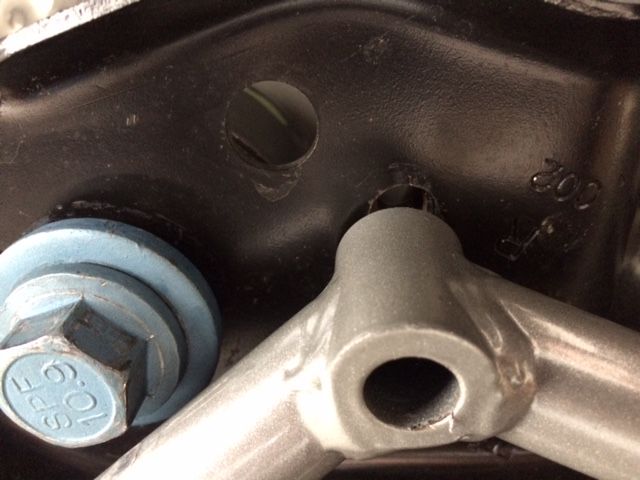
You'll notice in Bill's video, there is no jack supporting the front of the subframe. This gives the camera a nice clear view of Bill for the video. In Steeda's instructions they tell you in step #1 to lift the car by the chassis and then in step #2 to support the front of the subframe with a jack. I found out why. Where Bill got the perfect car and all holes lined up perfect, 1 side of mine didn't. In Steeda's instructions step #9, they tell you, "If at this point, everything is not lining up correctly, the 2 13mm hex head bolts on the front sub frame support brackets, and the main sub frame support bolt may need to be loosened up, so that the sub frame support bracket can be repositioned slightly." Well the first side I did, this was the case and I'm glad I read Steeda's instructions because this would be the time I'm cursing because it didn't bolt right in. I would change one thing in the instructions. All bolts to begin with should be installed very loose. Start with the factory bolt they mention in the front of the brace, then install the bolt that goes into the threaded plate that slides into the frame.
Note: Look carefully at the threaded plate, you'll see there is a top and bottom. You want the side with the clean threads facing down to get the bolt threaded in there easier.
Doing this will both support the brace and help so you're not having to muscle the bar around like Bill in the video. Then put the other bolt in the front of the brace, then the bolt and nut at the very back. I recommend putting the nut up there first. You can look up there and see if it is centered over the hole, then install the bolt. At this point all you have left is the dreaded center bolt that goes into the sub frame brace. If it lines up, you are lucky like Bill (and me on the driver's side). If not, this is where you'll need to support the front of the sub frame with the jack and loosen those 13mm and 22mm bolts that Steeda mentions in step #9. Just adjust it until you can get that bolt in and you're all set. Snug everything down then torque per specs that Steeda conveniently put in the instructions.
Link to Bill from CJ Pony Parts install video:
[ame]
Thank you again to David@Steeda for the great support and Steeda for the goodies that make my car amazing!
Sponsored
")