shobbs007
Forensicator
- Joined
- Apr 20, 2015
- Threads
- 4
- Messages
- 250
- Reaction score
- 64
- Location
- Mt. Juliet, TN
- First Name
- Steve
- Vehicle(s)
- 2015 GT - Race Red/PP; 2009 Tundra RW
- Thread starter
- #1
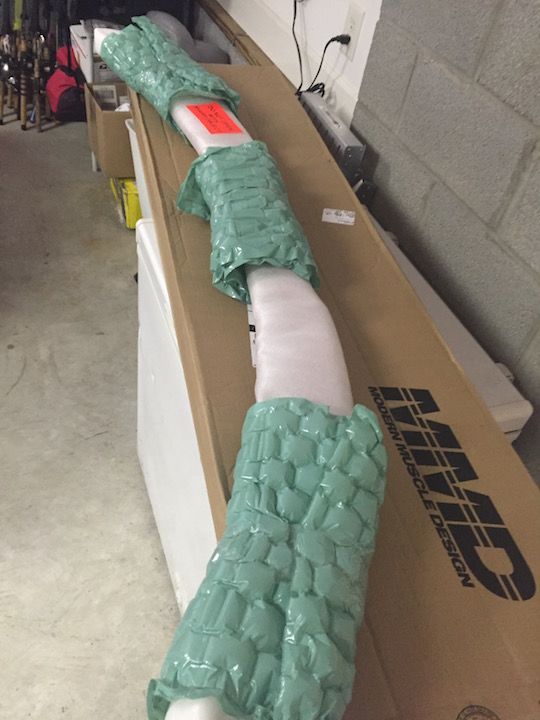
First and foremost, I have to give a shout-out to [MENTION=10447]AMAlexLazarus[/MENTION] and American Muscle. Early last week, Alex held a giveaway for a MMD Foose spoiler http://www.americanmuscle.com/mmd-foose-prepainted-rear-spoiler-2015.html?utm_content=Exterior+-+Quarter+Windows%7CMMD+by+FOOSE&utm_campaign=15%2B%20No%20Years&utm_source=Google-pla&utm_medium=Shopping&utm_term=%7Bkeyword%7D&AMID=mmd-foose-prepainted-rear-spoiler-2015-FPReplacementV1&T5_Var3=blue&GID=387385-H3. Well, as luck would have it, I won it! Alex held the drawing on Monday afternoon, and my Race Red pre-painted spoiler arrived Thursday. I was a little concerned about damage at first, cause one end of the box was almost open. But after opening the rest of the way I saw that it was protected pretty well.
After seeing this particular spoiler I knew I liked it better than the other options out there and really wanted one. I was going to have one, and soon. Turns out I got one, for $1.31. More on that later…
This is my first attempt at a Mustang DIY. I’m not a mechanic, nor do I claim to be, but I do have an awesome set of tools I find some enjoyment in doing these type of projects, especially when things go right. Unfortunately for me, things don’t go right a lot of the time. Maybe it’s just my nature, or the fact that I’m not a mechanic, nor do I do this kind of stuff often. Even though this install is relatively easy, I’m hoping this will help someone who is on the fence about doing this themselves. So let’s get on with this.
The unboxing:

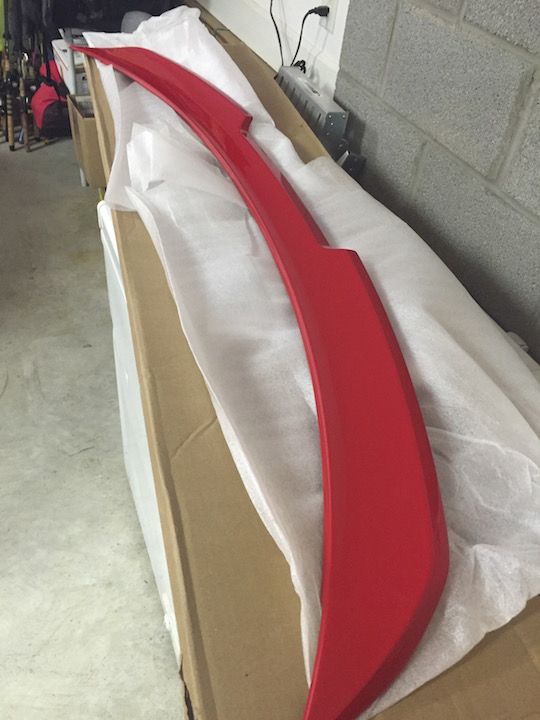
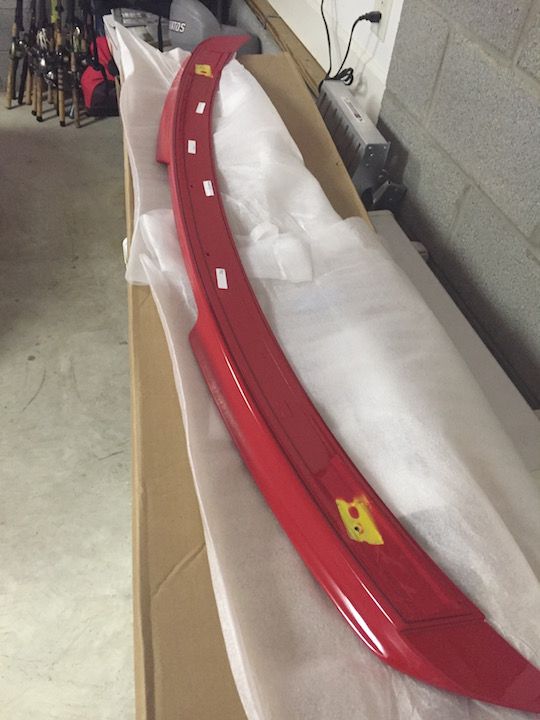
After unwrapping, the visual inspection:


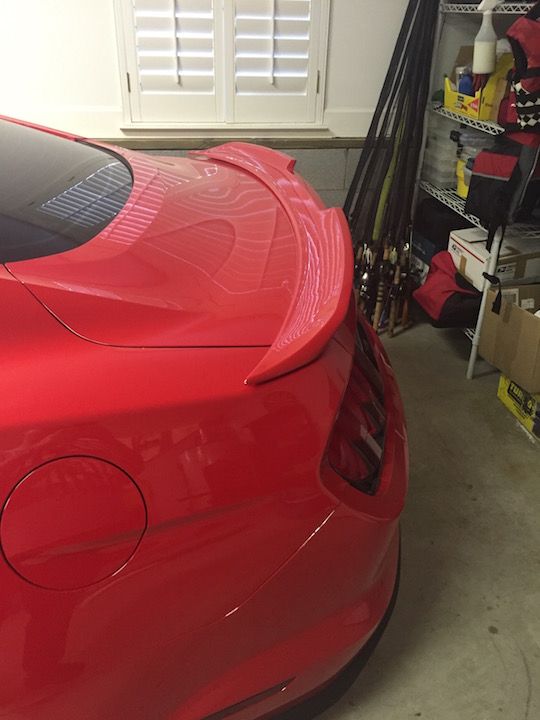
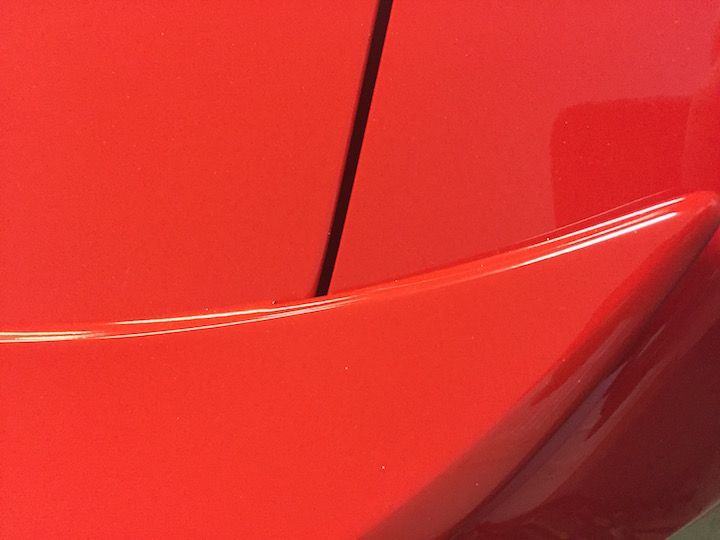
And now the test fit/color match check. Color match looks pretty dam spot-on.


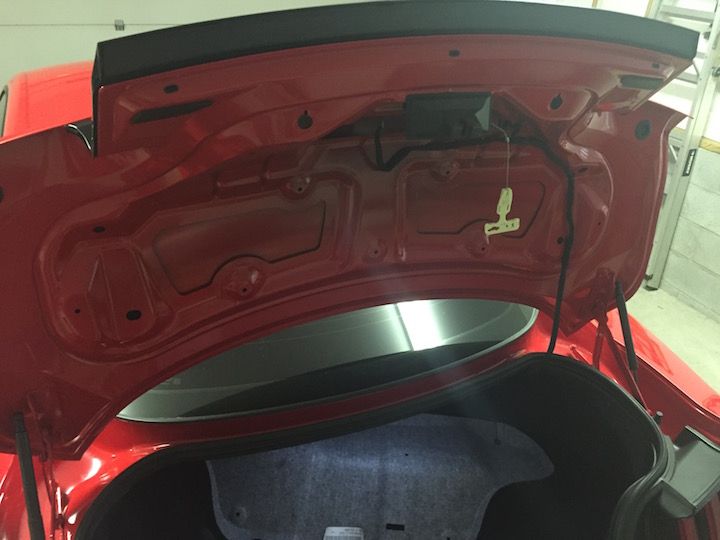
First, remove the trunk liner. There are a number of panel clips to remove, 2 rubber plugs and 2 rubber stops. It’s pretty easy to maneuver the liner out from around the trunk latch. You also have to do the same with the emergency trunk release.

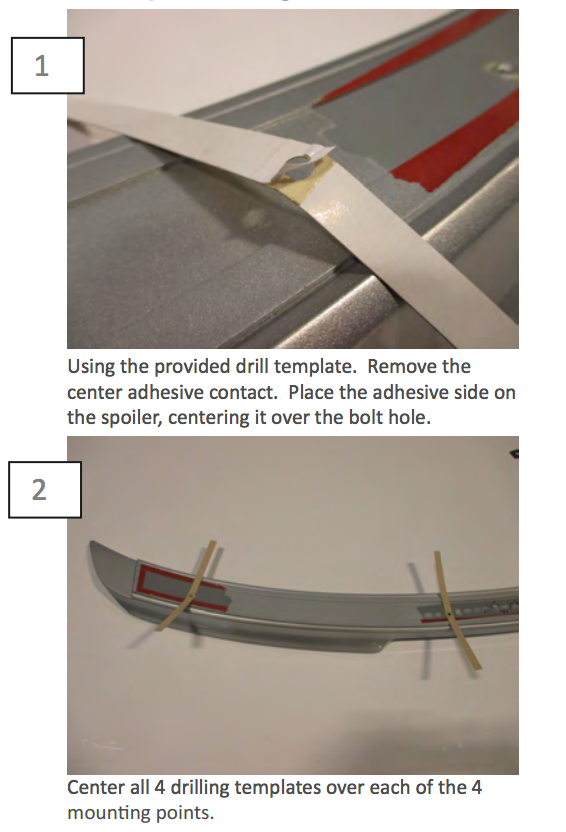
Prep the spoiler for installation. Being my spoiler was painted, there was painters tape to remove over the outermost mounting holes. After removing this, install the drill templates on the spoiler. The drill templates are nothing more than narrow strips of thin cardboard/heavy paper, with sticky on one side. There is a small hole in the middle that you line up with the mounting holes in the spoiler. Remove the backing from around the hole, line up with the hole in the spoiler and stick the template in place perpendicular to the spoiler. Out of all the pictures I took, this is the one I’m missing. So I’ll have to defer back to this being my first attempt at a DYI, and also an installation instructions photo.

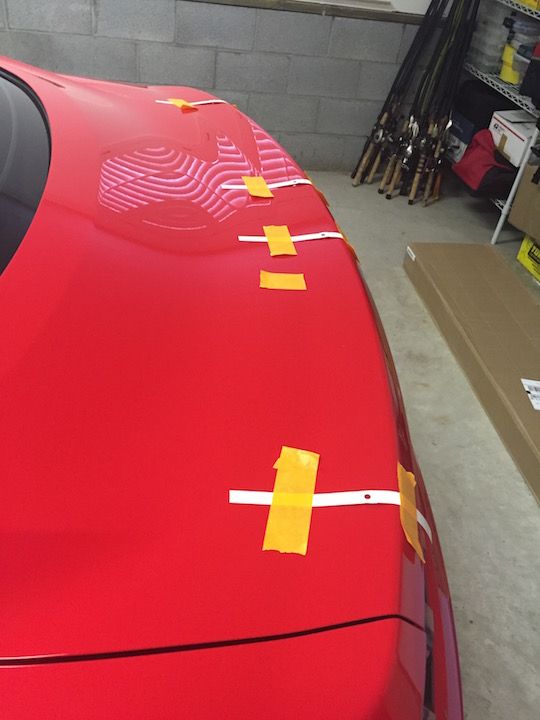
Place the spoiler on the deck lid and maneuver into position. There aren’t any instructions as to where to position it. What I found is there is a point where the spoiler is placed on the trunk and you can slide it forward till there is a slight “catch” at the rear of the trunk lid edge as it rolls over the back end. I assumed this is where it’s meant to be installed as it just seemed natural. Plus it looks good in this position. This is also one of those times where you measure 4 times, then check it again 4 more times. I got the spoiler centered on the trunk, checking the fitment many, many times before taping down the template strips. This tape is used to make sure the templates stay in place when you lift off the spoiler to drill the holes. I also added a small piece of tape just to give me a quick visual representation on where the spoiler is supposed to sit on the trunk lid. I ran this tape across the spoiler then the trunk, then cut it to separate the two. You can see the lone piece of tape in the pic below. (This definitely helped me later, as it’s a good quick reference point.) Carefully, and I mean carefully, remove the spoiler without moving these template strips. You move them, you will be drilling in the wrong spot.

Now it’s time to drill baby drill!!! Something about drilling holes into a perfectly good trunk lid on a $40,000 car, with less than 2,000 miles, is nonetheless unsettling. But it has to be done. I used an auto center punch to mark my drill location. This concerned me a little as I’ve seen comments about denting the trunk when closing it, but I had no issues here. I made the first hole with a 1/8” or so bit. Then I stepped it up to the required 7/32”. As others have mentioned, I also found this to be just slightly undersized and stepped it up to a 1/4” bit.
No turning back now… metal shavings = this thing is getting installed one way or another.

After drilling, I cleaned up the shavings with a vac/compressed air and removed the template strips, leaving my own tape strip in place. Thank you [MENTION=12819]ScottsGT[/MENTION] for pointing this out as I left it out - after drilling the holes, apply some paint, or as stated in the installation guide some fingernail polish to prevent any rust from developing.

TEST FIT before proceeding!!! I had somewhat of a hard time with this, as a second set of hands would have come in very, well, handy. It’s kind of hard to hold the spoiler in place, lift the trunk lid, and see if all your holes line up. Now with me and all my drilling prowess, I was a little off with the 2 center holes. I used the same 1/4” bit to slot the holes enough to work. I’m certain this was because my 2 center templates were a little loose around the holes when I removed the spoiler.
Test fit complete, now it’s time to stick the spoiler on. This was actually one of my biggest fears of this install, as the spoiler has a “ring” of 3M tape all the way around it. I know that this tape is good stuff and sticks very well. I procrastinated over this step for some time, knowing that you had to place the spoiler down in the right spot, cause that tape is going to stick. This is one of the reasons I made my own tape “reference” above, just for this step. However, included in the hardware kit are 4 small foam pads. These pads get placed over the mounting holes in the spoiler and actually lift it just enough to clear the 3M tape, so you do have some room to position the spoiler into place. One of my biggest fears turned out to be literally nothing. With the pads installed, now prep the trunk surface. Use the included alcohol wipes to clean the surface where the tape will make contact. Then follow this up with the 3M adhesion promoter. Don’t go crazy with the promoter, as it can be a bit of a pain to clean off the paint.
Pull all the tape backing off the spoiler and stick that baby on! When I got it into place I pretty much just applied some pressure in the very center of it, as I wanted to hold it here while getting some screws started. Did not want it to move and have the tape stick somewhere it wasn’t supposed to. Plus, this could still allow you a little bit of wiggle room to make sure it’s perfectly lined up. Install all 4 of the screws and tighten down. I highly recommend a very magnetic screwdriver for this, as it can be a little awkward getting some of the screws started. Once all the screws are tight, close the trunk and apply some pressure across the spoiler to make sure the 3M tape is stuck all the way around.
Now for some spoiler porn:


I freaking love this spoiler! It’s not over the top, but subtle, stylish. It really looks like a factory piece that should have come on this car.
Overall, the install was not bad at all. The part I was fretting the most was sticking the spoiler down into place, but that turned out to be one of the easiest pieces of the install. Start to finish I was in this for about 4 hours, but I spent a good bit of time working, washing clothes, etc. And just in case anybody is wondering what size the screws are, they are a M6x1. 2 (stainless) screws at the local hardware store cost $1.31. Yeah, I bought 2, but only needed 1 as I dropped 1 inside my dam trunk lid!
Anybody know how to get a screw out of the lid
After seeing this particular spoiler I knew I liked it better than the other options out there and really wanted one. I was going to have one, and soon. Turns out I got one, for $1.31. More on that later…
This is my first attempt at a Mustang DIY. I’m not a mechanic, nor do I claim to be, but I do have an awesome set of tools
The unboxing:
After unwrapping, the visual inspection:
And now the test fit/color match check. Color match looks pretty dam spot-on.
First, remove the trunk liner. There are a number of panel clips to remove, 2 rubber plugs and 2 rubber stops. It’s pretty easy to maneuver the liner out from around the trunk latch. You also have to do the same with the emergency trunk release.
Prep the spoiler for installation. Being my spoiler was painted, there was painters tape to remove over the outermost mounting holes. After removing this, install the drill templates on the spoiler. The drill templates are nothing more than narrow strips of thin cardboard/heavy paper, with sticky on one side. There is a small hole in the middle that you line up with the mounting holes in the spoiler. Remove the backing from around the hole, line up with the hole in the spoiler and stick the template in place perpendicular to the spoiler. Out of all the pictures I took, this is the one I’m missing. So I’ll have to defer back to this being my first attempt at a DYI, and also an installation instructions photo.
Place the spoiler on the deck lid and maneuver into position. There aren’t any instructions as to where to position it. What I found is there is a point where the spoiler is placed on the trunk and you can slide it forward till there is a slight “catch” at the rear of the trunk lid edge as it rolls over the back end. I assumed this is where it’s meant to be installed as it just seemed natural. Plus it looks good in this position. This is also one of those times where you measure 4 times, then check it again 4 more times. I got the spoiler centered on the trunk, checking the fitment many, many times before taping down the template strips. This tape is used to make sure the templates stay in place when you lift off the spoiler to drill the holes. I also added a small piece of tape just to give me a quick visual representation on where the spoiler is supposed to sit on the trunk lid. I ran this tape across the spoiler then the trunk, then cut it to separate the two. You can see the lone piece of tape in the pic below. (This definitely helped me later, as it’s a good quick reference point.) Carefully, and I mean carefully, remove the spoiler without moving these template strips. You move them, you will be drilling in the wrong spot.
Now it’s time to drill baby drill!!! Something about drilling holes into a perfectly good trunk lid on a $40,000 car, with less than 2,000 miles, is nonetheless unsettling. But it has to be done. I used an auto center punch to mark my drill location. This concerned me a little as I’ve seen comments about denting the trunk when closing it, but I had no issues here. I made the first hole with a 1/8” or so bit. Then I stepped it up to the required 7/32”. As others have mentioned, I also found this to be just slightly undersized and stepped it up to a 1/4” bit.
No turning back now… metal shavings = this thing is getting installed one way or another.

After drilling, I cleaned up the shavings with a vac/compressed air and removed the template strips, leaving my own tape strip in place. Thank you [MENTION=12819]ScottsGT[/MENTION] for pointing this out as I left it out - after drilling the holes, apply some paint, or as stated in the installation guide some fingernail polish to prevent any rust from developing.

TEST FIT before proceeding!!! I had somewhat of a hard time with this, as a second set of hands would have come in very, well, handy. It’s kind of hard to hold the spoiler in place, lift the trunk lid, and see if all your holes line up. Now with me and all my drilling prowess, I was a little off with the 2 center holes. I used the same 1/4” bit to slot the holes enough to work. I’m certain this was because my 2 center templates were a little loose around the holes when I removed the spoiler.
Test fit complete, now it’s time to stick the spoiler on. This was actually one of my biggest fears of this install, as the spoiler has a “ring” of 3M tape all the way around it. I know that this tape is good stuff and sticks very well. I procrastinated over this step for some time, knowing that you had to place the spoiler down in the right spot, cause that tape is going to stick. This is one of the reasons I made my own tape “reference” above, just for this step. However, included in the hardware kit are 4 small foam pads. These pads get placed over the mounting holes in the spoiler and actually lift it just enough to clear the 3M tape, so you do have some room to position the spoiler into place. One of my biggest fears turned out to be literally nothing. With the pads installed, now prep the trunk surface. Use the included alcohol wipes to clean the surface where the tape will make contact. Then follow this up with the 3M adhesion promoter. Don’t go crazy with the promoter, as it can be a bit of a pain to clean off the paint.
Pull all the tape backing off the spoiler and stick that baby on! When I got it into place I pretty much just applied some pressure in the very center of it, as I wanted to hold it here while getting some screws started. Did not want it to move and have the tape stick somewhere it wasn’t supposed to. Plus, this could still allow you a little bit of wiggle room to make sure it’s perfectly lined up. Install all 4 of the screws and tighten down. I highly recommend a very magnetic screwdriver for this, as it can be a little awkward getting some of the screws started. Once all the screws are tight, close the trunk and apply some pressure across the spoiler to make sure the 3M tape is stuck all the way around.
Now for some spoiler porn:
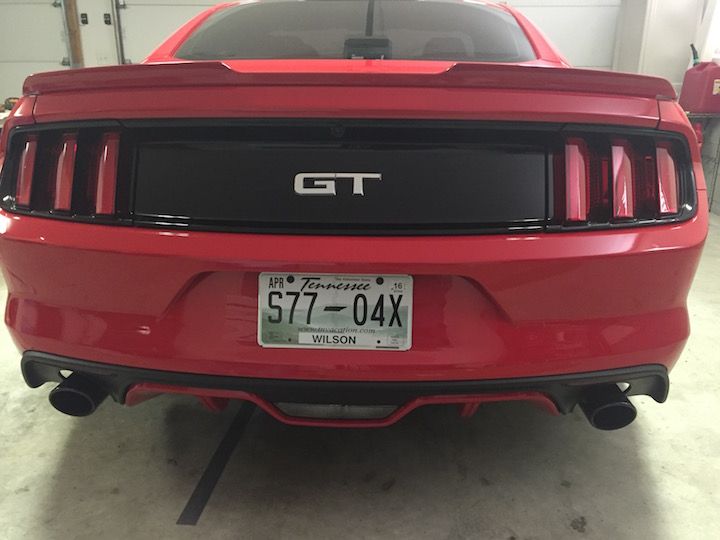
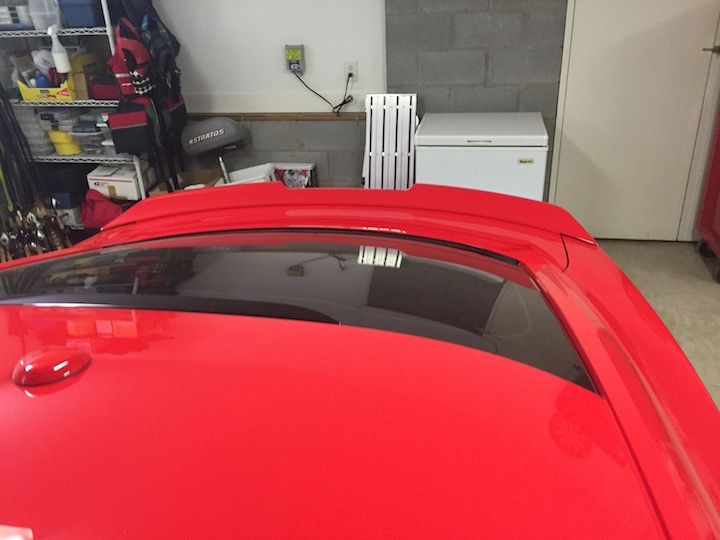
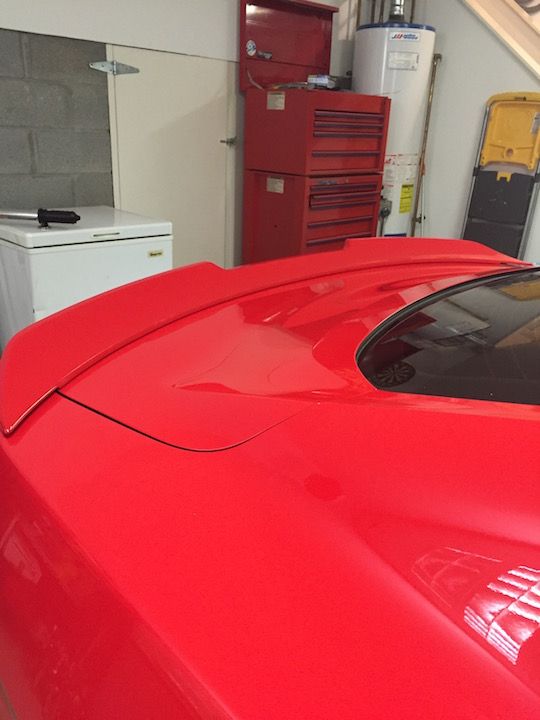
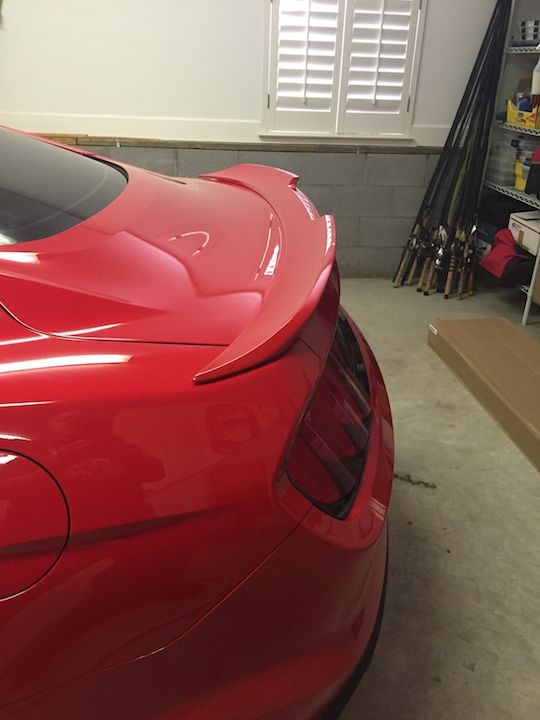
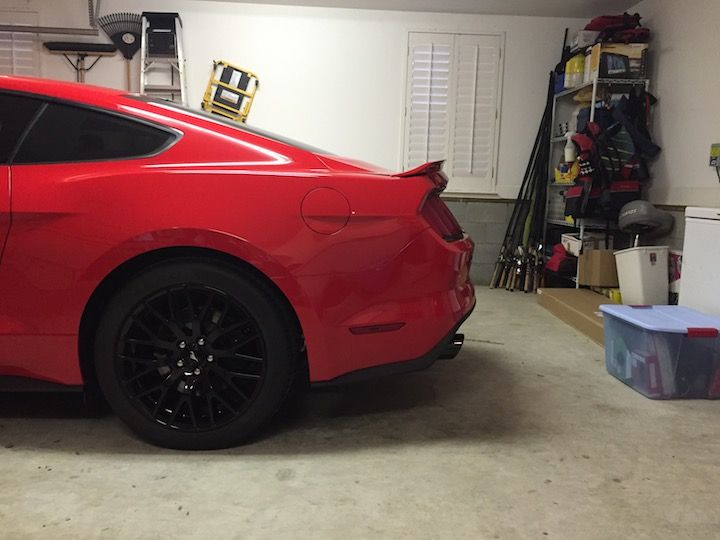
I freaking love this spoiler! It’s not over the top, but subtle, stylish. It really looks like a factory piece that should have come on this car.
Overall, the install was not bad at all. The part I was fretting the most was sticking the spoiler down into place, but that turned out to be one of the easiest pieces of the install. Start to finish I was in this for about 4 hours, but I spent a good bit of time working, washing clothes, etc. And just in case anybody is wondering what size the screws are, they are a M6x1. 2 (stainless) screws at the local hardware store cost $1.31. Yeah, I bought 2, but only needed 1 as I dropped 1 inside my dam trunk lid!
Anybody know how to get a screw out of the lid
Sponsored
Last edited:
