Sponsored

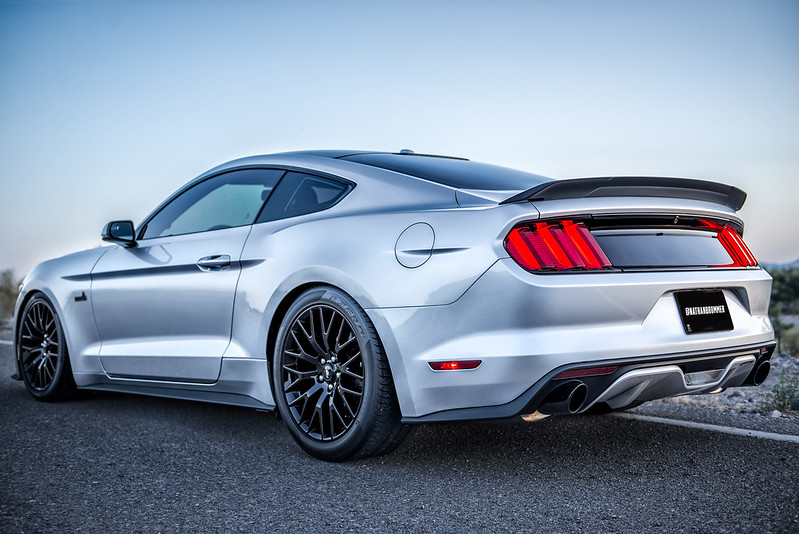
Nathan's Silver GT

OP
OP
Nathanbrummer@SCS

Nathanbrummer@SCS

Well-Known Member
Gold Sponsor
Joined
Apr 11, 2015
Threads
14
Messages
952
Reaction score
1,134
Location
602
Vehicle(s)
2015 silver GT
I made an update to my truck set up. I wanted to free up some truck space and make the compressor a little less noisy. This change made such a big difference in the noise level. Mounting the compressor on the fender shelf was so loud. With this new set up I can't hear anything over the radio at a normal level. It's such a huge improvement. The compressor is now mounted with small rubber isolators, and I added some Dynamat to help deaden some of the sound. The best part is now everything fits in the spare tire well and below the trunk mat.
This is how it should have been installed from the beginning. I got the seamless tank from @hypermotive.


Before
27477934934_fe04324e0d_c.jpg


After
34085652465_cd63c90df2_c.jpg
Sponsored

 
OP
OP
Nathanbrummer@SCS

Nathanbrummer@SCS

Well-Known Member
Gold Sponsor
Joined
Apr 11, 2015
Threads
14
Messages
952
Reaction score
1,134
Location
602
Vehicle(s)
2015 silver GT
34045867456_545d926669_c.jpg


I recently installed the blackvue front and rear cameras. I love this thing. It provides such piece of mind. There are so many crap drivers that it's only a matter of time before something happens. Hopefully it doesn't, but at least there will be footage if it does. The instal was very easy. The wires tuck into the fender liner and the cameras just adhere to the glass. I can't recommend this enough. Additional install photos and footage coming soon.
 
OP
OP
Nathanbrummer@SCS

Nathanbrummer@SCS

Well-Known Member
Gold Sponsor
Joined
Apr 11, 2015
Threads
14
Messages
952
Reaction score
1,134
Location
602
Vehicle(s)
2015 silver GT
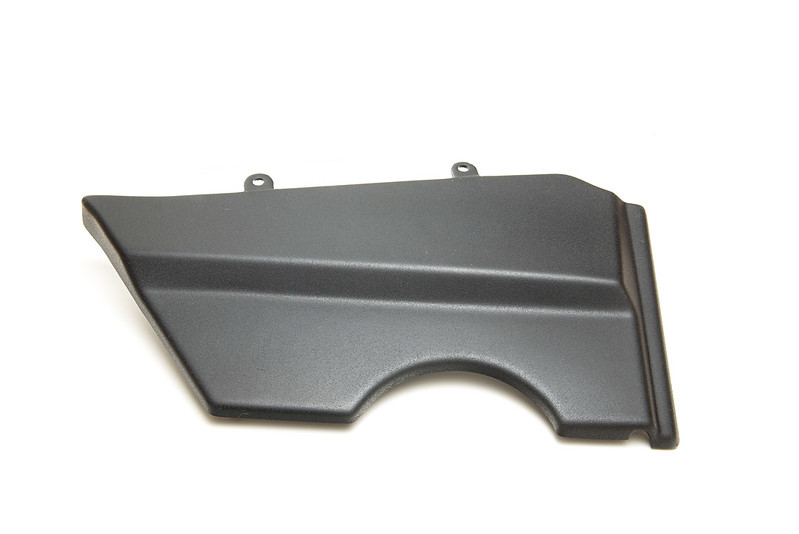
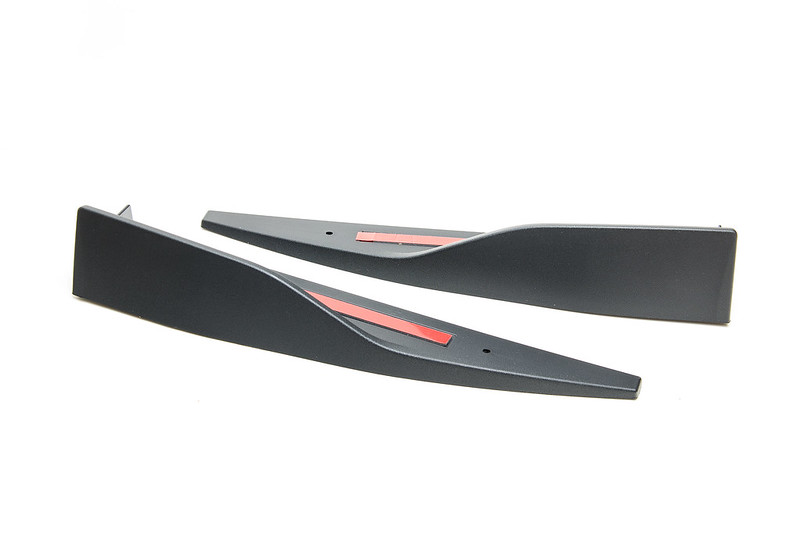
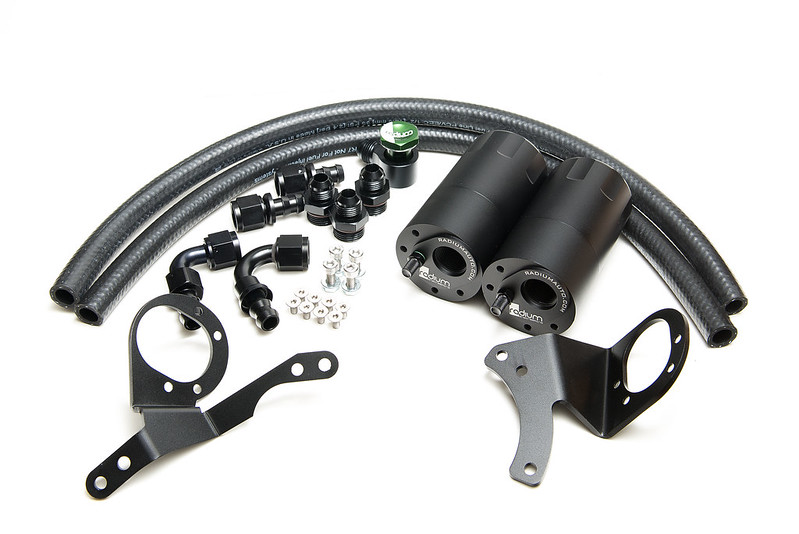
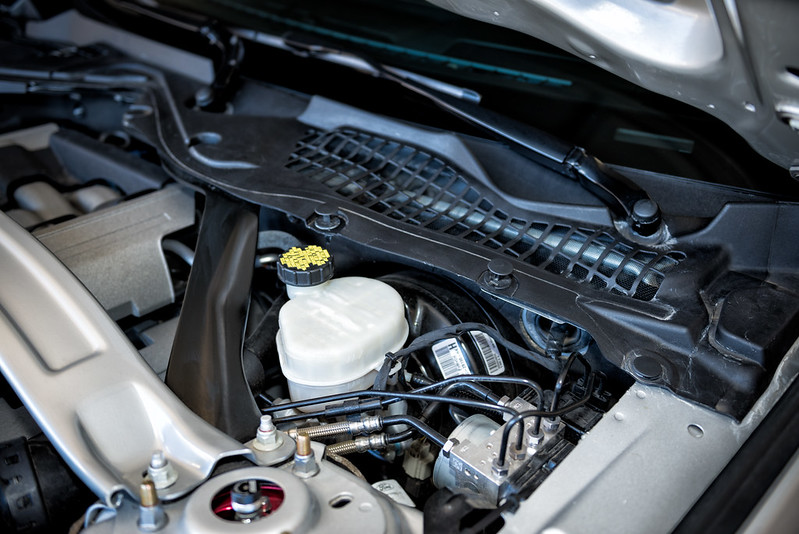
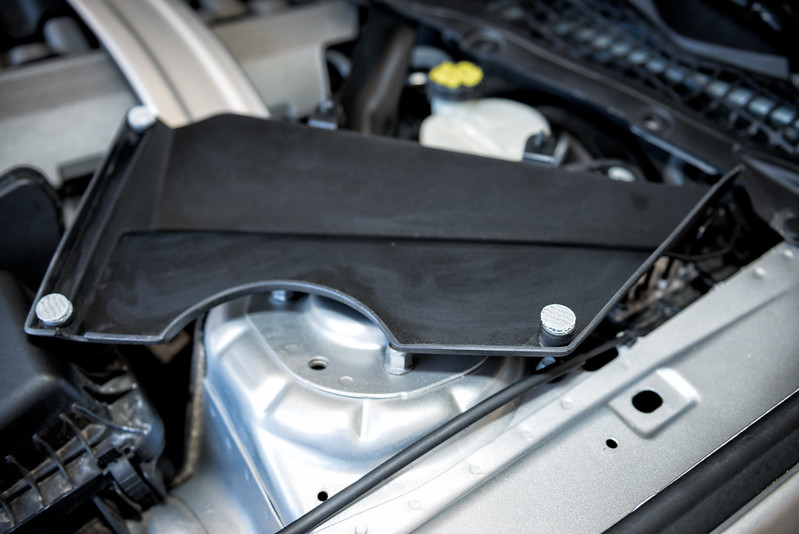
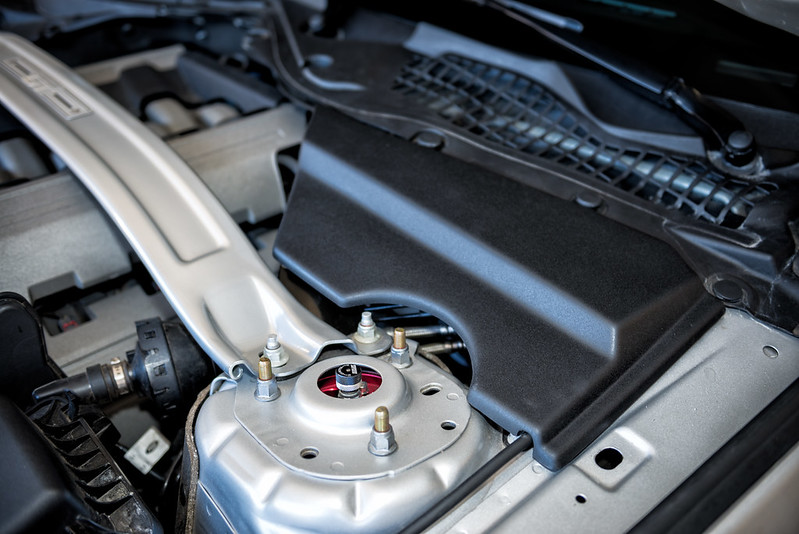
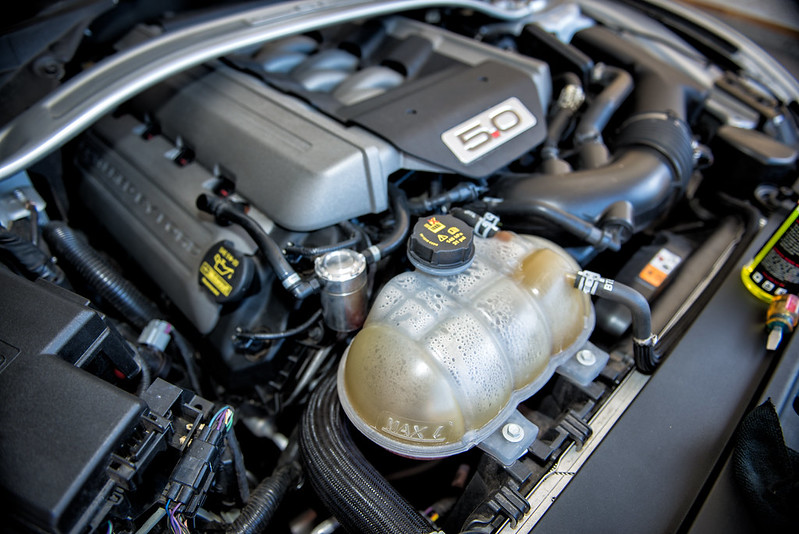
Got some new stuff in today. Should make for a fun install day this weekend.

JLT Master Cylinder Cover


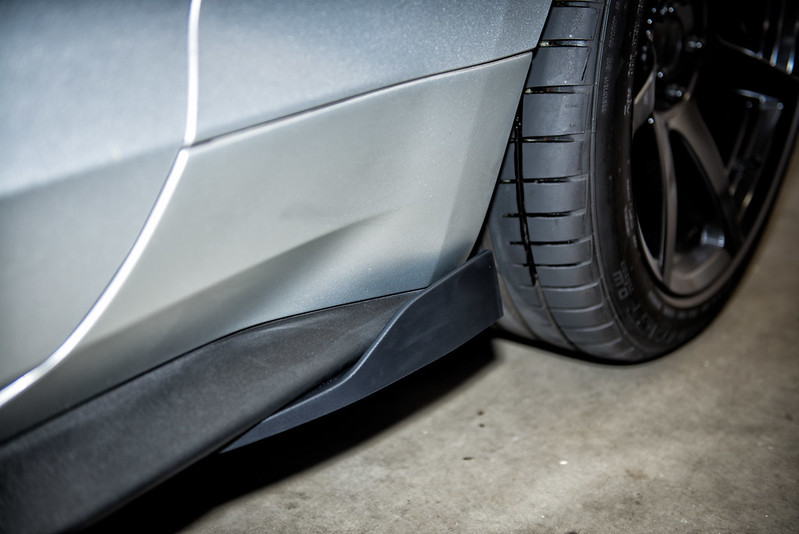
Roush Winglets


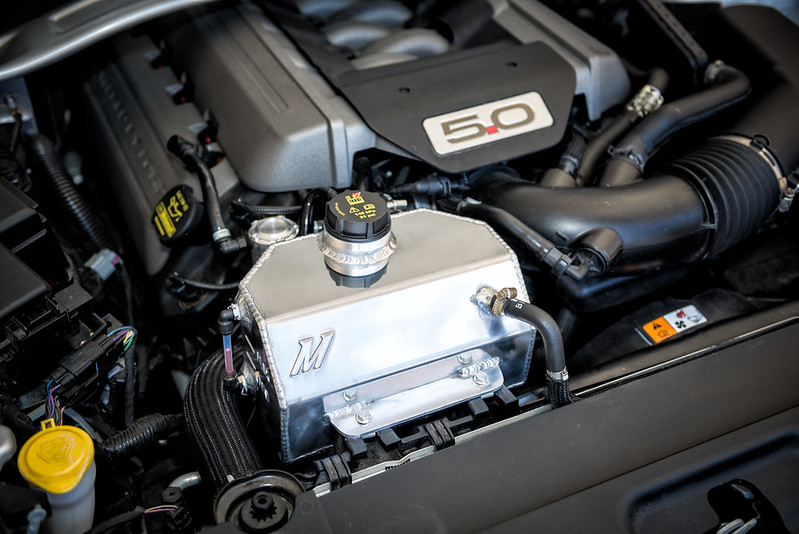
Mishimoto tank


Radium Engineering Dual Catch Can Kit


Not really a mod, but looking forward to trying this stuff too.
 
OP
OP
Nathanbrummer@SCS

Nathanbrummer@SCS

Well-Known Member
Gold Sponsor
Joined
Apr 11, 2015
Threads
14
Messages
952
Reaction score
1,134
Location
602
Vehicle(s)
2015 silver GT
Install Day.

Roush Winglets. Super easy install. Clean the side skirts, pull the tape, and pop in two screws. Boom Done. I love the look though. I should have gotten these much sooner. I realize now though that I need some Adams Polishes trim cleaner.


JLT Master Cylinder Cover. Another very easy install. Just pull the two pins and the tape on the velcro and done. It does a lot to clean up the looks of the engine bay.


The Mishimoto Coolant Tank.

First, shame on you Ford for putting that bubble in there. What and eye sore. So happy to have that thing gone. Another very easy install. Drain the coolant remove the old tank and install the new one. Man the difference in looks is staggering. SOOOO much better.
If I'm honest the polished tank finish is a little bit of a let down. I would say do your self a favor and the black one. This has scratches and gouges in it. Not the best. I tried to hand polish it but still not great. Light years better than the bubble, but I hoped/expected a little more.


OP
OP
Nathanbrummer@SCS

Nathanbrummer@SCS

Well-Known Member
Gold Sponsor
Joined
Apr 11, 2015
Threads
14
Messages
952
Reaction score
1,134
Location
602
Vehicle(s)
2015 silver GT
More new stuff.

I wasn't 100% happy with the mishimoto tanks so I'm going to switch over to the Radium tank. After seeing the quality on their catch cans I was sold. The quality on this one is equally as high.

34357478072_f59aa5225d_c.jpg


34357479022_53cbffd395_c.jpg


34518450605_9f77ecf1aa_c.jpg


33707929533_ea6520a17b_c.jpg


I still need to pick up a new radiator cap before I get this installed as the stock one is not retained.

Opt-7 Turn Signals

34357477042_b737d13e89_c.jpg


34357476302_b169c5bf5d_c.jpg


Rear Camber Arms

34357481722_81a155867a_c.jpg
 

Sponsored

GT_Tommy

Well-Known Member
Joined
Mar 6, 2016
Threads
8
Messages
233
Reaction score
164
Location
San Luis Obispo, CA
First Name
Tom
Vehicle(s)
TVS Supercharged Premium PP
Looking good man! You've got a knack for finding high quality parts that not a lot of people are running. Would love to hear your thoughts on those signals once you get them in! Video maybe??
 
OP
OP
Nathanbrummer@SCS

Nathanbrummer@SCS

Well-Known Member
Gold Sponsor
Joined
Apr 11, 2015
Threads
14
Messages
952
Reaction score
1,134
Location
602
Vehicle(s)
2015 silver GT
Looking good man! You've got a knack for finding high quality parts that not a lot of people are running. Would love to hear your thoughts on those signals once you get them in! Video maybe??
Thanks, I'm waiting on a harness, but I hope to have them installed in the next week or so.
 
OP
OP
Nathanbrummer@SCS

Nathanbrummer@SCS

Well-Known Member
Gold Sponsor
Joined
Apr 11, 2015
Threads
14
Messages
952
Reaction score
1,134
Location
602
Vehicle(s)
2015 silver GT
I finally got around to installing my rear BMR toe links. They've been sitting in my garage for like 4 months. I wanted to wait until i decided on a rear camber solution. I had hoped that BMR would have come out with an adjustable solution, but they haven't yet. I pick up a set of adjustable rear camber arms new in the classifieds for a good price so it was time to install.

The installation is very straight forward. Although the upper rear camber arm bolt is limited in space on the drivers side. It made getting a ratchet in there near impossible. The passenger side had more space and was much easier. All told, the install was around 1.5 hours for both the BMR toe links and the camber arms. I did do a diy alignment to hold me over until I am able to get to the alignment shop. Just eye balling it with the car in the air I almost nailed zero toe. I did end up adding a slight amount of toe in. I wish I could say the same with the camber. I way over estimate and was sitting at like +1. I went in and made some additional adjustment and based on my digital level I'm at -1.5. I'm looking forward to seeing how close I got it when I go to the alignment shop tomorrow. The BMR lock outs made adjustment so easy. I was kind of dreading this install because of being intimated about alignments, but it was actually pretty easy. As an added benefit I have been experiencing a slight clunk in the suspension somewhere. I haven't been able to find it, but when I was removing the stock passenger toe link I found the super soft busing flexing and causing the noise. I am happy to report that with these new links everything is firm and quiet.
In my quick drive everything feels firm, the diy alignment seems good. All in all I'm very happy.

Driver Side Installed
33700325804_4c1536271b_c.jpg


Passanger Side Installed
34543116205_c20192008b_c.jpg


Stock VS BMR
34543117455_f62f2069e5_c.jpg

33732307123_c91b2d39d6_c.jpg


Stock VS Adjustable Camber Arm
33700326904_8c55d38610_c.jpg


Front toe measurement
33700325414_2c5ed2c80b_c.jpg

Rear toe measurement
33700325734_ac553fe70a_c.jpg
 

Sponsored
OP
OP
Nathanbrummer@SCS

Nathanbrummer@SCS

Well-Known Member
Gold Sponsor
Joined
Apr 11, 2015
Threads
14
Messages
952
Reaction score
1,134
Location
602
Vehicle(s)
2015 silver GT
[ame]

Knocked out another install today.
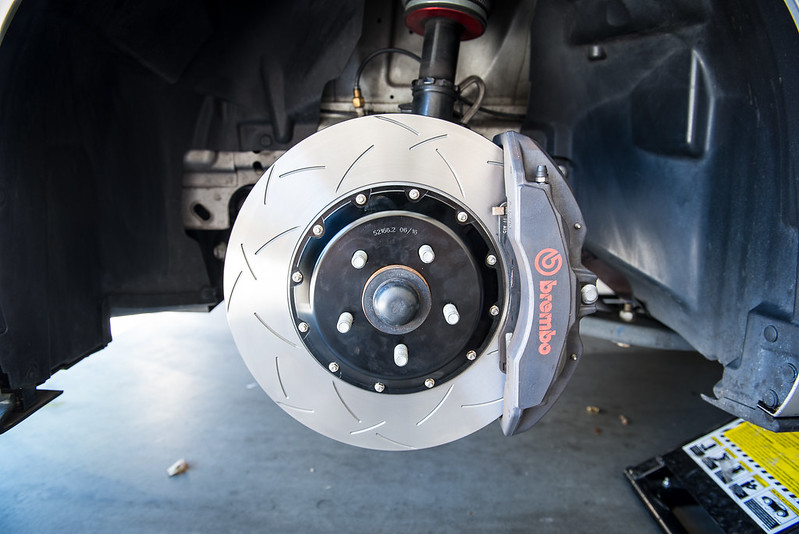
This time it was a set of new brake rotors from DBA USA.
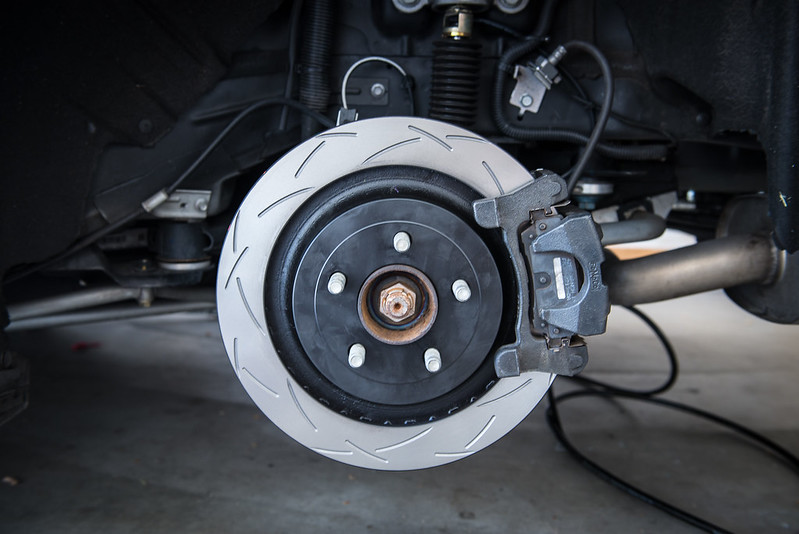
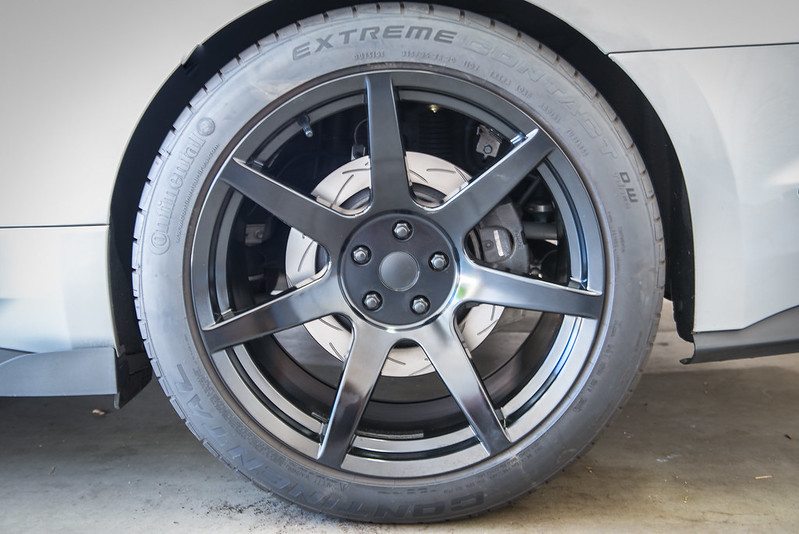
I picked up a set of DBA5000 two piece rotors for the front and a set of DBA4000 series for the rear (as of right now no rear 5000 series are available, hopefully this will change).

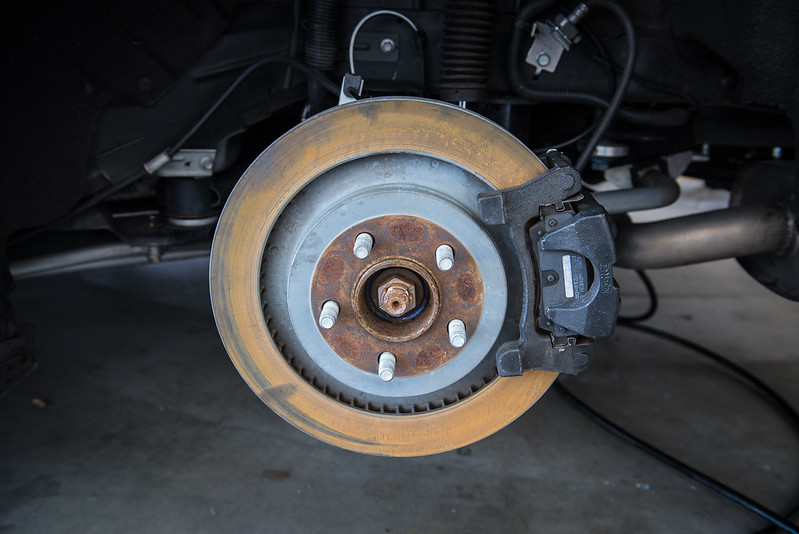
The install was pretty straight forward. I had some slight difficulties removing the rear rotors as there was some slight surface rust keeping them on. Some WD40 and a big hammer helped to work out their stubbornness. The fronts went on with zero drama.

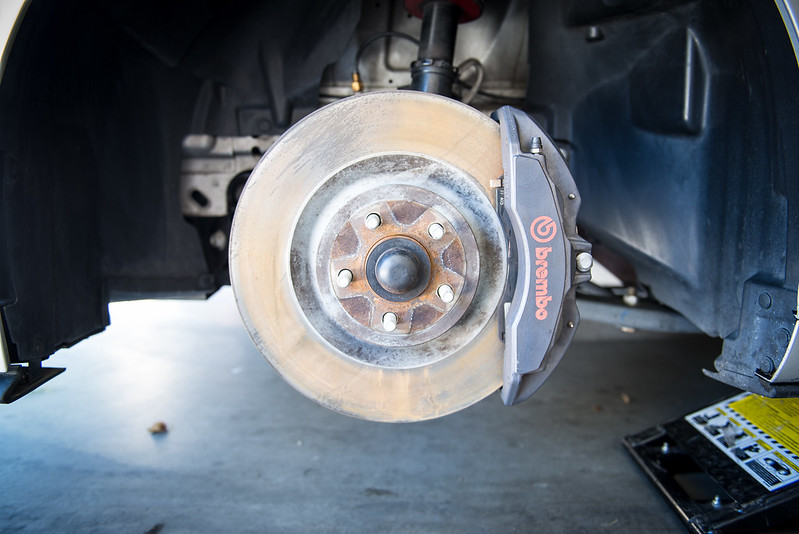
If you have never removed or replaced your rotors it's pretty easy. After you remove your wheels, there are two bolts holding on the calipers. The front is a 15mm and the rear is a 19mm. These two bolts get removed and you can slide the caliper off and then the rotor just pulls off. Then you just reverse with the new rotor in place. Top tip, don't have the emergency brake on when doing the rear (don't ask how I know this).


These look gross.


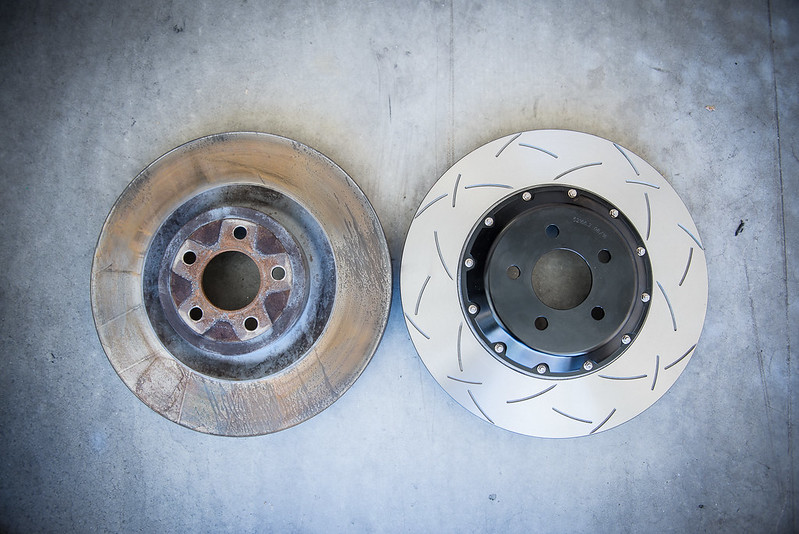
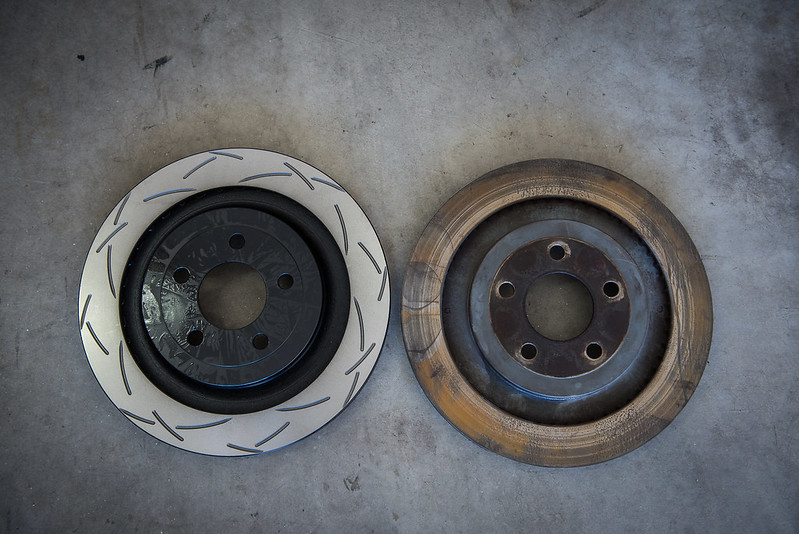
Stock rotor compared to the DBA5000 rotor. The stock rotor weights in at 35lbs and the DBA is only 24lbs. It will be nice to cut out about 10lbs per side.


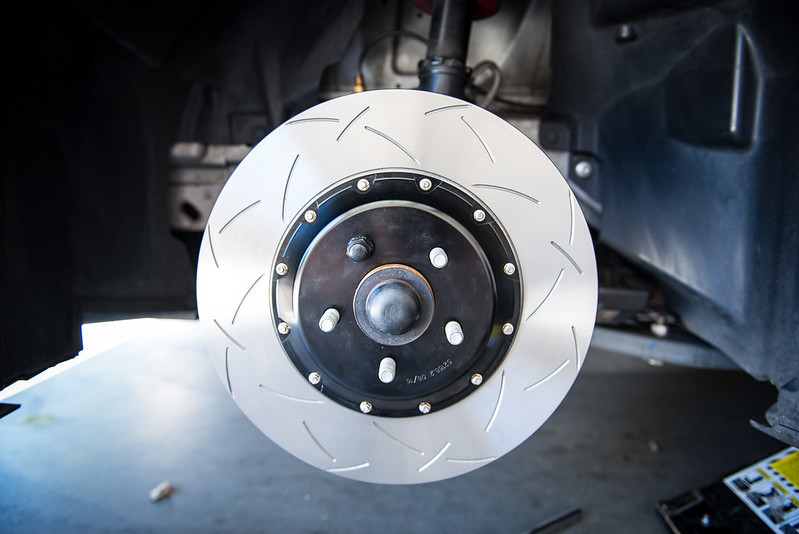
New rotor on and ready to reinstall the caliper.


Caliper back in place and ready to be buttoned up.


Much better.


Again, gross!


No weight savings here. But there are still advantages to the DBA 4000 series that should help improve braking. Plus they look soooo much better.


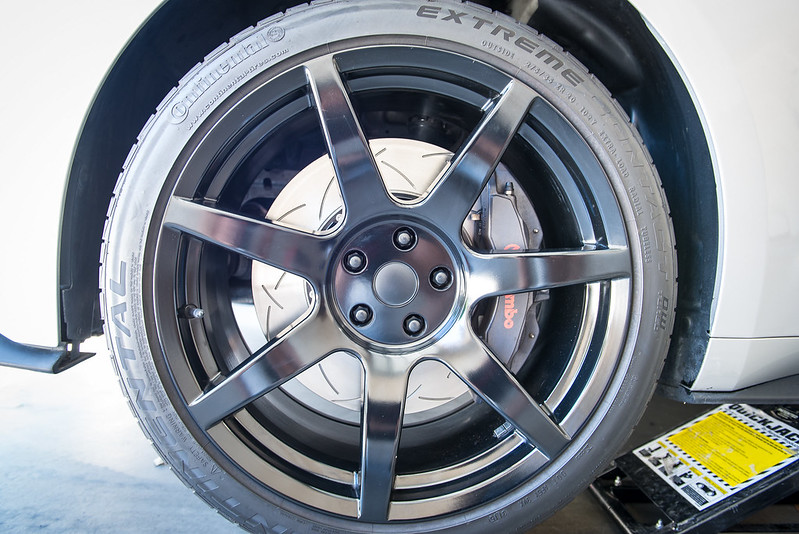
The rear caliper back in place. Just waiting for the wheel.


There it is.


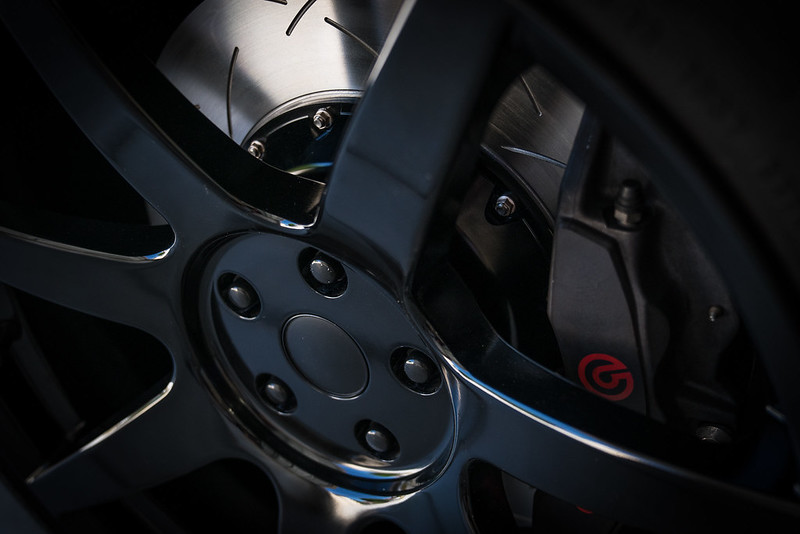
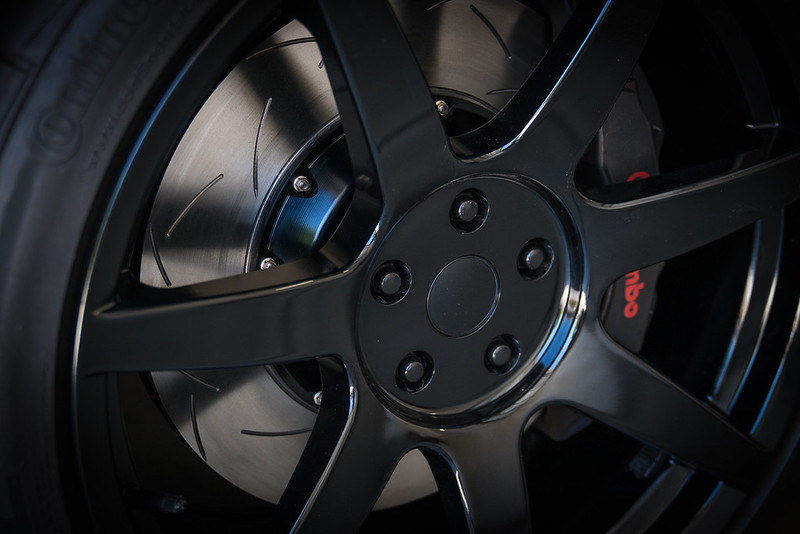
Just some beauty shots.


For those unfamiliar with the DBA rotors here are some details:

The 5000 series rotors feature their proprietary T3 precision CNC machined slots. These Tri-symmetrical curved slots help dampen vibration harmonics resulting in a quieter, more responsive and smoother brake feel. DBA rotors also feature their Kangaroo Paw ventilation system. This design helps to increase the surface area resulting in greater heat dissipation, ultimately providing less brake fade and prolonging service life for both pads and rotors. Being a two-piece rotor the outer rotor ring is replaceable and is made from XG150 high carbon alloyed iron. This allows for an increase in thermal capacity, which allows the rotor to handle extreme heat over periods of time while minimizing warping and cracking. To monitor braking temperatures DBA also incorporates heat paint markings into their rotors, allowing drivers to monitor rotor fatigue and aide in rotor replacement.

Front Rotor Part Number: DBA52166BLKS
Rear Rotor Part Number: DBA42165S
 

Boston23

Well-Known Member
Joined
Jun 16, 2015
Threads
13
Messages
564
Reaction score
605
Location
South Carolina
First Name
Bruce
Vehicle(s)
2017 GT PPP Ingot Silver
Hey Nathan, given the time and effort you've put into this build, did you consider the GT350 track pack spoiler vs the Steeda Q Series? Just curious as I'm about to order one of two.
 

plc268

Well-Known Member
Joined
Jun 2, 2015
Threads
31
Messages
1,853
Reaction score
648
Location
Central Texas
First Name
Patrick
Vehicle(s)
2015 Mustang GT Premium Race Red
Those rotors look awesome. Where did you get them? I'm googling the model numbers and everything, and I'm not finding much.
 
OP
OP
Nathanbrummer@SCS

Nathanbrummer@SCS

Well-Known Member
Gold Sponsor
Joined
Apr 11, 2015
Threads
14
Messages
952
Reaction score
1,134
Location
602
Vehicle(s)
2015 silver GT
Hey Nathan, given the time and effort you've put into this build, did you consider the GT350 track pack spoiler vs the Steeda Q Series? Just curious as I'm about to order one of two.
The air design (aka q series spoiler) was attractive because it was no drill and I also think it's slightly more aggressive. Both look very similar though and I don't think you can go wrong with either. The gt350 was not avlible when I ordered mine so that was also a large factor.
 

Boston23

Well-Known Member
Joined
Jun 16, 2015
Threads
13
Messages
564
Reaction score
605
Location
South Carolina
First Name
Bruce
Vehicle(s)
2017 GT PPP Ingot Silver
The air design (aka q series spoiler) was attractive because it was no drill and I also think it's slightly more aggressive. Both look very similar though and I don't think you can go wrong with either. The gt350 was not avlible when I ordered mine so that was also a large factor.
Did you paint the Steeda or is that the satin primer? Thanks
Sponsored


Top