Sponsored

SCS Store: Coyote Badges, Cyclone Badges, Trunk Close Kit, Visor Covers, and more!

OySmallFry@SCS

Well-Known Member
Joined
Jul 7, 2015
Threads
21
Messages
829
Reaction score
553
Location
Houston, TX
First Name
SpaceCitySpyLLC
Vehicle(s)
Turbo
SpaceCitySPY go fast bits ;)
Order here: http://spacecityspy.tictail.com/
Follow for updates on new products: https://tictail.com/cart/spacecitys...f9ea6a98f4acf08b6b824339a&tt_locale=en#follow

I've mentioned a few of these products to you guys, but I thought I'd throw up a post specifically non-decal haha.

Hands-Free Trunk Close Kit, IN STOCK AND AVAILABLE!


Available colors:
Black, High Viz Yellow, Red, Green, Blue, Purple, and Digital Camo

More pictures on the webstore: http://spacecityspy.tictail.com/

These were finally available this week and I unrolled them at the local Houston meet. Lots of satisfied people with fingerprints no longer! Installation video incoming.

Benefits:
  • 1 minute install
  • no disassembly required
  • no drilling
  • OEM style nonmetallic fastener
  • Colors!


Remove Before Flight keychain tags


:D

Just a sweet tag for your keychain, review mirror, or elsewhere. There were kinda pricey for just one online, so I bought in bulk and now can offer them for only 3 bucks!

Visor Label Blackout - Matte Black Vinyl Covers Available this week!


Because who wants to stare at some government mandated warning labels?


More to come!
Any questions please ask.
Sponsored

 
Last edited:

Elvis has a Mustang

Well-Known Member
Joined
May 26, 2015
Threads
4
Messages
107
Reaction score
29
Location
Defiance Ohio
Vehicle(s)
2015 Ecoboost Premium Convertible 50 Years Edition
How much for the girl on the right??????? :D
 
OP
OP
OySmallFry@SCS

OySmallFry@SCS

Well-Known Member
Joined
Jul 7, 2015
Threads
21
Messages
829
Reaction score
553
Location
Houston, TX
First Name
SpaceCitySpyLLC
Vehicle(s)
Turbo
Hands-Free Trunk Kit Installation Instructions:

Tools Required:
1 x Nylon Loop (included in kit)
1 x Fastener (included in kit)
1 x Rubber Mallet
1 x hand (left or right, your preference)
1 x 2015 Mustang

1a.jpg


Installation:
Step 1. Open your trunk.
If you didn't know (don't feel bad, I didn't), there's a small rubber button directly above your license plate, facing downwards. With your keys in the pocket, press that button. Presto! Trunk open. 1 step closer to hands-free Mustang operation.

Step 2. Choose your location.
All the small, black plastic rivets holding the trunk liner in are the same. Personally, I would choose the upper left or upper right plastic rivet for greatest trunk-closing leverage. We're going to replace this rivet with the fastener included in the kit.

1b.jpg


Step 3. Remove plastic rivet.
Slide your hand underneath the liner, with a finger on either side of the rivet and pull. They're not very strong. Promise you won't hurt anything. Put that one in your spare parts bin, it's no longer needed.

2.jpg

3.jpg


Step 4. Install the lower half of the new fastener.
The fastener is two parts. Shove the lower (collapsible) portion through the brass grommet in the strap. Then install where you removed the oem plastic rivet.

4.jpg
5.jpg
6.jpg


Step 5. Secure pull loop with the upper half of the new fastener.
Insert the upper half into the lower half. It will go most of the way in with just "thumb pressure".

7.jpg
8.jpg


Step 6. Break out the big guns!
Not really. But one swift, accurate wack of the rubber mallet will seat the upper half into the lower half. This fastener is oversized for the hole, so it is tight on purpose. If you ever need to uninstall, a flat head screwdriver will easily dislodge the upper half.

9.jpg

10.jpg


Step 7. Try out your new fingerprint-free strap!
And reward yourself with a beer. :cheers:
 
OP
OP
OySmallFry@SCS

OySmallFry@SCS

Well-Known Member
Joined
Jul 7, 2015
Threads
21
Messages
829
Reaction score
553
Location
Houston, TX
First Name
SpaceCitySpyLLC
Vehicle(s)
Turbo
Just installed my own visor blackouts in matte black. I was surprised how much nicer it is to not have that label glaring in my peripheral vision. :)

I also increased the size to 4.5" x 6" for plenty of wiggle room during install.

I might eventually use a hair dryer to permanently remove the labels, but this was a 30 second install and instant difference. Easy!


Carbon fiber and gloss black also available.
 

Sponsored

OP
OP
OySmallFry@SCS

OySmallFry@SCS

Well-Known Member
Joined
Jul 7, 2015
Threads
21
Messages
829
Reaction score
553
Location
Houston, TX
First Name
SpaceCitySpyLLC
Vehicle(s)
Turbo
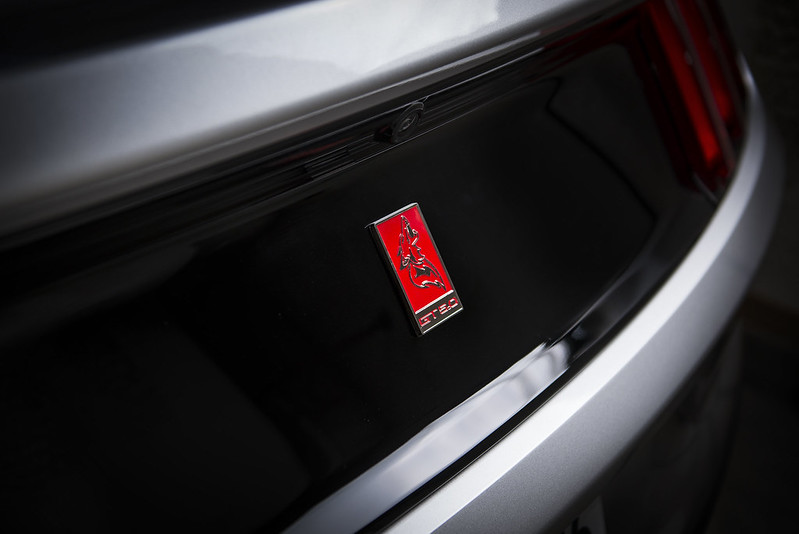
Punisher decklid badge is ready!
Thanks to [MENTION=14791]Cheezebandit[/MENTION] for playing guinea pig with the prototype. His car looks amazingly mean!
:cool: :headbang: :eyebulge:

uploadfromtaptalk1443728433142.jpg

uploadfromtaptalk1443728417323.jpg

uploadfromtaptalk1443728446426.jpg


Ready for order here: https://www.shapeways.com/shops/spacecityspy
 

Cheezebandit

Well-Known Member
Joined
Mar 26, 2015
Threads
8
Messages
88
Reaction score
9
Location
Lewisville, Texas
First Name
Dusty
Vehicle(s)
17 GT350
I have ordered the key chains and the trunk strap .. and the smaller punisher badge for another mod I'm planning . Pretty excited to get started.
 

SC_Ruby

Well-Known Member
Joined
Jun 1, 2015
Threads
24
Messages
1,891
Reaction score
1,225
Location
Garden Grove
First Name
Dennis
Vehicle(s)
2016 GT Premium PP Ruby Red
Just placed an order for the Hands Free Trunk Close Kit :thumbsup:
 

PhillMcKraken

Well-Known Member
Joined
Jun 8, 2015
Threads
7
Messages
325
Reaction score
101
Location
DFW Texas
Vehicle(s)
2016 Mustang Ecoboost
Installed the Hands Free Trunk Close Kit today. Works GREAT! Highly recommended mod for everyone to do. Easy and simple!

Thanks OySmallFry!
 
OP
OP
OySmallFry@SCS

OySmallFry@SCS

Well-Known Member
Joined
Jul 7, 2015
Threads
21
Messages
829
Reaction score
553
Location
Houston, TX
First Name
SpaceCitySpyLLC
Vehicle(s)
Turbo
I'd like to quickly announce the official addition of [MENTION=15102]Nathanbrummer@SCS[/MENTION] to the team! And by team, I mean just us two haha. :cheers: :first: :usa:
Here's to many new sweet S550 mods from SpaceCitySpy!

And now, a few photos of the prototype SVO ecoboost badge! It's looking absolutely killer on [MENTION=17656]higdominator[/MENTION]'s ride! (from thread http://www.mustang6g.com/forums/show...hlight=SVOmage)
FYI, higdominator did some pretty in-depth polishing and painting on this one, so don't think it will arrive quite this on point. These are 3D printed by our friends at Shapeways. You can choose your final color, material, and finish on the SCS Shapeways site.

From feedback, it's been shortened a little. For official, final dimensions, check the SCS Shapeways site: SCS Shapeways
image.jpg
image (1).jpg
 
Last edited:

Sponsored
OP
OP
OySmallFry@SCS

OySmallFry@SCS

Well-Known Member
Joined
Jul 7, 2015
Threads
21
Messages
829
Reaction score
553
Location
Houston, TX
First Name
SpaceCitySpyLLC
Vehicle(s)
Turbo
So if it's "hands free" how do you close the trunk? :shrug::lol:
The force, duh

(whoops, that for open :p )

If that doesn't work, try this:
 
OP
OP
OySmallFry@SCS

OySmallFry@SCS

Well-Known Member
Joined
Jul 7, 2015
Threads
21
Messages
829
Reaction score
553
Location
Houston, TX
First Name
SpaceCitySpyLLC
Vehicle(s)
Turbo
Front Grille Badge Mounting w/ Mount Kit

Maybe this is self explanatory for most, but I figured I'd throw up this quick guide if there are questions.

**This can be done without removing your grille / bumper cover. 10 minute install.**


Step 1. Gather your supplies.
(Please excuse my shredded R&D mule of a grille)


1_supplies.jpg


Step 2. Choose your mounting location. Make sure it looks good. Stock GT350 location is far left side.


2_mockup.jpg


Step 3. Thread your cable ties through your mounting plates. Each plate is 1" across, so 2 will take up the majority of the size of the badge.


3_prep.jpg


Step 4. Thread the end of the cable ties through the grille mesh and hand tighten. At this point some vice grips will really help to tighten the cable ties down. Don't worry if the plates are not perfectly square, you've got wiggle room so the badge will still be straight.


4_mount.jpg


Step 5. Clip the ends. Good scissors are required. These are thick cable ties.

5_tightencut.jpg


Step 6. Pull off the red adhesive cover from the backside of the badge.


6_prep2.jpg


Step 7. Line up and apply! Press firmly. Done.


7_done.jpg


Step 8. I dare you to try to rip it off now ;) 3M adhesive is no joke! (I tried.. but really, don't do it.)


8_done2.jpg
 
Last edited:

JTR

Well-Known Member
Joined
Oct 18, 2014
Threads
16
Messages
700
Reaction score
71
Location
FL
Vehicle(s)
Black Ecoboost
Can y'all come out with something similar to the coyote/cyclone badge for the ecoboost?


Sent from my iPhone using Tapatalk
Sponsored


Top